

What a Used Mini Excavator Is and Who Should Consider One
Every listing you scroll past wants your money. This guide wants to save it. If you're shopping for a used mini excavator for sale, you deserve more than a price tag and a grainy photo -- you need a framework for telling a reliable machine from an expensive regret.
What Counts as a Mini Excavator
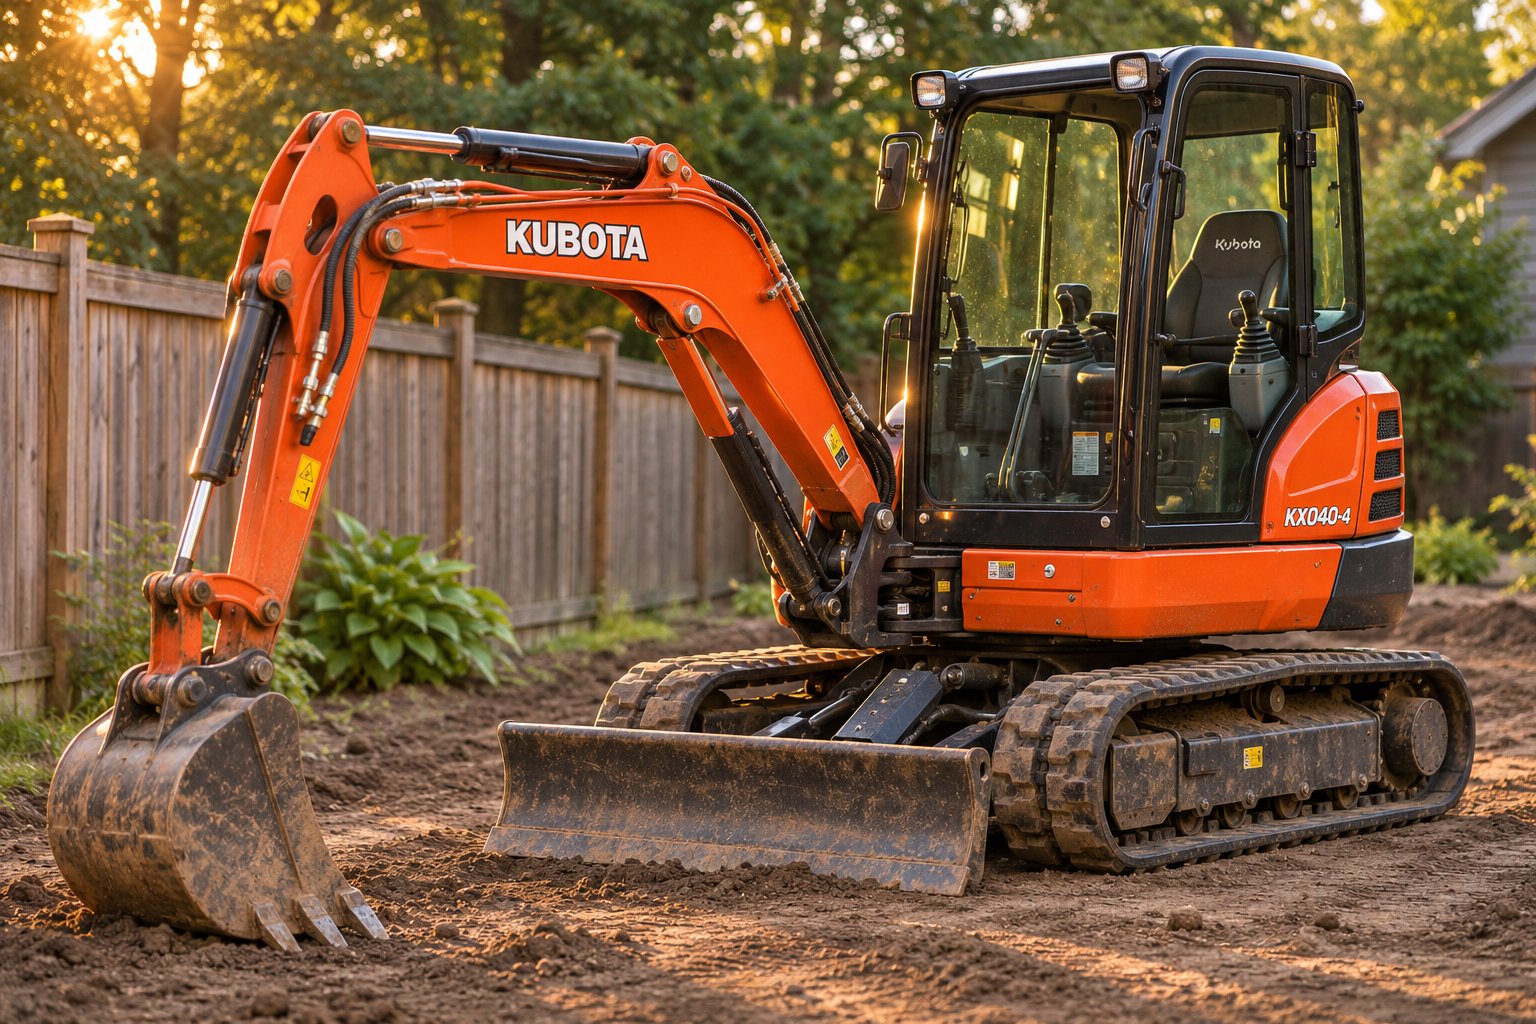
A mini excavator -- also called a compact excavator, mini digger, or mini ex -- is a tracked digging machine with an operating weight generally under 10,000 pounds (roughly 6 metric tons). That weight boundary isn't carved in stone; some manufacturers stretch the "mini" label up to about 11 tons, while others draw the line closer to 6 tons. Operating weights across major brands range from about 2,000 pounds for micro models up to around 22,000 pounds for the largest compacts, so the category is broader than most buyers initially expect.
One practical distinction: mini excavators almost always feature a front blade, whereas full-size crawler excavators do not. You'll also hear the term "compact excavator" used interchangeably with "mini," though some brands reserve "compact" for machines in the 5-to-10-ton range. Terminology varies -- the spec sheet matters more than the marketing label.
Who Benefits from Buying Used
The used compact excavator market has been gaining momentum. Used financed mini excavator sales jumped 13.1% year over year to 12,725 units, even as new financed sales declined by 7.7%. That shift signals something important: buyer demand remains high, but affordability concerns are pushing more contractors toward depreciated models. Whether you're expanding a fleet or buying your first machine, a well-chosen used mini excavator avoids the steepest depreciation hit while still delivering strong jobsite productivity.
This guide is built for four distinct buyer profiles:
- Owner-operators and small contractors -- looking for a single reliable machine that handles trenching, grading, and light demolition without draining working capital.
- Landscapers stepping up from manual labor -- ready to replace hand-digging with a compact machine that fits through residential gates and rides on a standard trailer.
- Rental yards and equipment dealers -- sourcing inventory where resale value, brand reputation, and cosmetic condition all factor into the buying decision.
- Import buyers and bulk purchasers -- comparing machines across multiple brands and geographies, often purchasing several units at once for overseas resale or fleet deployment.
Each profile carries different priorities -- budget ceilings, hour-meter thresholds, attachment needs, and transport logistics all shift depending on how you plan to use or resell the machine. The sections ahead build a decision framework that accounts for every one of those variables, starting with the size class that actually matches your work.
Mini Excavator Size Classes and the Jobs They Handle Best
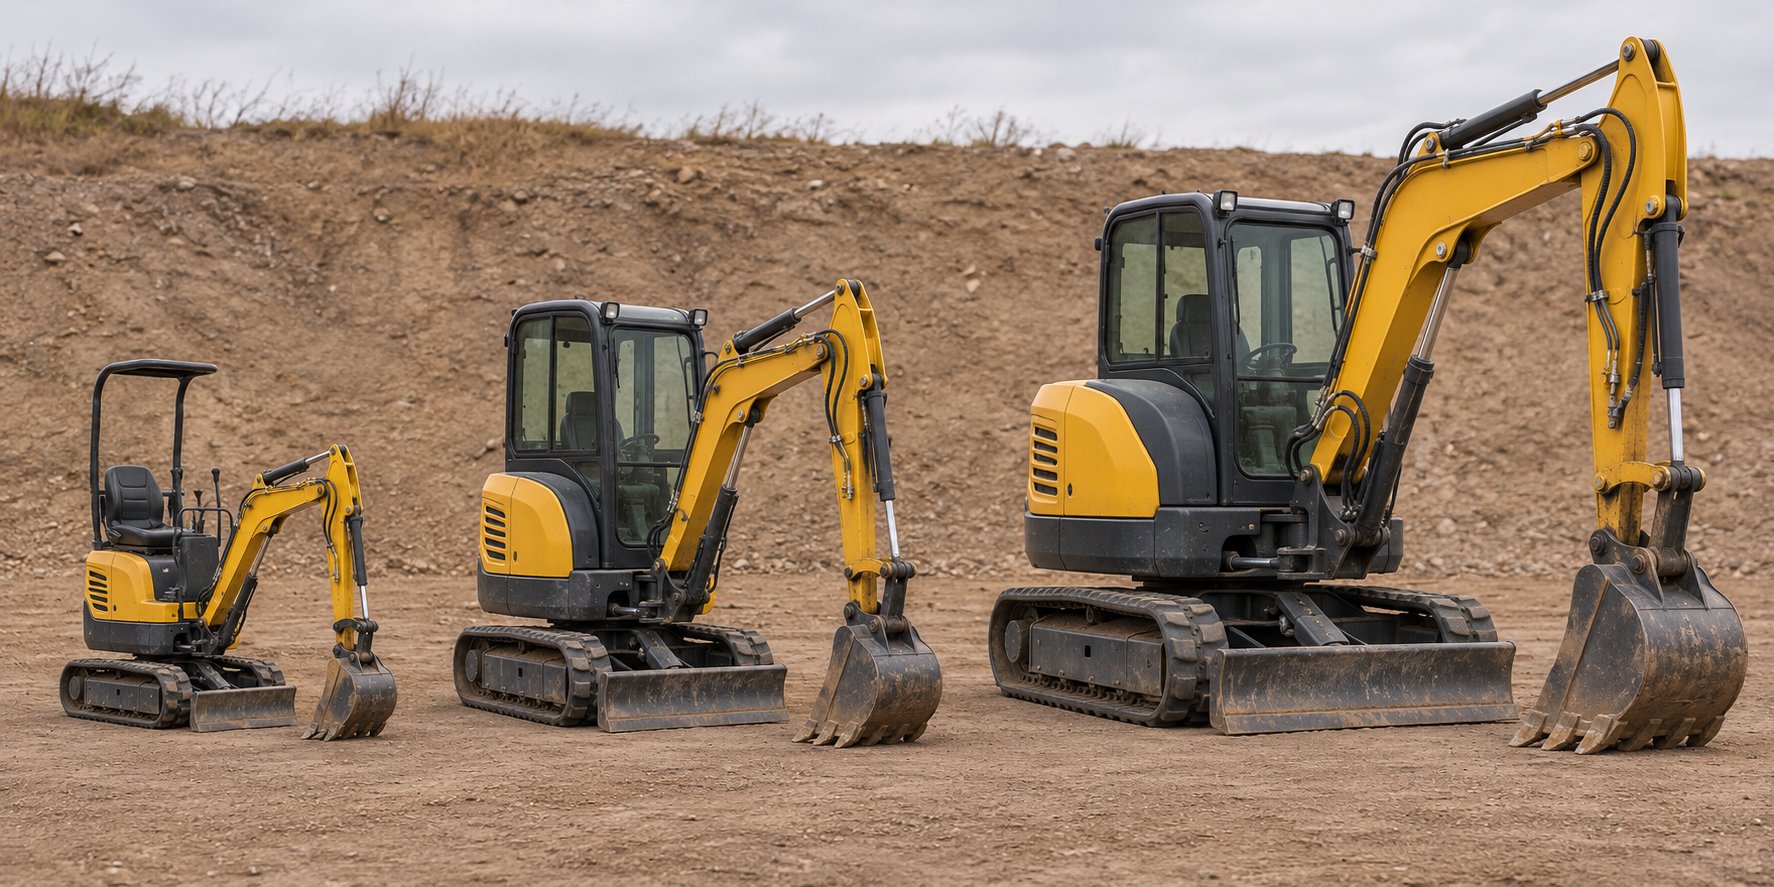
Buying the biggest machine your budget allows is a tempting shortcut -- and often the wrong one. A 5-ton compact excavator parked in a backyard where a 1.5-ton unit would have slipped through the gate doesn't look like a smart investment; it looks like a stuck asset. The smarter approach is matching the machine's size class to the work it will actually perform.
Under 1 Ton and 1-to-2-Ton Micro Excavators
Imagine needing to trench a waterline through a narrow side yard or strip out a concrete slab inside a standing structure. Machines in the sub-2-ton range are purpose-built for exactly those scenarios. Models like the Kubota K008-5 (roughly 2,025 lbs) or the CAT 300.9D at about 2,399 lbs can squeeze through a standard 36-inch residential gate and ride on a single-axle tilt trailer behind a half-ton pickup. Brands spanning Kubota, Yanmar, Caterpillar, Bobcat, and several Chinese-manufactured models all compete aggressively in this space, which means used inventory is plentiful.
Typical applications include backyard landscaping, shallow irrigation trenching, interior demolition, and utility work in confined spaces. Dig depths generally top out between 5 and 8 feet -- enough for planting beds and shallow drainage runs, but not deep enough for basement excavation or municipal utility mains. If your project stays relatively light and access is tight, this class delivers the most maneuverability per dollar.
2-to-4-Ton Mini Excavators
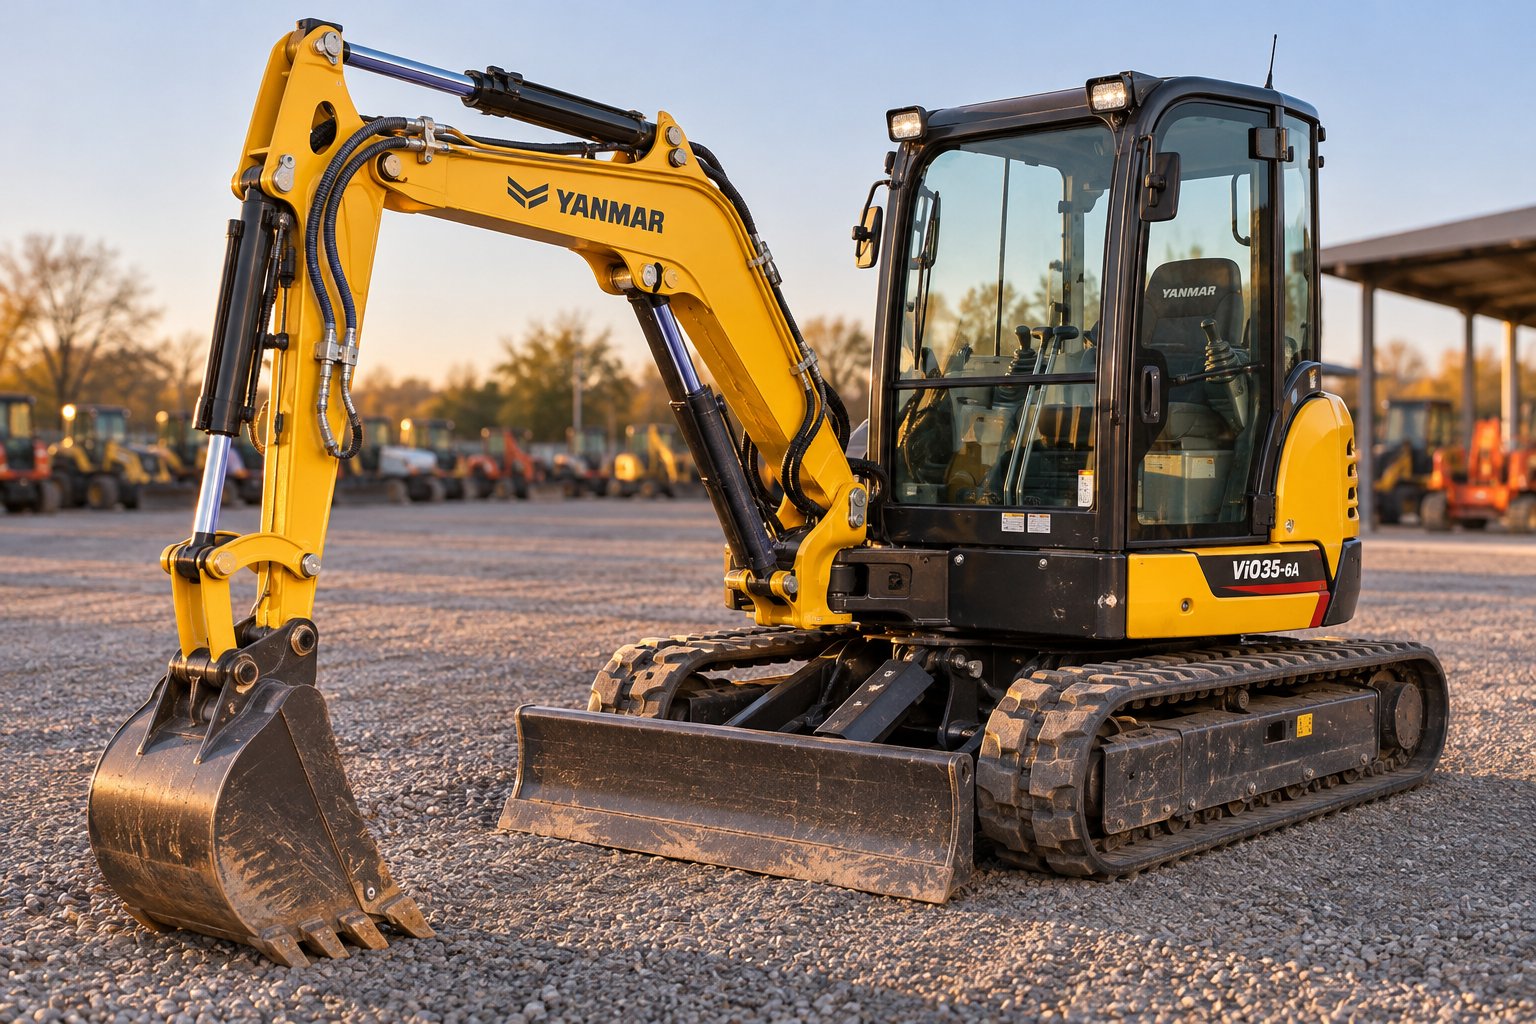
This is the volume king of the used market. The 2-to-4-ton class -- think Bobcat E35, John Deere 35 P-Tier, or the Yanmar ViO35-6A -- handles residential construction, pool digging, moderate trenching, and light commercial site work with enough breakout force to muscle through compacted soil. Operating weights here typically fall between 7,000 and 10,000 pounds, and dig depths push past 10 feet on most models.
Why does this range dominate resale listings? The 3-to-4-metric-ton segment is the most popular mini excavator class in North America, favored by contractors, landscapers, and rental fleets alike. High production volume means more machines eventually roll into the secondary market, giving used buyers a broader selection of brands, model years, and hour-meter readings to compare. If you're shopping for versatile concrete rental equipment or general excavation capability without crossing into heavy-commercial territory, start here.
4-to-6-Ton Compact Excavators
Stepping into the 4-to-6-ton bracket bridges a mini excavator's portability with the muscle needed for deeper commercial and municipal projects. Models like the Kubota KX057-5 (roughly 12,346 lbs) or the Hitachi ZX50U-5N deliver dig depths beyond 11 feet, dump heights tall enough to clear standard dump-truck sideboards, and noticeably greater bucket breakout force. You'll find these units handling storm-drain installations, road shoulder work, and larger-scale grading -- jobs where a lighter machine would burn hours struggling through hard ground.
Transport requirements shift at this weight, too. A 10,000-plus-pound excavator typically needs a commercial-grade trailer and a heavier tow vehicle, so factor hauling logistics into any cost comparison between a cheaper distant listing and a pricier local one.
| Size Class | Typical Operating Weight | Common Applications | Typical Dig Depth |
|---|---|---|---|
| Under 1 ton – 2 tons | 2,000 – 4,500 lbs | Backyard landscaping, interior demolition, utility micro-trenching | 5 – 8 ft |
| 2 – 4 tons | 5,500 – 10,000 lbs | Residential construction, pool digging, light commercial site work | 8 – 12 ft |
| 4 – 6 tons | 10,000 – 13,500 lbs | Municipal utility, commercial grading, deeper trenching | 11 – 14 ft |
Use the table above as a starting filter, not a final answer. Actual specs vary by manufacturer and model configuration, so always cross-check the specific machine's data sheet. The real takeaway is philosophical: match the excavator to the job rather than defaulting to the heaviest unit your trailer can carry. A right-sized machine works faster, costs less to transport, and holds its resale value better because the next buyer faces the same sizing logic you do.
Specs on paper, however, only tell part of the story. Two machines in the same weight class can feel dramatically different on the jobsite depending on dig geometry, tail-swing configuration, and hydraulic flow -- the technical details that truly separate a smart purchase from an expensive compromise.
Critical Specifications That Separate a Good Deal from a Bad One
Listing photos show paint and posture. Spec sheets reveal capability. When you're comparing a used mini excavator for sale against three other options in the same price range, the numbers on the data sheet -- not the seller's description -- tell you whether the machine can actually handle your work. The challenge is knowing which numbers matter and which ones are marketing padding.
Operating Weight, Dig Depth, and Dump Height
Think of operating weight as the spec that touches everything else. A heavier machine generally delivers better stability, stronger digging force, and higher lifting capacity -- but it also demands a sturdier trailer, a heavier tow vehicle, and possibly a CDL to haul legally. As Machinery Online notes, manufacturers don't always define "operating weight" the same way: some figures include a cab, others a canopy only; some include a standard bucket, others don't. Before you conclude that one listing outweighs another by 500 pounds, confirm both numbers represent the same configuration.
Dig depth determines whether the machine can reach the bottom of your trench, basement cut, or utility run. A 3-ton excavator rated at 10 feet of dig depth handles most residential waterline and sewer laterals comfortably, but a storm-drain installation at 12 feet demands a larger frame. Keep in mind that published dig depths assume a specific boom-and-arm combination -- a long-stick option increases reach but may reduce breakout force, so you're rarely getting something for nothing.
Dump height is the detail buyers forget until the first time a loaded bucket can't clear the sideboards of a dump truck. If you regularly load haul trucks on site, confirm the machine's maximum dump height exceeds the truck bed height by at least a few inches. Machines in the sub-2-ton class often top out around 8 to 9 feet of dump clearance, while 4-to-6-ton compacts can reach 12 feet or more -- a meaningful difference when you're cycling material into a standard 10-wheeler.
Zero Tail Swing vs Conventional Tail Swing
Picture yourself trenching along a property-line fence with six inches of clearance behind the cab. A conventional-tail-swing excavator rotates its counterweight well beyond the track width on every swing cycle, which means constant repositioning -- or worse, contact with the fence. A zero-tail-swing (ZTS) model keeps the counterweight inside the track footprint throughout a full rotation, so you can position the machine tight against a boundary and still swing the boom freely without striking nearby obstructions.
The trade-off is physics, not marketing. Zero-tail-swing designs sacrifice some counterweight mass and position to achieve that compact swing radius. The practical result? Slightly reduced lifting capacity and less stability on slopes compared to a conventional machine of the same tonnage. Conventional excavators, with their extended counterweight, provide additional leverage -- an asset for heavy lifts, steep-grade work, or loading trucks at maximum reach.
Here's the trap buyers fall into: assuming a model name tells the full story. Manufacturers sometimes offer both zero-tail-swing and conventional configurations under similar model designations. A Komatsu PC88, for example, might appear alongside a PC88MR (minimum radius) variant with very different swing characteristics. Always confirm the tail-swing specification on the exact serial number you're evaluating -- not just the model family.
Bucket Breakout Force and Auxiliary Hydraulics
Breakout force is the raw "bite" -- the maximum force the bucket cylinder generates when curling the bucket toward the cab. If your jobs involve compacted clay, fractured rock, or frozen ground, this number matters more than bucket capacity. Two machines in the same weight class can post significantly different breakout force figures depending on cylinder bore, hydraulic pressure, and linkage geometry. A Kubota KX057-4 delivers about 49.7 kN of bucket breakout force, while other 5-ton machines may sit closer to 38-42 kN -- a gap large enough to change how the machine handles hard-ground conditions.
One subtlety most buyers miss: spec sheets may report breakout force under different measurement standards. SAE J1179 measures force at the bucket tooth tips, while ISO 6015 measures at the cutting edge -- a shorter radius that produces a higher published number for the identical machine. Neither standard is wrong, but comparing an SAE-rated excavator against an ISO-rated one without adjusting for the difference creates a false capability gap.
Auxiliary hydraulic flow is the spec that decides your attachment future. Breakers, augers, thumbs, and mulchers all rely on the machine's auxiliary circuit, and each attachment requires a specific flow rate (measured in GPM or LPM) and operating pressure (PSI or bar) to function correctly. A machine with impressive breakout force but inadequate auxiliary flow will underperform with a hydraulic breaker just as badly as a weaker machine with the right flow specs. Before you commit, verify the listing machine's auxiliary output against every attachment you plan to run -- now and in the foreseeable future.
Always request the specific machine's factory spec sheet tied to its serial number rather than relying on generic model-year data. Factory options, regional configurations, and long-stick versus standard-arm setups can shift breakout force, auxiliary flow, and operating weight enough to change whether a machine fits your requirements.
Specifications set the boundaries of what a machine can do. Price determines whether it makes financial sense to do it. The gap between a fair deal and an overpriced listing often comes down to understanding the variables that actually drive used excavator pricing -- and knowing how to benchmark any number a seller puts in front of you.
What Used Mini Excavators Actually Cost and How to Verify Fair Pricing
You've found a listing that matches your size class and hits every spec on your checklist. The asking price looks reasonable -- or does it? Without a reliable way to benchmark that number, you're trusting someone who profits from your uncertainty. The used compact excavator market doesn't have a Kelley Blue Book equivalent, and that information gap is exactly where buyers overpay.
Rather than chasing a single "correct" price, think in terms of a defensible range. As Ironmart's equipment valuation guide puts it, a used excavator doesn't have one universal value independent of why you're asking -- a lender, a dealer, and an auction buyer are each solving a different problem. Your job is to identify the variables that push any given machine higher or lower within that range, then verify whether the seller's number lands inside it.
What Drives Used Mini Excavator Pricing
Not all pricing variables carry equal weight. Here they are, ranked roughly by the magnitude of their impact on final sale price:
- Brand reputation and parts availability -- This is the single biggest resale-value lever. Kubota and Bobcat lead the pack for resale strength in the sub-10,000-pound class, largely because both brands dominate rental fleets and dealer inventories across North America. Caterpillar holds value well too, especially in the 5,000-to-8,000-pound range, while John Deere and Takeuchi consistently outperform lesser-known imports. Buyers trust machines they can get parts for quickly -- and that trust shows up directly in resale pricing.
- Hour-meter reading relative to maintenance history -- Hours function as a proxy for wear, but they're an imperfect one. A 5-year-old machine with 800 hours and documented quarterly service will command a higher price than a 3-year-old unit with 2,500 hours and no records, because buyers are pricing remaining component life, not the model year. Machines under roughly 2,000 hours typically sit at a significant premium over those north of 4,000 hours -- but only when the records back up the meter reading.
- Undercarriage condition -- Track replacement on a mini excavator can run into thousands of dollars, making the undercarriage the most expensive wear system on the machine. A unit with 70% or more remaining track life prices very differently from one that needs new rubber within 500 hours.
- Model year and emissions tier -- Newer machines benefit from updated cab designs, electronics, and hydraulic efficiency. They also carry Tier 4 Final emissions equipment (DPF, DEF systems), which some buyers view as added complexity. Older, pre-Tier-4 machines occasionally attract a premium from operators who prefer simpler maintenance -- a counterintuitive pricing wrinkle worth watching.
- Geographic location and regional demand -- Construction-heavy markets in the Sun Belt or along the East Coast absorb inventory faster, which keeps local prices firmer. A machine sitting in a soft market may appear cheaper, but transport costs to your jobsite can erase the savings. Always compare landed cost, not asking price.
- Included attachments -- A listing bundled with a hydraulic thumb, two or three buckets, and a breaker may look expensive at first glance. Separate the attachment value from the base machine, and the picture often changes. Standard attachments keep the audience wide and support resale; specialized ones add value only to the right buyer.
How do these variables play out in real dollar terms? Market data for a typical 3-ton class machine illustrates the spread clearly: a "like new" unit under 500 hours might trade between $35,000 and $55,000, while a high-hour unit in the 3,000-to-5,000-hour range drops to roughly $15,000 to $28,000. That's the same size class -- the condition and brand tier account for the entire gap. A well-maintained Kubota or Bobcat in the moderate-use tier sits at the top of its range, while a lesser-known import in the same hour bracket gravitates toward the bottom.
Residual-value curves sharpen the picture further. Premium brands like Caterpillar, Kubota, and Bobcat tend to retain 60% to 70% of their original price after five years, whereas value-tier and import brands may retain only 35% to 50% over the same period. If you plan to trade up in three to five years, the premium brand's stronger residual can offset a higher upfront purchase price -- something budget-focused buyers frequently overlook.
How to Benchmark a Fair Price
Knowing what drives pricing is half the equation. The other half is verifying whether a specific listing is priced fairly relative to comparable machines that have actually changed hands. Here's a practical benchmarking workflow:
Pull completed auction results, not asking prices. An asking price is a seller's hope; a sold price is a fact. Public auction platforms like Ritchie Bros. and IronPlanet publish hammer prices for completed sales, giving you real transaction data. Search for the same model, a similar year range, and a comparable hour bracket. Even four to six solid comparables will tell you more than fifty unsold listings. If you're evaluating a Komatsu PC88 or a Caterpillar 305.5, for instance, filter by machines within 500 hours and two model years of your target -- tight enough to be meaningful, broad enough to generate results.
Cross-reference marketplace listings. Aggregator sites like MachineryTrader and Equipment Trader compile dealer and private-party listings that reflect current retail-level pricing. These numbers represent the ceiling of the range, not the midpoint. Compare at least five to eight listings for the same model-year bracket, noting which ones include attachments and which ones are bare. If every comparable listing clusters around a similar price and the machine you're eyeing sits well above that cluster, ask the seller to justify the premium -- or move on.
Request a dealer trade-in appraisal. Even if you don't plan to buy from a dealer, calling one or two local dealerships and asking what they'd offer on a trade-in for the exact model, year, and hour count you're considering gives you a wholesale floor. The gap between that trade-in number and dealer retail pricing represents the dealer's margin -- and a fair private-sale price typically falls somewhere between those two points.
Normalize for attachments. This step trips up more buyers than any other. A machine listed at $38,000 with a hydraulic thumb ($2,500-$4,000 new), a 24-inch trenching bucket ($800-$1,500), and a hydraulic breaker ($3,000-$6,000) may actually be priced below market once you subtract the attachment value. Conversely, a bare machine at $32,000 that needs $8,000 in attachments before it's job-ready isn't the bargain it appears. Always compare base-machine-to-base-machine, then add attachment value separately.
Pricing data shifts with economic cycles, seasonal demand, and regional construction activity. Pull current comparables every time you evaluate a new listing rather than relying on any static price chart -- including the ranges referenced in this guide.
A fair price, though, only matters if you're buying through the right channel. The same machine can trade at meaningfully different price points depending on whether it moves through an auction house, a dealer lot, or a direct-purchase aggregator -- and each channel carries its own fee structures, inspection opportunities, and risk profiles worth understanding before you commit.
Where to Buy Used Mini Excavators and How Each Channel Compares
A used mini excavator priced fairly on one platform might cost you thousands more -- or thousands less -- on another, depending entirely on how that platform makes its money and what services it wraps around the transaction. The buying channel you choose shapes your total cost just as much as the machine itself. Think of it this way: the same Kubota KX040 with 1,800 hours could sell at auction with a buyer premium stacked on top, list on a dealer marketplace with retail markup baked in, or move through a direct-purchase exporter at an FOB port price with shipping handled separately. Each path has legitimate advantages, and each carries trade-offs worth weighing before you place a bid, submit an offer, or wire a deposit.
The table below puts the major channels side by side so you can scan the differences quickly, then read the detailed breakdowns that follow.
| Buying Channel | Typical Selection Size | Buyer Premiums / Fees | Inspection Opportunity | Best For |
|---|---|---|---|---|
| Direct purchase from exporters / multi-brand aggregators | Medium to large (multi-brand inventory at port facilities) | No buyer premium; FOB or CIF pricing, shipping arranged separately | On-site yard inspection, live video calls, or third-party inspection at port | Equipment dealers, bulk buyers, import buyers comparing across brands |
| Auction houses and online auction platforms | Very large (thousands of lots per event) | Buyer premium of 5% - 15% depending on platform and lot value | Limited preview windows (typically 1 - 3 days before sale); as-is-where-is terms | Experienced evaluators comfortable with competitive bidding and no warranty |
| Online marketplaces and dealer listings | Large (aggregated from hundreds of dealers nationwide) | No direct buyer fee; dealer markup built into asking price | On-site visits by appointment; some dealers offer delivery with return period | Buyers who want negotiation room, potential dealer warranty, and local pickup |
Auction Houses and Online Auction Platforms
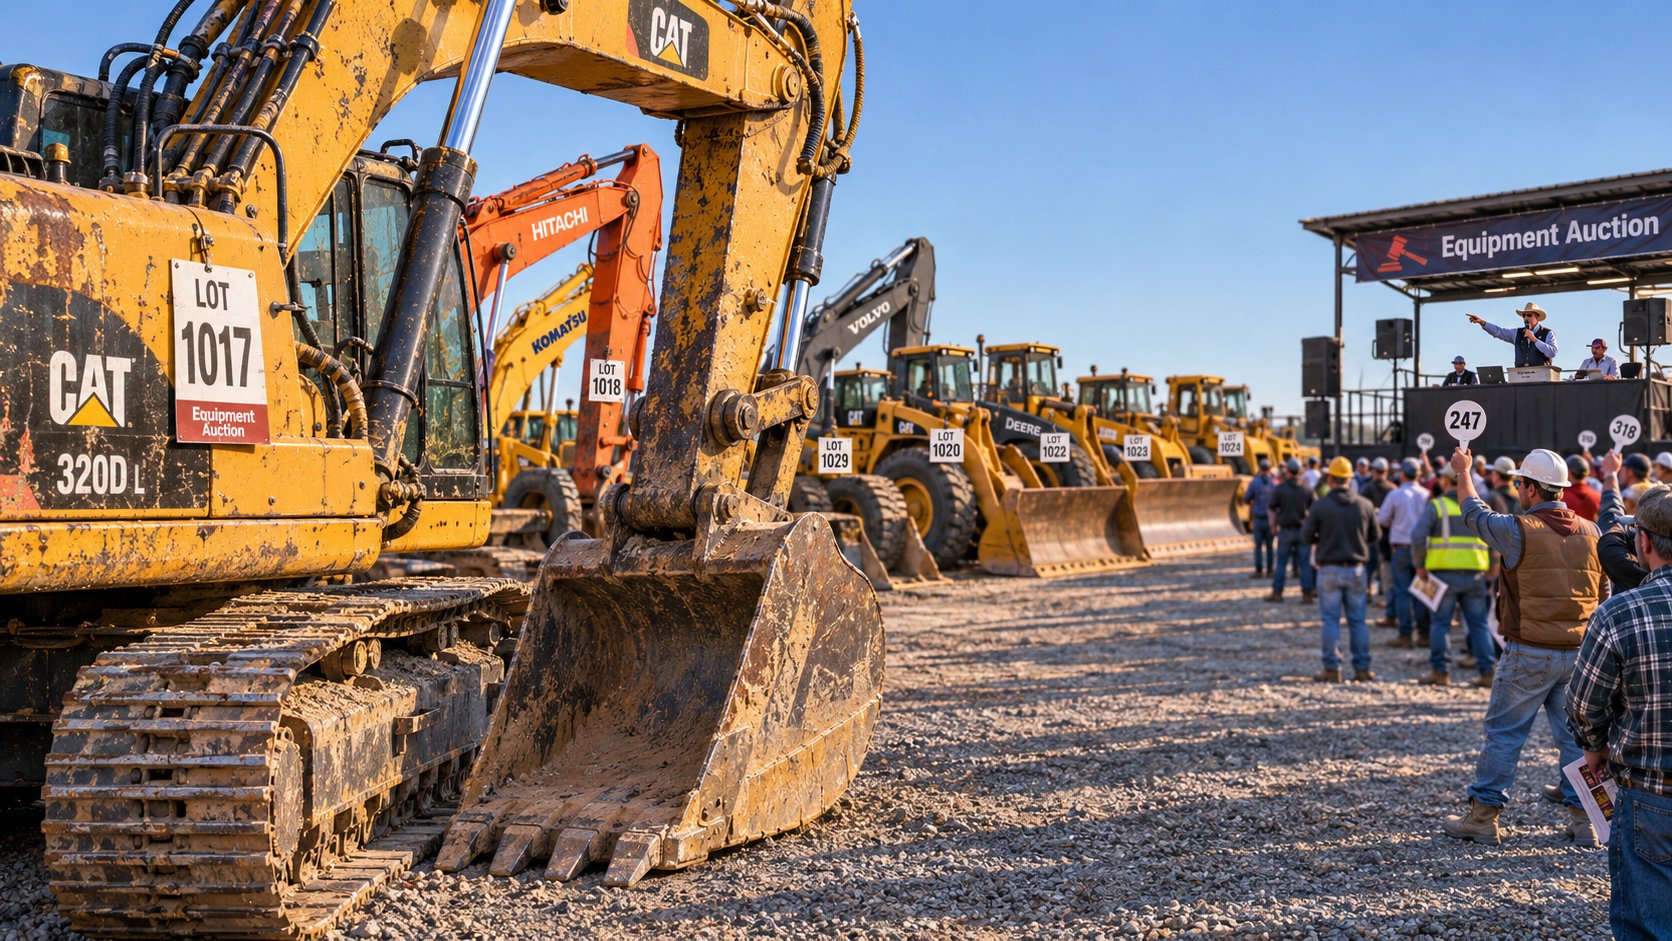
Auction buying delivers one thing no other channel can match: pricing transparency rooted in real-time market demand. When a hammer drops on a used mini excavator, you're seeing what a pool of competing buyers was willing to pay at that exact moment -- not a dealer's aspirational retail number. Platforms like Ritchie Bros. and IronPlanet run both live and timed online events with thousands of equipment lots, which means inventory breadth is rarely an issue. If a specific model-year combination exists in the secondary market, it will eventually cycle through one of these sales.
The downside? Fees are real and often larger than first-time buyers expect. Ritchie Bros. charges a transaction fee (their term for a buyer's premium) on every winning bid: 10% on lots up to $30,000, 5.5% on lots between $30,000 and $75,000, and a flat $4,125 on anything above $75,000. So a $20,000 winning bid becomes $22,000 before taxes, and a $60,000 hammer price jumps to $63,300. Other platforms apply similar structures, though the percentages vary. You'll also face documentation fees on titled items, storage charges if you don't pick up on time, and separate transport costs to get the machine home.
Inspection windows are the other constraint. Most auction yards allow in-person previews one to three days before the sale, and online-only events may offer nothing beyond photos and a condition report. Every lot sells as-is-where-is, with no warranty and no recourse if you discover a cracked dipper arm a week after pickup. That risk profile favors buyers who can evaluate a machine quickly and confidently -- or who budget for a mechanic's time during the preview window.
Pros
- Market-driven pricing with full sold-price transparency
- Massive selection across brands, model years, and size classes
- No negotiation required -- competitive bidding sets the price
- Useful as a benchmarking tool even when you buy elsewhere
Cons
- Buyer premiums add 3% to 10% on top of the hammer price
- Limited or no mechanical warranty -- every lot is as-is
- Short inspection windows make thorough evaluation difficult
- Competitive bidding can push final prices above what a patient private-market buyer would pay
Online Marketplaces and Dealer Listings
Listing aggregators like Machinery Trader and Equipment Trader function as classified hubs where dealers and private sellers post inventory for buyers to browse. These sites don't sell the machine themselves -- they connect you with the seller, and the transaction happens directly between the two parties. The advantage is volume and variety: Machinery Trader, owned by Sandhills Global, has been aggregating heavy equipment listings since 1978, and its combined print-and-digital reach means you'll find everything from a sub-1-ton micro excavator to a loader Komatsu 600 class machine on the same platform.
Unlike auction channels, marketplace listings give you room to negotiate. A dealer's asking price includes their margin, reconditioning costs, and advertising fees -- which means there's almost always daylight between the list price and the walk-away number. Some dealers also offer limited powertrain warranties or certified pre-owned programs on select units, adding a layer of protection that auction purchases simply don't provide.
The flip side is variable dealer quality. A reputable dealership with a service department and a return policy is a very different buying experience from a small-lot reseller who bought the same machine at auction last week and relisted it at a markup. Verify the dealer's history, read reviews, and insist on service records before treating any marketplace listing as a vetted opportunity. Advertising fees for sellers on platforms like Machinery Trader reportedly range from about $99 to $299 per listing per month, which means dealers have carrying costs that motivate them to negotiate -- especially on units that have been sitting for weeks.
Pros
- Ability to negotiate price directly with the seller
- Some dealers offer limited warranties or return windows
- Broader inspection opportunities -- schedule a visit on your timeline
- No buyer premium added to the purchase price
Cons
- Dealer markup can exceed auction prices for comparable machines
- Quality and transparency vary widely between sellers on the same platform
- Listings may include stale inventory with outdated photos
- Private sellers on these platforms rarely offer any warranty protection
Direct Purchase from Exporters and Multi-Brand Inventories
Some buyers -- particularly equipment dealers sourcing resale stock, contractors purchasing multiple units at once, and import buyers building fleets overseas -- find that neither auctions nor domestic marketplaces fully serve their needs. Buying in volume through a curated multi-brand inventory at a port facility offers a different value proposition: the ability to compare machines from several manufacturers under one roof, negotiate bulk pricing, and arrange export logistics through the same supplier.
This channel is especially relevant for buyers open to sourcing internationally. An important distinction worth emphasizing: equipment exported from China is not necessarily manufactured by a Chinese brand. Port-based aggregators often stock used units from Caterpillar, Komatsu, Hitachi, XCMG, Sany, and other global makes -- all inspected and prepared for export from a single facility. JIUHONG's excavator collection is one example of this model, bringing together compact and larger machines from multiple brands so buyers can compare listings, request model-specific quotes, and arrange individual or bulk purchases from a centralized inventory. Keep in mind this is a broad excavator collection rather than a mini-excavator-only category, so you'll want to filter by the size class and specs you identified earlier in this guide.
The trade-off is due diligence. Buying remotely from any international supplier demands more legwork than walking a local dealer's lot. Request live video inspections of the specific serial-numbered unit you're considering, verify hour-meter readings against service records, and confirm export documentation -- including CE, EPA, or other certifications your destination market requires -- before wiring any payment. Third-party inspection services at the port of origin add cost but also add confidence, especially on higher-value machines.
Pros
- Multi-brand comparison from a single supplier saves sourcing time
- Bulk pricing and consolidated shipping for multi-unit purchases
- No buyer premium -- pricing is typically FOB or CIF
- Access to global inventory that may not appear on domestic platforms
Cons
- Remote buying requires thorough due diligence and supplier vetting
- Shipping transit times range from 2 to 10 weeks depending on destination
- Import duties, customs clearance, and port fees add to the landed cost
- In-person inspection requires travel or reliance on video and third-party reports
Each channel rewards a different type of buyer. Auction platforms favor experienced evaluators who can move fast and absorb risk. Dealer marketplaces suit buyers who value negotiation leverage and the safety net of a potential warranty. Direct-purchase aggregators serve volume buyers and international operators who need multi-brand access and export-ready logistics. The smartest approach? Search across all three simultaneously, benchmark prices against each other, and let the best combination of machine condition, total landed cost, and transaction security determine where you ultimately buy.
Whichever channel you choose, the machine still needs to pass a physical inspection -- and that's where most buyers either protect themselves or set themselves up for an expensive surprise. A structured walk-around checklist, applied consistently whether you're standing in an auction yard or reviewing a video from a port facility, is the single most effective tool for separating a solid purchase from a costly mistake.
The Pre-Purchase Inspection Checklist for Used Mini Excavators
You've identified the right size class, verified the specs, benchmarked the price, and chosen a buying channel. Everything looks promising on screen. But a listing is not a machine -- it's a sales pitch with photos. The moment you commit money without physically verifying what you're buying (or having someone verify it on your behalf), you're gambling. Whether you're standing in an auction yard, visiting a dealer lot you found on Machinery Trader, or reviewing a live video walkthrough from a port facility, this numbered checklist gives you a repeatable sequence that catches the problems sellers hope you'll miss.
Print it. Save it to your phone. Hand it to whichever mechanic or inspector you trust. Every item below is ordered to follow a logical walk-around path -- starting underneath the machine where the most expensive wear hides, moving through the hydraulic system, and finishing with the engine, swing mechanism, and structural integrity checks.
Undercarriage, Tracks, and Rollers
The undercarriage is the single most expensive wear system on any mini excavator. Undercarriage components typically account for 15% to 25% of total lifetime machine expenses, and a full replacement -- tracks, rollers, idlers, and sprockets -- can easily run several thousand dollars on a 3-to-5-ton unit. This is where you start because this is where sellers lose the most money if a buyer knows what to look for.
Check track tension first. A rubber track should sag slightly between the top roller and the drive sprocket -- too tight stretches the internal steel cords and overloads final drive bearings, while too loose risks derailment during turns. For steel tracks, measure sag against the manufacturer's specification. Next, examine the sprocket teeth: pointed, hook-shaped teeth indicate advanced wear and will chew through new tracks quickly. Rollers and idlers should spin freely without wobble or grinding; a stiff or leaky roller signals bearing failure. Finally, look for uneven wear patterns across the track frame -- one side noticeably more worn than the other can point to frame misalignment, a problem that goes well beyond a simple parts swap.
Hydraulic System and Cylinder Integrity
Hydraulics are the nervous system of the machine. Every digging, swinging, and lifting motion depends on clean fluid moving through tight-tolerance components without leaking past where it shouldn't. Start your inspection visually: walk around the boom, arm, and bucket cylinders looking for wet spots, oil film, or active drips around rod seals and hose fittings. Slow or weak hydraulic action during operation can indicate pump or valve problems, so test every function -- boom raise, arm curl, bucket dig, and swing -- under load, not just at idle.
The drift test is your best friend here. Raise the boom to full height with a loaded bucket, shut the engine off, and watch. A cylinder functioning properly should hold its position with the lever in neutral. If the boom creeps downward over ten to fifteen minutes, internal seal bypass is the likely culprit -- and by the time drift is visible under load, the cylinder bore is often scored enough that a simple seal kit won't fix it permanently. Pull the hydraulic oil dipstick or check the sight glass while you're at it: fluid that appears milky, foamy, or abnormally dark signals contamination from water intrusion, aeration, or overdue fluid changes. Any of these conditions accelerate wear on every hydraulic component in the circuit.
Engine, Swing Bearing, and Structural Checks
Request a cold start -- and be suspicious of any seller who conveniently has the engine warmed up before you arrive. A cold engine reveals hard-starting tendencies, excessive cranking, and smoke characteristics that disappear once things reach operating temperature. White or blue exhaust smoke on startup can indicate coolant leaks into the combustion chamber or worn rings, while persistent black smoke under load points to fueling or air-intake issues. Check for milky residue on the oil filler cap -- a classic sign of coolant mixing with engine oil, which usually means a head gasket or worse.
Swing the upper structure a full 360 degrees and listen. Grinding, popping, or rattling during rotation suggests swing bearing wear -- one of the more expensive repairs on a compact excavator because the entire upper frame must be separated from the undercarriage to replace the bearing. Check for vertical play between the turntable and the lower frame by rocking the upper structure side to side; any perceptible looseness warrants a closer look or a specialist's opinion.
Finish with the structural elements most prone to fatigue: the boom foot weld, boom nose, dipper arm tip, and cylinder mounting points. Run your hand along these areas -- grinding marks or freshly applied paint over weld zones can conceal crack repairs. Inspect every pin and bushing joint by cycling the bucket and arm slowly; clunking or sloppy movement at any pivot means wear that will worsen with every hour of operation. Whether you're evaluating skip loaders, a TL6-class compact, or a standard mini excavator, the stress points are the same -- and the repair bills are equally unforgiving.
Here's the full sequence consolidated into a portable checklist you can reference on-site:
- Verify the serial number plate matches all documentation and title records.
- Check track tension and inspect rubber or steel tracks for cuts, exposed cords, or stretched links.
- Examine sprocket teeth for hooking, rounding, or uneven wear patterns.
- Spin each roller and idler by hand -- confirm free rotation with no grinding, wobble, or oil seepage.
- Look for uneven undercarriage wear that may indicate frame misalignment.
- Inspect all hydraulic cylinders (boom, arm, bucket, blade) for rod scoring, seal leaks, and hose damage.
- Perform a loaded drift test -- raise the boom, shut the engine off, and time any downward creep over 10 to 15 minutes.
- Check hydraulic fluid color and clarity through the sight glass or dipstick; flag milky, foamy, or dark fluid.
- Request a cold start and observe cranking time, exhaust smoke color, and idle stability.
- Swing the upper structure 360 degrees and listen for grinding, popping, or bearing noise.
- Rock the turntable to check for vertical play between the upper frame and undercarriage.
- Inspect boom foot, boom nose, dipper arm tip, and cylinder mounts for cracks, fresh welds, or grinding marks.
- Cycle the bucket and arm slowly at each pin joint -- note any clunking or excessive play in bushings.
- Test all cab controls, gauges, lights, A/C, and safety equipment including seat belt and ROPS/FOPS integrity.
- Run every function under load -- boom, arm, bucket, swing, and travel -- checking for hesitation, drift, overheating, or uneven travel speed.
- Confirm which attachments are included and physically verify their condition.
Hour-meter readings should always be cross-referenced with service records, telematics data, or OEM dealer history reports. Hour meters can be reset, replaced, or disconnected -- a "low hour" machine with worn pedals, a cracked seat, and shiny joystick grips is telling you a different story than the meter is.
A thorough inspection protects you from buying someone else's problem. But even a disciplined walk-around can't predict every future failure -- which is why understanding the most common mechanical breakdown points in used mini excavators, and the repair costs they carry, gives you one more layer of defense before you sign anything.
Common Failure Points and Red Flags in Used Mini Excavators
An inspection checklist tells you what to look at. Knowing the failure points tells you what to fear. Every used mini excavator carries a finite list of components that will eventually fail -- and when they do, some drain your wallet far more aggressively than others. Understanding which breakdowns cost hundreds versus which ones cost thousands gives you a clear line between a negotiable flaw and a machine you should walk away from entirely.
Final Drive and Travel Motor Failures
Final drives are sealed planetary gear assemblies housed at each track, and they rank among the most expensive single-component repairs on any compact excavator. A complete final drive failure can involve worn internal gears, damaged bearings, and compromised seals -- all packed into a unit that must be removed, disassembled, and either rebuilt or replaced outright. On a 3-to-5-ton mini excavator, that repair can easily run $3,000 to $6,000 or more per side, depending on brand and parts availability.
The warning signs are surprisingly audible if you know what to listen for. A grinding or screeching noise during travel almost always traces back to worn gears or failed bearings inside the drive housing. Oil seepage around the final drive cover or pooling beneath the track frame signals blown seals -- and once gear oil leaks out, the internal components starve for lubrication and deteriorate rapidly. Perhaps the most telling symptom: one track moving noticeably slower than the other. If the machine pulls to one side during a straight travel test, a weak hydraulic motor or gear failure on the lagging side is the likely culprit. As one industry troubleshooting guide notes, blockages in the rotary manifold or swivel joint can produce similar one-sided symptoms, so diagnosing the root cause before assuming the worst is important -- but budget for a major repair until you've confirmed otherwise.
Boom Cylinder Leaks and Cracked Dipper Arms
Heavy breaker use and chronic overloading are the two fastest ways to shorten a mini excavator's structural life. Every time a hydraulic breaker hammers through concrete or rock, the impact reverberates up the dipper arm and into the boom -- cyclic stress that promotes fatigue cracks at welded joints, cylinder pin bosses, and the boom foot where the structure connects to the swing frame. Machines that spent their working life in demolition or rock-heavy applications will show this stress earlier and more severely than units used primarily for soft-soil trenching.
Cracked dipper arms are a particular concern because the damage often hides under dirt, paint, or hastily applied touch-up welds. Cracks longer than two inches in load-bearing members are considered deal-breakers by experienced evaluators -- they propagate quickly under load and can lead to catastrophic structural failure on the jobsite. Run your fingers along every weld seam on the boom and dipper, especially near the nose and heel where stress concentrates. Freshly ground metal or new paint over a weld zone should raise immediate questions about what's being concealed underneath.
Cylinder drift under load, meanwhile, reveals a different but equally expensive problem. If you performed the loaded drift test from the previous chapter's checklist and the boom crept downward, internal seal bypass is already advanced. By the time drift is noticeable at operating pressure, simply repacking the seals may not restore full performance -- a scored cylinder bore often requires re-chroming or full cylinder replacement, pushing the repair into the $1,500 to $3,500 range per cylinder on a typical compact unit.
Electrical and Emissions System Issues
Buyers upgrading from older, mechanically simple machines into newer used inventory often underestimate one shift that happened quietly across the industry: Tier 4 Final emissions compliance. Machines built after roughly 2014-2015 (depending on engine size and manufacturer) carry diesel particulate filters (DPF), diesel exhaust fluid (DEF) injection systems, and associated sensors and control modules that earlier models never had. These components work well when properly maintained -- but on a used machine with spotty service records, a clogged DPF or a malfunctioning DEF dosing unit can trigger derating modes that cut engine power by 25% to 50%, and a forced regeneration failure can sideline the machine entirely.
Electrical gremlins compound the issue. Corroded wiring harnesses, intermittent sensor faults, and aftermarket modifications to the emissions system all appear more frequently on high-hour used units. Unlike a hydraulic leak you can see or a bearing noise you can hear, an electrical fault may only surface under specific operating conditions -- which is why requesting a full diagnostic scan with the OEM software tool is worth the expense on any Tier 4 Final machine you're seriously considering. The same logic applies whether you're evaluating mini excavators, telehandler forklifts, or even equipment in entirely different categories like JLG boom lifts -- emissions-era machines across the board demand a different maintenance awareness than their pre-Tier-4 predecessors.
Below is a consolidated red-flag summary. Print it alongside your inspection checklist so you can match any symptom you observe to its likely financial impact:
- Grinding or screeching during travel -- Final drive gear or bearing failure. Repair cost category: Major ($3,000 - $6,000+ per side).
- Oil pooling around final drive housing -- Seal failure with potential internal lubrication starvation. Repair cost category: Moderate to Major ($800 - $4,000 depending on damage extent).
- One track significantly slower than the other -- Hydraulic motor failure, gear damage, or swivel joint blockage. Repair cost category: Major ($2,500 - $5,000+).
- Visible cracks at boom or dipper arm weld joints -- Structural fatigue from overloading or breaker use. Repair cost category: Major ($2,000 - $5,000+ for professional weld repair or replacement).
- Boom or arm cylinder drift under load -- Internal seal bypass and possible bore scoring. Repair cost category: Moderate to Major ($1,500 - $3,500 per cylinder).
- DPF warning light active or engine in derate mode -- Clogged particulate filter or DEF system malfunction. Repair cost category: Moderate to Major ($1,200 - $4,000+ for filter cleaning, sensor replacement, or module repair).
- Intermittent electrical faults or non-functional gauges -- Wiring harness corrosion or sensor failure. Repair cost category: Minor to Moderate ($200 - $1,500 depending on location and complexity).
- Excessive exhaust smoke (blue or white) that persists at operating temperature -- Internal engine wear (oil burning) or coolant intrusion. Repair cost category: Major ($3,000 - $8,000+ for overhaul).
- Swing bearing grinding or vertical play between turntable and undercarriage -- Bearing race wear requiring full bearing replacement. Repair cost category: Major ($3,000 - $7,000+ including labor).
Every item on that list represents a problem you'd rather discover before signing a purchase agreement than after. And here's the principle worth repeating: walking away from a bad machine saves more money than negotiating a discount on one. A $4,000 price reduction on a unit that needs $8,000 in repairs isn't a deal -- it's a down payment on someone else's deferred maintenance. The buyers who build the best fleets aren't the ones who find the cheapest listings; they're the ones disciplined enough to say no until the right machine appears at the right price.
Avoiding a lemon, though, is only half the financial picture. The other half is deciding whether buying used is actually the smartest acquisition strategy for your situation -- or whether renting, leasing, or even buying new delivers better returns once you factor in depreciation curves, utilization rates, and the hidden logistics costs that rarely show up in a listing price.
Buying Used vs Renting vs Leasing vs Buying New
Knowing how to spot a bad machine is essential -- but so is knowing whether buying one at all is the right move. Not every contractor, landscaper, or equipment dealer benefits from purchasing a used mini excavator. Depending on your project pipeline, utilization rate, and cash position, renting, leasing, or even buying new might deliver a better financial outcome. The goal isn't to default to the cheapest upfront option; it's to match the acquisition method to how you'll actually use the machine over the next two to five years.
When Buying Used Makes Financial Sense
The strongest argument for buying used is the depreciation curve you avoid. Heavy equipment typically loses 20% to 30% of its value in the first year and 10% to 15% annually thereafter. A $120,000 compact excavator bought new could be worth roughly $72,000 after just three years -- a $48,000 hit absorbed entirely by the original owner. Buying that same machine as a two- or three-year-old used unit lets you step in after the steepest depreciation has already occurred, effectively letting someone else subsidize the heaviest value loss.
Depreciation math alone doesn't justify a purchase, though. Utilization rate -- the percentage of available working days the machine actually runs -- is the metric that separates smart ownership from expensive idle time. Industry guidance consistently points to a 60% annual time utilization threshold (based on roughly 22 working days per month) as the point where purchasing becomes economically rational. For mini excavators specifically, the break-even point where owning costs roughly the same as renting falls around 120 rental days per year -- approximately five to six months of continuous use. If your project backlog puts the machine in the dirt more than that, ownership starts building equity rather than burning cash.
Tax benefits tilt the scales further. Section 179 deductions allow you to write off the full purchase price of qualifying equipment in the year it's placed in service -- up to $1,160,000 for 2026. Bonus depreciation, MACRS schedules, and interest deductions on financed purchases all reduce the effective cost of ownership. A contractor in the 25% tax bracket buying an $80,000 used excavator could see first-year tax savings exceeding $20,000 through a combination of these provisions. Rental payments are deductible as operating expenses too, but they don't offer the same accelerated write-off potential.
When Renting or Leasing Is the Smarter Move
Imagine you win a three-month site-prep contract that needs a 3-ton excavator, and then nothing on the calendar requires one for the rest of the year. Buying a machine for 60 days of work means absorbing depreciation, insurance, storage, and maintenance costs during the other 300 days it sits idle. In that scenario, renting at $200 to $400 per day or $2,000 to $5,000 per month keeps your capital free and your risk at zero -- you return the machine when the job ends, and the rental company handles everything else.
Renting also wins when you're testing a size class before committing. If you've been searching for a Chinese mini excavator for sale near me or evaluating whether a 2-ton unit can handle what you've been renting 4-ton machines for, a short-term rental lets you answer that question with real jobsite data instead of spec-sheet guesswork. The same logic applies to specialty equipment like a narrow scissor lift rental for a one-off interior project -- owning makes no sense when the need is temporary.
Leasing occupies the middle ground that many buyers overlook entirely. A typical equipment lease runs 24 to 60 months with fixed monthly payments, often including maintenance. As financial consultant Garry Bartecki of GB Financial Services advises, if you're consistently renting the same size machine for four to five months a year, a lease or rent-to-own agreement frequently costs less per month than repeated rentals while avoiding the full capital commitment of a purchase. Lease payments are fully deductible as operating expenses, and you sidestep depreciation risk entirely -- at lease end, you either return the machine or exercise a buyout option.
The trade-off? You build no equity during the lease term, early termination triggers penalties, and some agreements cap annual usage hours. For contractors with 100 to 150 projected annual use days and moderate capital reserves, leasing often hits the sweet spot between renting's flexibility and ownership's long-term economics.
Transport and Logistics as a Hidden Cost Factor
A listing 400 miles away priced $3,000 below local comparables looks like a deal -- until you calculate the cost of getting it home. Transport is the hidden variable that distorts every price comparison between distant and local machines, and it scales directly with weight.
Machines under roughly 4,000 pounds -- most sub-2-ton micro and mini excavators -- can typically ride on a standard dual-axle utility trailer towed by a half-ton pickup. That keeps transport costs limited to fuel and your own time. Step up to the 2-to-4-ton class (7,000 to 10,000 lbs operating weight), and you'll need a heavier commercial-grade trailer and a three-quarter-ton or one-ton tow vehicle. Cross into the 4-to-6-ton bracket above 10,000 pounds, and the equation changes again: many states require a CDL for combined vehicle-and-trailer weights exceeding 26,000 pounds, and hiring a professional hauler can run several hundred dollars for a regional move or over $1,000 for a cross-country trip.
Factor transport into your landed cost, not just your purchase price. A locally available machine priced $2,000 higher than a distant alternative may actually be cheaper once you add hauling fees, fuel, tolls, and the day of labor it takes to pick it up. The same calculation applies to anyone evaluating a PC900-class unit or any larger machine where oversize-load permits and escort vehicles push transport costs even higher.
The decision matrix below pulls every acquisition method into a single view so you can match your situation to the option that fits best:
| Acquisition Method | Upfront Cost | Ongoing Cost | Best For | Key Risk |
|---|---|---|---|---|
| Buy used | Moderate ($15,000 - $60,000+ depending on size and condition) | Maintenance, insurance, storage, and eventual resale effort | Contractors with 120+ use days per year and a multi-year project backlog | Unexpected major repairs; depreciation on resale if market softens |
| Buy new | High ($40,000 - $120,000+ for mini/compact class) | Lower maintenance initially; full warranty coverage; same insurance and storage as used | Buyers who need the latest emissions compliance, technology, and full manufacturer support | Steepest first-year depreciation (20% - 30%); highest capital outlay |
| Lease (24 - 60 months) | Low (first and last month payment; possible security deposit) | Fixed monthly payment; maintenance may be included; no depreciation risk | Operators with 100 - 150 use days per year who want predictable costs without ownership burden | No equity built; early termination penalties; possible hour-usage caps |
| Rent (daily / weekly / monthly) | None beyond the first billing cycle | Rental rate only -- maintenance, insurance, and compliance handled by the rental company | One-off projects, seasonal work, size-class testing, or utilization below 100 days per year | Cumulative cost exceeds purchase price on long-term use; no asset to sell at the end |
No single row in that table is universally correct. A landscaper with steady residential work twelve months a year lands firmly in the "buy used" column. A general contractor who touches excavation on only a handful of projects per year belongs in the rental row. And a growing operation that hasn't yet locked in consistent utilization should seriously consider leasing as a bridge -- testing the commitment without the full financial exposure of ownership.
The financial framework matters, but timing matters almost as much. When you buy -- not just what you buy or how you acquire it -- can shift the final price by thousands of dollars in either direction, especially in a market where seasonal demand swings and year-end inventory pressure create predictable windows of opportunity.
Timing Your Purchase and Taking the Right Next Steps
Every dollar of homework you've done -- sizing the machine, verifying specs, benchmarking prices, choosing a channel, and running the inspection checklist -- can be undermined by one avoidable mistake: buying at the wrong time. The used equipment market isn't static. It breathes with the seasons, reacts to economic uncertainty, and punishes impulsive buyers who shop only when a project deadline forces their hand. A little patience and a watchful eye on market rhythms can shave thousands off your final purchase price without compromising machine quality.
Seasonal Patterns and the Best Time to Buy
Construction activity in temperate climates follows a predictable annual arc -- and used mini excavator pricing follows it like a shadow. Spring brings a surge of new residential and commercial projects, which spikes demand for compact excavators and tightens the available supply. Sellers know this, and asking prices firm up accordingly. If you're shopping in March or April because a landscaping season just started, you're competing against every other contractor who waited until the last minute.
Late autumn and winter flip the equation. As jobsites wind down for the season, contractors and rental fleets look to offload surplus equipment before year-end balance sheets close. Auction houses see higher consignment volumes during this window, and per-unit competition among bidders drops because fewer buyers are actively looking. Dealers and industry observers consistently note that prices often drop in the fall and winter as seasonal work wraps up, then rise again in late winter and spring when new projects ramp up. If you can plan your acquisition before peak demand hits, you'll likely find better pricing and a wider range of machines to choose from.
Broader economic forces matter too. Sandhills Global market data shows that used medium-duty construction equipment -- the category that includes mini excavators -- saw asking values trending sideways to slightly down in recent months, with mini excavator asking values specifically dipping about 1% month over month. Inventory for used medium-duty equipment dropped over 11% year over year, which means the selection is tighter even as prices soften. Economic uncertainty has extended sales cycles, with dealers reporting more cautious buyers and longer negotiation timelines. For a patient shopper, that caution creates leverage: sellers sitting on inventory for weeks are more motivated to deal than sellers fielding multiple offers.
Even the rough terrain scissor lift hire market and adjacent equipment segments reflect the same cyclical patterns -- when construction activity cools, values across the board tend to ease. The takeaway is simple: monitor listings consistently rather than searching only when a project creates urgency. Set alerts on auction platforms and marketplace aggregators for your target model, size class, and hour range, and let the deals come to you over weeks instead of scrambling to find something acceptable in days.
Building a Shortlist and Requesting Quotes
You've spent the previous eight sections building a decision framework. Applying it takes discipline, but the process itself is straightforward. Think of your search as a funnel: start wide across multiple channels, narrow based on specs and condition, and close only when a machine passes every filter you've established.
Search auction platforms like Ritchie Bros. and IronPlanet for real-time and upcoming lots. Scan dealer marketplaces like MachineryTrader and Equipment Trader for retail-priced inventory where negotiation is possible. And if you're an equipment dealer sourcing resale stock, a contractor purchasing multiple units, or an import buyer comparing machines from various global brands, include direct-purchase aggregators in your search. JIUHONG's excavator collection, for example, brings together compact and larger machines from multiple manufacturers in a single inventory -- useful for comparing options and requesting model-specific quotes across individual or bulk purchase scenarios. Keep in mind that this is a broad excavator collection rather than a mini-excavator-only category, and that equipment exported from China encompasses machines from various global and domestic brands, so filter by the size class and specifications you identified earlier in this guide.
For each promising listing, request the machine-specific spec sheet tied to its serial number, the most recent service records, and -- if buying remotely -- a live video walkthrough or third-party inspection report. Compare base-machine values separately from attachment values, and normalize every price to a landed cost that includes transport, buyer premiums, or import duties as applicable. Whether you're evaluating a Takeuchi TL10 compact loader, a 3-ton Kubota, or a 5-ton Cat, the comparison logic is identical: same specs, same condition tier, same delivered cost.
Here's your full buyer journey distilled into a numbered action list:
- Define your size class based on the jobs you'll actually perform -- not the biggest machine your budget allows.
- Identify the critical specs for your work: dig depth, dump height, tail-swing configuration, breakout force, and auxiliary hydraulic flow for planned attachments.
- Set a realistic budget range by pulling completed auction results and cross-referencing dealer listings for your target model-year and hour bracket.
- Search across all three channels simultaneously -- auctions, dealer marketplaces, and direct-purchase aggregators -- to maximize selection and benchmark prices against each other.
- Request serial-number-specific spec sheets and service records for every machine on your shortlist.
- Perform or commission a pre-purchase inspection using the walk-around checklist from this guide, paying particular attention to undercarriage wear, hydraulic drift, and structural cracks.
- Cross-reference the hour-meter reading against service records, telematics history, and physical wear indicators before trusting the displayed hours.
- Calculate total landed cost -- purchase price plus buyer premiums, transport, import duties, and any needed attachments -- and compare machines on that number, not the listing price alone.
- Negotiate with confidence, using your auction comparables and multi-channel pricing data as leverage.
- Time your purchase for late autumn or winter when possible, avoiding the spring demand spike that inflates prices across the used market.
Thorough research and patient timing consistently outperform rushing into the first listing that appears. The best used mini excavator purchase isn't the cheapest one you can find today -- it's the right machine, at a fair price, bought when the market favors the buyer instead of the seller.
Frequently Asked Questions About Buying a Used Mini Excavator
1. How many hours is too many on a used mini excavator?
There is no single cutoff, but machines under 2,000 hours typically command a significant premium because most major components still have substantial life remaining. Units above 4,000 hours are not automatically bad -- the key is whether documented service records support the hour-meter reading. Cross-reference the displayed hours with physical wear indicators like pedal condition, seat wear, and joystick smoothness. A well-maintained 3,500-hour Kubota or Bobcat with full records can be a better buy than a 1,200-hour machine with no maintenance history.
2. What is the most reliable mini excavator brand on the used market?
Kubota and Bobcat consistently lead in resale value retention and parts availability across North America, largely because both dominate rental fleets and dealer networks. Caterpillar performs strongly in the 5,000-to-8,000-pound range, while John Deere and Takeuchi also hold value well. Brand reliability on a used unit depends heavily on how the previous owner maintained it, so always prioritize service records and inspection results over the badge on the boom.
3. What should I check before buying a used mini excavator?
Start with the undercarriage -- tracks, sprockets, rollers, and idlers -- since this system accounts for 15% to 25% of total lifetime machine expenses. Then inspect all hydraulic cylinders for leaks and perform a loaded drift test by raising the boom, shutting off the engine, and timing any downward creep. Request a cold engine start to observe exhaust smoke and cranking behavior. Check the swing bearing for grinding or play, and inspect boom and dipper arm welds for cracks. Always verify the hour meter against service records, as meters can be reset or replaced.
4. Is it cheaper to buy a used mini excavator or rent one?
The answer depends on your annual utilization rate. If you will use the machine more than roughly 120 days per year, buying used generally costs less over time than cumulative rental fees. Below that threshold -- especially for one-off projects or seasonal work under 100 days annually -- renting avoids depreciation, storage, insurance, and maintenance costs. Leasing offers a middle ground for operators in the 100-to-150-day range who want predictable monthly payments without full ownership commitment.
5. Where is the best place to buy a used mini excavator?
Each channel serves different buyers. Auction platforms like Ritchie Bros. offer transparent market-driven pricing and massive selection but charge buyer premiums of 5% to 15% and sell everything as-is. Dealer marketplaces like MachineryTrader allow negotiation and may include limited warranties, though markup is built into asking prices. For equipment dealers, bulk buyers, and import purchasers comparing multiple brands, direct-purchase aggregators such as JIUHONG's excavator collection at jiuhong-machinery.com consolidate inventory from various global manufacturers in one place. Searching across all three channels simultaneously gives you the broadest selection and strongest pricing leverage.