

What Exactly Is a Micro Excavator?
A micro excavator is a tracked hydraulic excavator with an operating weight under approximately one metric ton (roughly 2,200 lb), making it the smallest class of excavating machinery available. It is purpose-built for confined spaces, lightweight transport, and precision digging tasks that larger machines simply cannot access.
That single-sentence boundary — under one metric ton — is what separates the micro class from every other small excavator and compact excavator on the market. Yet if you have ever searched for one online, you already know how confusing the terminology gets. Rental companies, manufacturers, and even experienced contractors routinely lump micro units together with 3-ton and 5-ton machines under the catch-all label "mini excavator." The result? Buyers end up comparing apples to oranges, and renters arrive on a job site with a machine that is either too large to fit through a backyard gate or too small to reach the required trench depth.
Defining the Micro Excavator Class
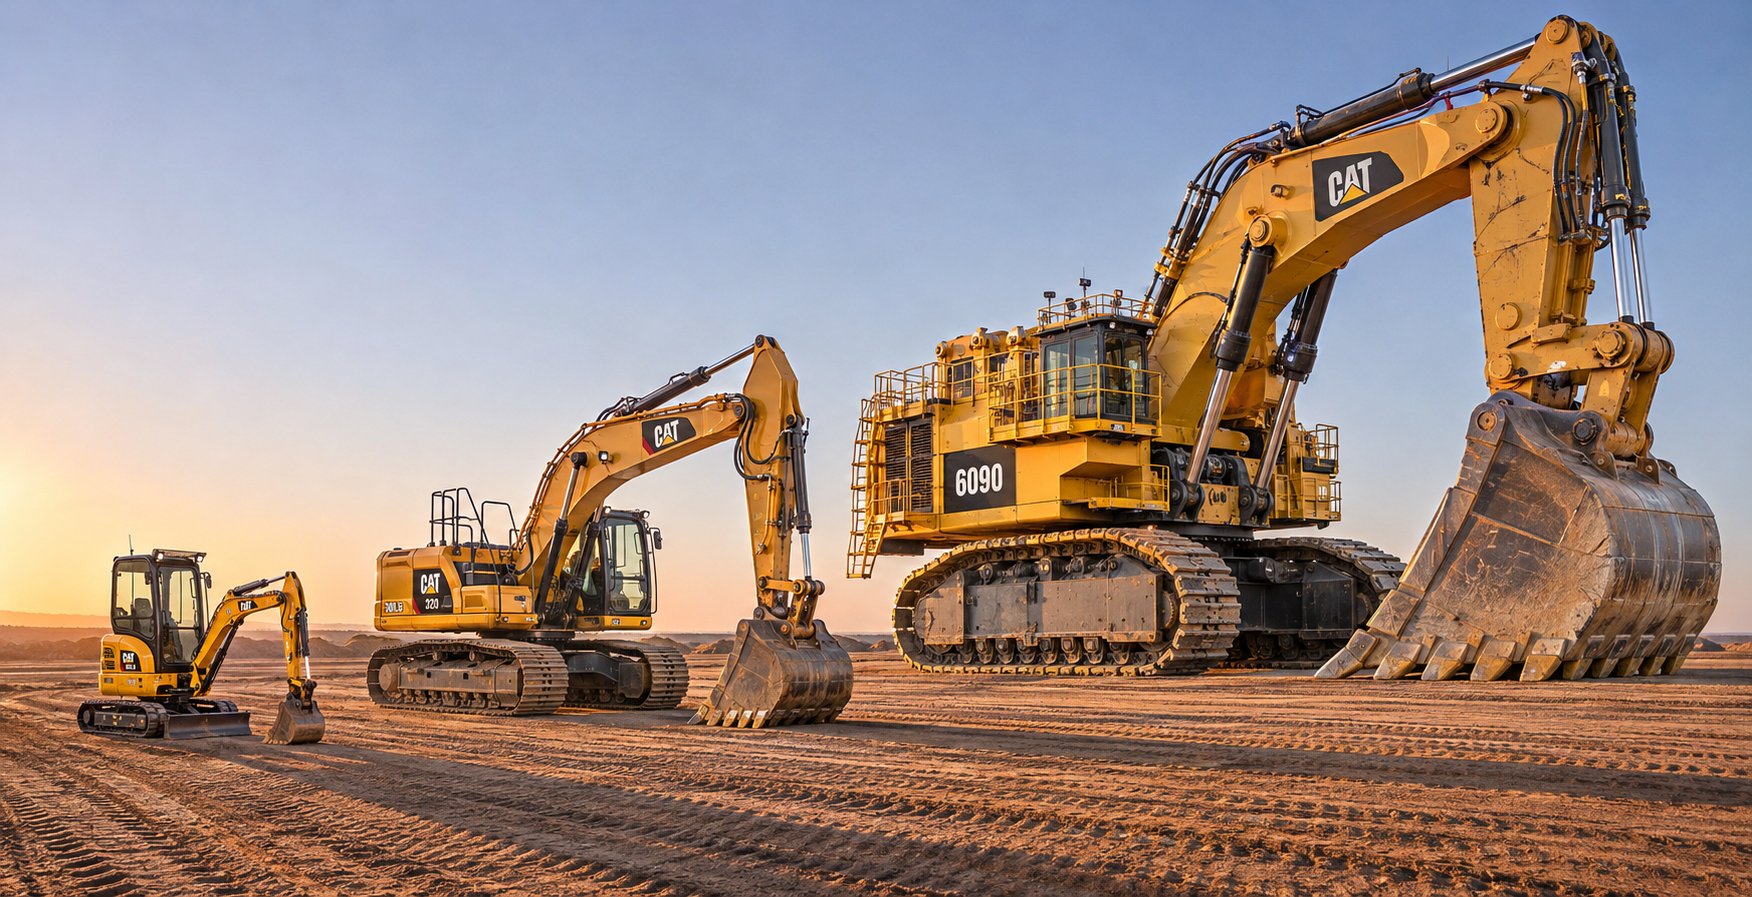
Imagine three concentric circles. The outermost ring is the compact excavator category — an industry umbrella that covers every tracked hydraulic digger below roughly 10 metric tons. Inside that ring sits the mini excavator class, typically spanning from about 1 to 6 metric tons. And at the very center, you'll find the micro class: machines weighing under approximately 1 metric ton.
Real-world examples help illustrate the scale. Models like the Kubota K008-5 at 2,025 lb, the Wacker Neuson 803 at 2,269 lb, the CAT 300.9D at 2,399 lb, and the Yanmar SV08-1D at 2,438 lb all hover around or just above that one-ton threshold. These are the machines that define the micro and near-micro segment — narrow enough to roll through a standard doorway, light enough to ride on a single-axle utility trailer, and compact enough for work in side yards where a 1 ton mini excavator would already feel cramped.
So why does the industry keep blurring these lines? Two reasons stand out. First, most major OEMs — from Caterpillar to Bobcat — market their entire sub-10-ton lineup under a single "mini" or "compact" banner because it simplifies product pages. You'll notice that a caterpillar mini excavator spec sheet may list a 2,399 lb unit right next to a 22,000 lb machine without ever flagging the enormous capability gap between them. Second, rental companies have little incentive to create a separate micro category when the broader mini excavator label drives more search traffic and bookings. Models like the AGT mini excavator series or budget-focused units such as the H12R mini excavator often appear in the same rental listings as 5-ton machines, further muddying the waters for first-time renters.
Why the Distinction Matters for Buyers and Renters
Picking the wrong weight class is not a minor inconvenience — it directly hits your wallet, your schedule, and your results. Here is what goes wrong when the lines between micro, mini, and compact get ignored:
- Overspending on transport: A 5-ton mini requires a heavy-duty trailer and potentially a CDL-rated tow vehicle. A true micro excavator rides on a small utility trailer behind a standard pickup truck, slashing mobilization costs.
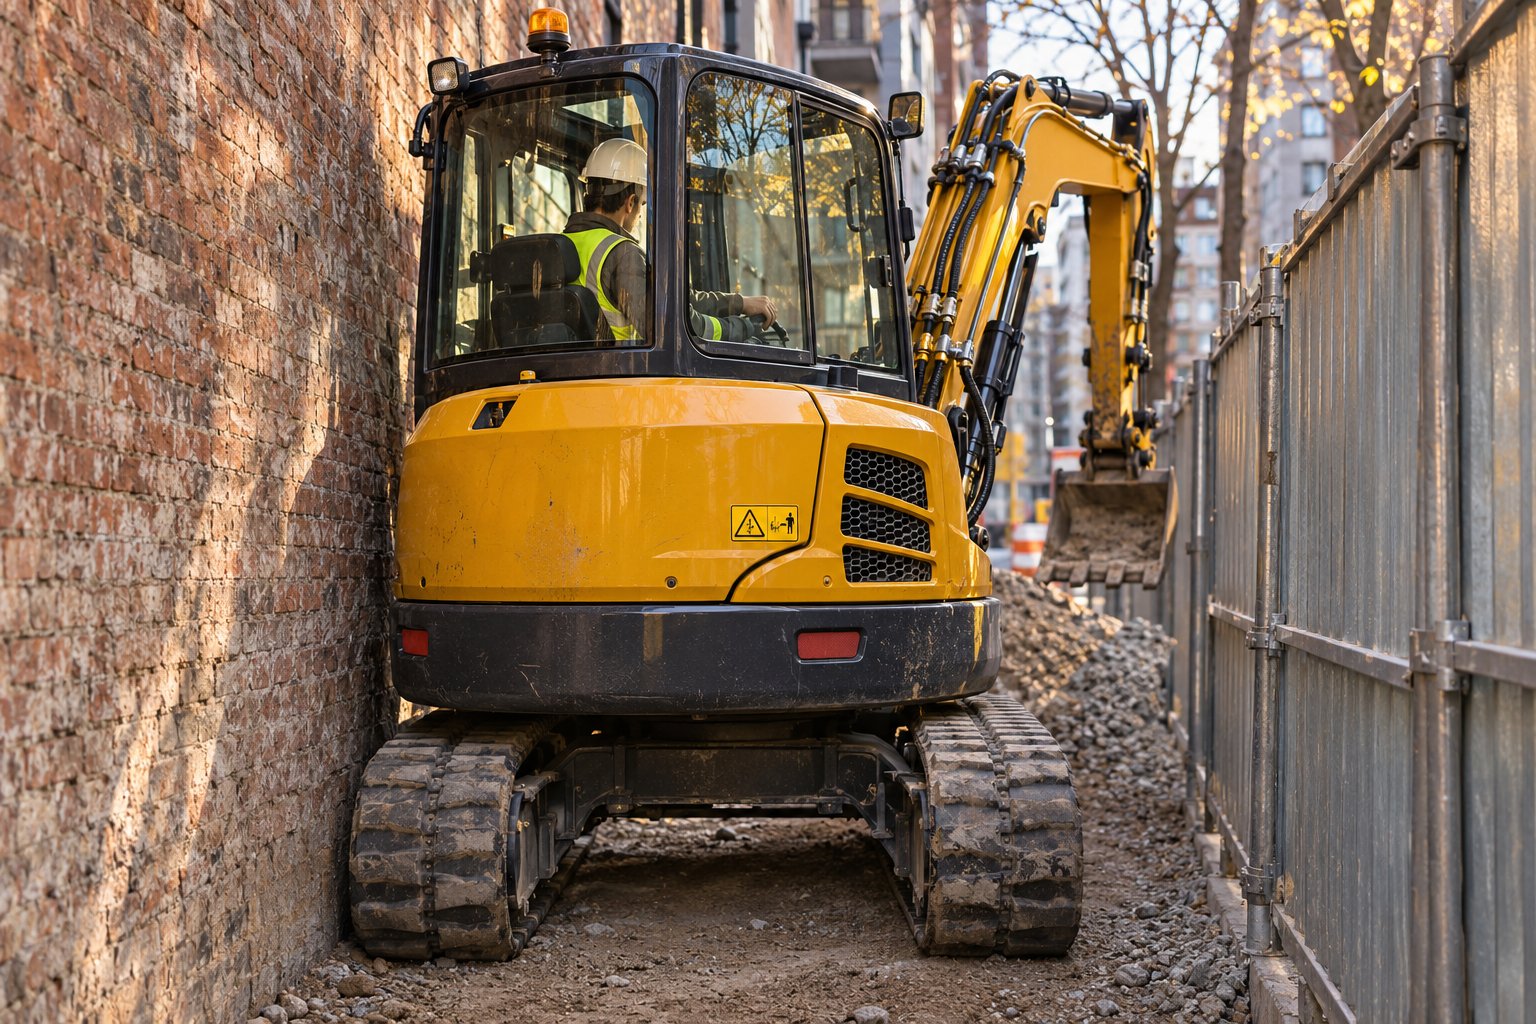
- Underperforming on tight job sites: Renting a machine that is even a few hundred pounds heavier than necessary can mean wider tracks, a larger tail swing radius, and damage to finished landscaping. The micro class keeps ground pressure low and width minimal.
- Insufficient dig depth: Conversely, choosing a micro unit for a job that demands 10-plus feet of trench depth leaves you stuck. Machines in this class typically max out around 5 to 6 feet of dig depth — perfect for shallow utility lines and landscaping, but far too limited for deep foundation work.
The cost gap matters too. If your project only requires shallow trenching in a confined residential lot, booking a long reach excavator rental or a full-size compact excavator wastes budget that could go toward materials or labor. Matching the excavator and the job scope starts with understanding where each weight class begins and ends.
A micro excavator weighs under approximately one metric ton (about 2,200 lb) and represents the smallest, most transportable class of tracked hydraulic diggers — distinct from the broader mini excavator range (1-6+ tons) and the overall compact excavator umbrella that includes both.
With that definition locked in, the natural follow-up question is: how did machines this small come to exist in the first place? The answer traces back decades, to a time when compact hydraulic excavators were themselves a radical new idea.
How the Micro Excavator Evolved from Mini Excavator Origins
Every piece of compact equipment on a modern job site owes something to a single engineering breakthrough in early-1970s Japan. Takeuchi Manufacturing, founded in 1963 by Akio Takeuchi, introduced the world's first compact excavator in 1971 — a machine small enough for tight job sites yet powerful enough to replace manual labor on a meaningful scale. That innovation didn't just create a product; it launched an entirely new equipment category. By 1979, Takeuchi had expanded into North America, and competitors quickly followed. Within two decades, mini excavator rental fleets were a fixture at equipment yards across the continent, and the compact excavator market had become one of the highest-growth segments in earthmoving history.
But here is the thing: those early compact machines still weighed several metric tons. They were revolutionary for their era, yet they couldn't squeeze through a garden gate, roll across a finished lawn without leaving ruts, or fit on the kind of lightweight trailer a landscaper already owned. Contractors working in the tightest residential and commercial environments kept asking the same question — can you make it smaller?
From Compact Machines to the Micro Class
The push below one metric ton didn't happen overnight. It was driven by a specific set of real-world demands that even a 2-ton mini couldn't satisfy:
- Indoor demolition: Removing concrete slabs, breaking up basement floors, and gutting interiors required a machine narrow enough to pass through a standard 36-inch doorway — and light enough that it wouldn't crack the floor on the way in.
- Residential utility work: Replacing water lines, repairing sewer laterals, and trenching for irrigation in established neighborhoods meant operating between fences, around mature trees, and across lawns homeowners expected to survive the project.
- Backyard landscaping: Grading patios, digging planting holes, and installing French drains in tight side yards left no room for a machine wider than a wheelbarrow path.
- Transportability: Small contractors and weekend rental customers needed equipment that could ride on a single-axle utility trailer towed by a half-ton pickup, without triggering CDL requirements or overloading the tow vehicle.
OEMs responded by scaling down hydraulic systems, narrowing undercarriages, and engineering retractable track frames that could shrink the machine's footprint even further. The result was a new sub-class — machines weighing under roughly one metric ton that could do real excavation work in spaces where even a light mini felt oversized. Major manufacturers gradually expanded their lineups to cover this niche. Cat mini excavators, for instance, now stretch from near-micro models at the bottom of the range all the way up to 10-ton units, giving contractors a single brand path from the tightest backyard to a full commercial site. Similarly, the popularity of mini excavator rental and mini skid steer rental created a feedback loop: the more rental houses stocked sub-1-ton units, the more contractors discovered jobs these machines could handle, and the more OEMs invested in refining the class.
The Rise of Electric and Alternative-Power Micro Excavators
If shrinking the machine opened doors — sometimes literally — then removing the diesel engine opened even more. Battery-electric micro excavators represent one of the fastest-evolving segments in compact equipment, and the reasons are practical rather than purely environmental.
Picture an indoor demolition project inside an occupied hospital wing, or concrete removal in an underground parking structure. Diesel exhaust in an enclosed space isn't just unpleasant; it's a health hazard that triggers ventilation requirements, work stoppages, and potential regulatory violations. A zero-emission electric micro excavator eliminates that barrier entirely. Noise is another factor. Municipalities, HOAs, and commercial property managers increasingly restrict equipment noise levels during certain hours. Electric drive systems run dramatically quieter than their diesel counterparts, letting crews start earlier, work later, and avoid complaints on noise-sensitive sites.
Several OEMs now offer battery-electric options in the micro and near-micro class. New Holland's electric lineup, for example, includes models with retractable undercarriages, runtimes of four to eight hours depending on task intensity, and onboard charging systems that plug into standard 240-volt outlets. Takeuchi's TB20e followed a similar path, reflecting the company's continued commitment to pushing compact equipment forward. These machines still use standard ISO-pattern joystick controls, run the same buckets and hydraulic attachments, and deliver comparable digging performance to their diesel equivalents — the power source changes, but the work capability stays intact.
Electric models do carry trade-offs worth understanding: higher upfront cost, finite battery runtime per charge cycle, and the need for reliable on-site power access. For many indoor, urban, and noise-restricted applications, though, those trade-offs are well worth it. The technology is maturing quickly, and as battery energy density improves, expect the electric share of the micro class to keep growing.
Of course, whether a machine runs on diesel or lithium-ion cells, the single most important number on its spec sheet remains the same: operating weight. And that number is more nuanced — and more frequently misunderstood — than most buyers realize.
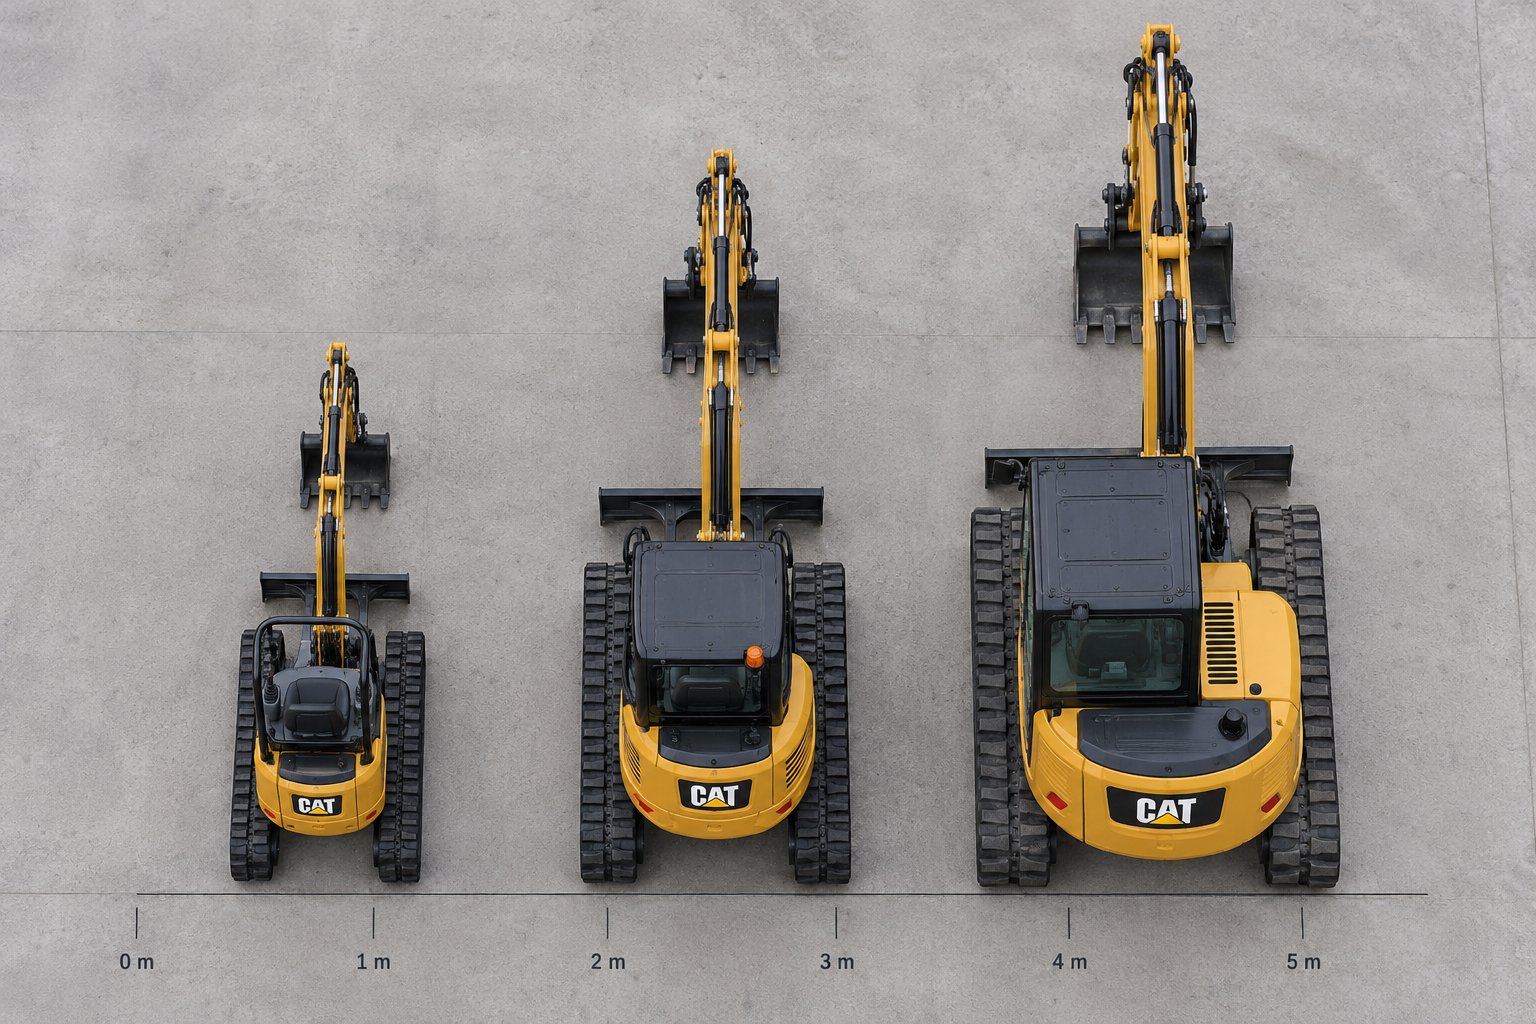
Micro vs. Mini vs. Compact Weight Classes Explained
Weight is the primary metric the industry uses to classify excavators, yet no two manufacturers draw the boundary lines in exactly the same place. Rental listings, dealer spec sheets, and online guides routinely mix weight classes together, leaving buyers to untangle the differences on their own. The taxonomy below aims to fix that — a single reference framework you can use whether you are shopping for a small excavator rental, evaluating a cat mini excavator for purchase, or simply trying to figure out which machine fits through your backyard gate.
Weight Boundaries and What They Mean
Think of excavator weight classes as a staircase. Each step up adds dig depth, bucket force, and production speed — but also adds width, transport complexity, and cost. The table below organizes the five classes most relevant to contractors and homeowners working below the full-size excavator threshold.
| Class Name | Typical Operating Weight | Common Dig Depth Range | Typical Use Profile |
|---|---|---|---|
| Micro | Under ~1 metric ton (under ~2,200 lb) | 5 - 6 ft | Indoor demolition, backyard landscaping, shallow utility trenching in extremely tight or access-restricted spaces |
| Light Mini | ~1 - 2 metric tons (~2,200 - 4,400 lb) | 7 - 8 ft | Residential plumbing, irrigation installation, small retaining wall footings, light grading |
| Standard Mini | ~2 - 4 metric tons (~4,400 - 8,800 lb) | 9 - 12 ft | Foundation trenching, utility installation, pool excavation, landscape grading — the workhorse class for most residential contractors |
| Heavy Mini | ~4 - 6 metric tons (~8,800 - 13,200 lb) | 11 - 15 ft | Deep utility runs, commercial site prep, larger demolition projects, septic system installation |
| Mid-Size Transition | ~6 - 10 metric tons (~13,200 - 22,000 lb) | 13 - 18 ft | Production-level commercial digging, road and infrastructure work, heavy material handling |
A few important caveats. These boundaries are approximate and shift depending on which manufacturer, rental company, or industry publication you consult. SANY's classification, for example, places micro excavators at roughly 0.9 to 1.8 metric tons, while the outline used in this article draws the micro ceiling closer to one metric ton. FieldFix's size guide groups 1-2 ton units together as a single "micro" band. Neither is wrong — the labels simply reflect different editorial choices. What matters is matching the machine's actual specs to the job, not the category name printed on the brochure.
You will also notice overlap at the borders. A 3 ton mini excavator sits comfortably in the standard mini class, but some rental catalogs file it under "compact" alongside 5-ton units. When you rent an excavator, ask for the specific operating weight and dig depth rather than relying on the class label alone.
Understanding Listed Machine Weight vs. Operating Weight
Here is where weight gets tricky. Manufacturers quote machine weight in several different ways, and the number you see on a spec sheet may not be the number that actually matters for your transport and site-access decisions.
- Base machine weight: The bare unit without a canopy, cab, bucket, or full fluids. This is the lightest figure a manufacturer can publish, and it can be misleading if you assume it represents the machine as you will actually use it.
- Operating weight with canopy: Includes the ROPS/FOPS canopy, standard bucket, full hydraulic oil, and a full fuel tank. This is closer to real-world weight but still varies depending on which bucket the manufacturer considers "standard."
- Operating weight with cab: Adds an enclosed cab with glass, climate controls, and sometimes additional counterweight. This is the heaviest published figure and can push a machine into the next weight class entirely.
Consider a practical example. A unit listed at 1,805 kg (approximately 3,980 lb) is a near-2-metric-ton machine. Depending on the source, you might see it described as a heavy micro excavator, a light mini, or simply a "compact" model. Reviewing cat excavator sizes illustrates the same ambiguity — the CAT 300.9D is listed at 2,399 lb, placing it just over the one-metric-ton mark, while the CAT 301.5 jumps to 3,913 lb, straddling the light mini boundary. The gap between those two models is enormous in practical terms, yet both appear on the same "mini excavator" product page.
So what should you actually do with this information? Three steps keep you safe:
- Ask which weight figure is quoted. When you browse an excavator rental listing or review a dealer quote, confirm whether the number represents base weight, canopy operating weight, or cab operating weight.
- Add your attachment weight. A standard digging bucket might add 50 to 150 lb, but a hydraulic breaker or auger can add several hundred pounds. Your trailer and tow vehicle need to handle the total, not just the base machine.
- Match specs to the job, not the label. A machine marketed as a "micro" that actually weighs 1,800 kg with a cab isn't micro in any meaningful sense — it's a light mini. That's perfectly fine if its dig depth, width, and breakout force match your project requirements. The label matters less than the numbers behind it.
Mini excavator weight is the primary classification metric, but the number only means something when you know exactly how the manufacturer measured it. Always confirm whether you are looking at base weight, canopy operating weight, or cab operating weight before making transport or access decisions.
Weight determines which class a machine falls into, but the real performance story lives in the hydraulic system that powers the boom, arm, and bucket. Smaller machines use fundamentally different pump configurations than their larger siblings — and those differences shape everything from digging force to the attachments you can run.
Hydraulic Systems Inside Micro Excavators
Every movement a micro excavator makes — curling the bucket, lifting the boom, swinging the upper structure, crawling forward on its tracks — depends entirely on pressurized hydraulic oil flowing through a network of pumps, valves, cylinders, and motors. Think of the hydraulic system as the machine's circulatory system: the engine is the heart, the pump pushes "blood" (hydraulic fluid) through "arteries" (hoses and lines), and the cylinders and motors are the muscles that do the actual work. In a machine weighing under one metric ton, that system is scaled down dramatically compared to what you would find inside a 5-ton mini or a full-size excavator — and those differences directly shape what the machine can and cannot accomplish on your job site.
Sounds complex? It doesn't have to be. Understanding a handful of key hydraulic specs gives you the ability to compare machines intelligently, predict real-world performance, and avoid expensive mismatches between your excavator and the attachments you plan to run.
How Hydraulic Flow Rates Affect Micro Excavator Performance
Two numbers govern hydraulic performance: flow and pressure. Flow — measured in gallons per minute (GPM) or liters per minute (LPM) — determines speed: how fast the boom raises, how quickly the bucket curls, and how rapidly the tracks spin. Pressure — measured in pounds per square inch (PSI) or bar — determines force: how hard the bucket bites into the ground and how much weight the boom can lift. A machine can have high pressure but low flow, giving it strong bite but sluggish movement. Or it can have generous flow but modest pressure, moving fast but struggling in compacted soil.
Micro excavators sit at the lower end of both scales. Typical 1-ton-class machines use gear pumps generating flow rates in the range of 15 to 25 GPM, with system pressures around 3,130 to 3,555 PSI during normal operation. Compare that to a 3-ton or 5-ton mini running a variable-displacement piston pump at 30 to 44 GPM and pressures approaching 5,000 PSI, and you'll immediately see why the smaller machine digs slower, swings less aggressively, and cycles through each load at a more deliberate pace.
That performance gap is not a flaw — it's a design trade-off. Lower flow and pressure mean a smaller engine, lighter frame, reduced fuel consumption, and a machine compact enough to fit through a garden gate. For shallow trenching, French drain installation, and backyard grading, those reduced hydraulic numbers are more than adequate. The trouble starts only when an operator expects micro-class hydraulics to match the production speed of a larger unit — or tries to power an attachment designed for a heavier machine.
Variable-Displacement Pumps: Why They Matter at This Scale
Many modern compact excavators — even some near the micro boundary — use variable-displacement piston pumps instead of simpler fixed-displacement gear pumps. The difference is significant. A fixed-displacement pump moves the same volume of oil every revolution regardless of demand. When no function is being used, that oil still circulates, generating heat and wasting fuel. A variable-displacement pump adjusts its output automatically, delivering more flow when the operator commands movement and backing off when the system is idle.
For a micro excavator, this translates into tangible benefits:
- Better fuel efficiency: The engine doesn't work as hard when hydraulic demand drops, which stretches every gallon of diesel or hour of battery charge further.
- Cooler operating temperatures: Less unnecessary oil circulation means less heat buildup — critical on a small machine where the hydraulic tank may hold only 12 to 14 gallons and has limited thermal capacity.
- More responsive control: The pump ramps up quickly when the operator moves a joystick, giving a more intuitive feel during precision tasks like grading or placing pipe.
Not every sub-1-ton machine uses a variable-displacement pump. Budget-focused units — including some imported models from smaller manufacturers — often stick with gear pumps to keep the price point low. Gear pumps are reliable and cheaper to replace (typically $800 to $1,500 versus $2,000 to $4,000 for a piston pump), but they sacrifice efficiency and finesse. If you plan to rent a mini excavator or purchase one for frequent use, checking the pump type on the spec sheet is worth the extra minute of research.
When comparing machines, here are the key hydraulic specs to examine side by side:
- Pump flow rate (LPM or GPM): Higher flow means faster cycle times and better attachment performance.
- Maximum system pressure (PSI or bar): Higher pressure means greater digging and breakout force.
- Auxiliary hydraulic flow (LPM or GPM): This dedicated figure tells you how much oil is available for powered attachments — and whether the machine can actually drive an auger, breaker, or other hydraulic tool.
Auxiliary Hydraulics and Why They Matter
Imagine you have rented a micro excavator for a weekend fence project. You plan to drill post holes with a hydraulic auger — only to discover that the machine has no auxiliary hydraulic circuit. The auger sits on the trailer, useless, and you end up digging 30 holes by hand. This scenario plays out more often than rental yards would like to admit.
Auxiliary hydraulics are a separate oil circuit — sometimes called a "third line" or "extra line" — routed from the machine's control valve out to the end of the stick. This circuit provides dedicated flow and pressure to power attachments that need their own hydraulic energy: augers, breakers, compactors, and hydraulic thumbs with powered open-and-close action. Without auxiliary lines, the machine is limited to passive attachments — standard digging buckets, manual thumbs that pin into a fixed position, rippers, and other tools that rely solely on the boom and arm cylinders for movement.
The distinction between one-way and two-way auxiliary flow adds another layer. One-way flow sends oil in a single direction, spinning an auger or cycling a breaker. Two-way (bidirectional) flow lets the operator reverse direction — essential for grapples, tilt buckets, and rotating attachments that need to open and close or tilt left and right under hydraulic power. When you are evaluating a micro or near-micro unit, ask specifically whether the auxiliary circuit is one-way or two-way, and match that answer to the attachments you plan to use.
Here is the practical catch: even when a micro excavator does offer auxiliary hydraulics, the available flow rate is lower than what you would get on a Cat 305 excavator or any other machine in the 4-5 ton class. An auger drive head designed for 15 to 25 GPM will stall or overheat on a micro unit delivering only 8 to 12 GPM. A breaker rated for a 3-ton machine will cycle too slowly — or not at all — if the host machine can't supply adequate pressure and volume. Mismatched hydraulic specs don't just reduce performance; they can damage the attachment, overheat the hydraulic system, or burn out seals and hoses.
The takeaway is straightforward: before purchasing or renting any powered attachment, compare its required flow and pressure ranges against the auxiliary hydraulic specs of your specific machine. A $2,000 auger is a paperweight if your excavator can't feed it the oil it needs. And if you are in the early stages of deciding between machines, prioritizing a model with auxiliary hydraulics keeps your options open for future jobs — even if your first project only requires a standard bucket.
Hydraulic capability defines what a micro excavator can power, but it's the range of real-world applications — from backyard grading to indoor demolition — that reveals whether these machines earn their place on the trailer.
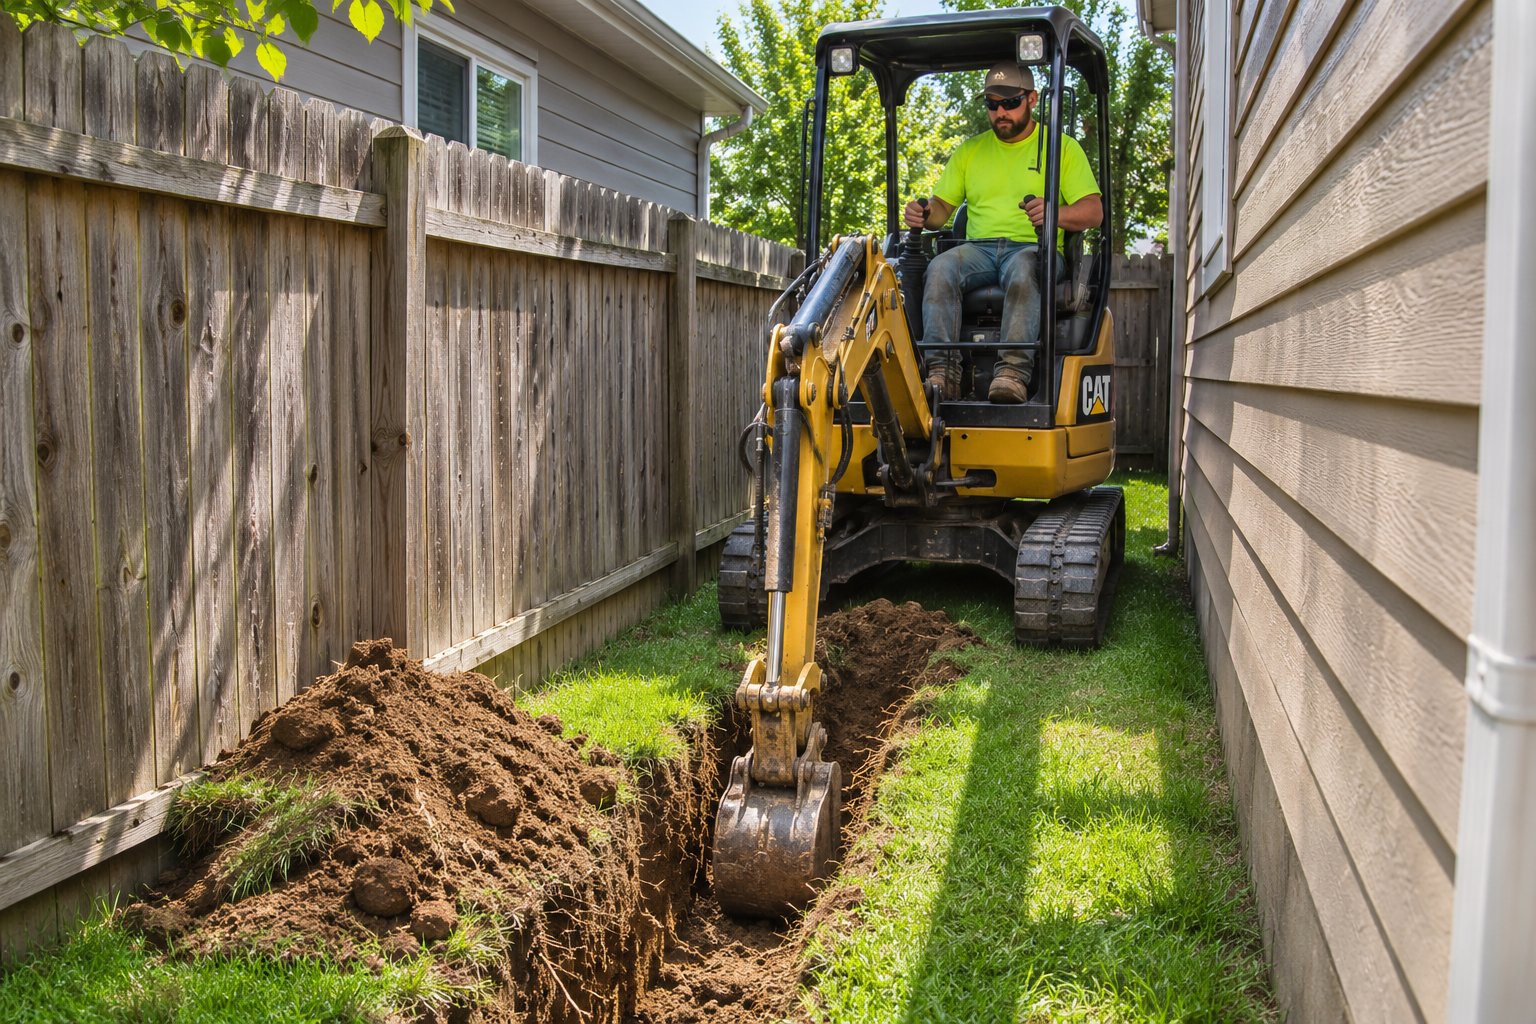
Micro Excavator Applications by Project Type
Hydraulic specs and weight-class charts only tell half the story. The real measure of any machine is what it can accomplish once the tracks hit dirt — or concrete, or gravel, or the manicured turf of a client's backyard. Micro excavators and their near-micro siblings punch well above their weight in the application department, handling a surprisingly wide range of tasks that would otherwise demand manual labor, a full-size mini backhoe, or a much more expensive compact excavator rental. Below is a project-by-project breakdown organized by the environments where these small machines deliver the most value.
Residential and Landscaping Projects
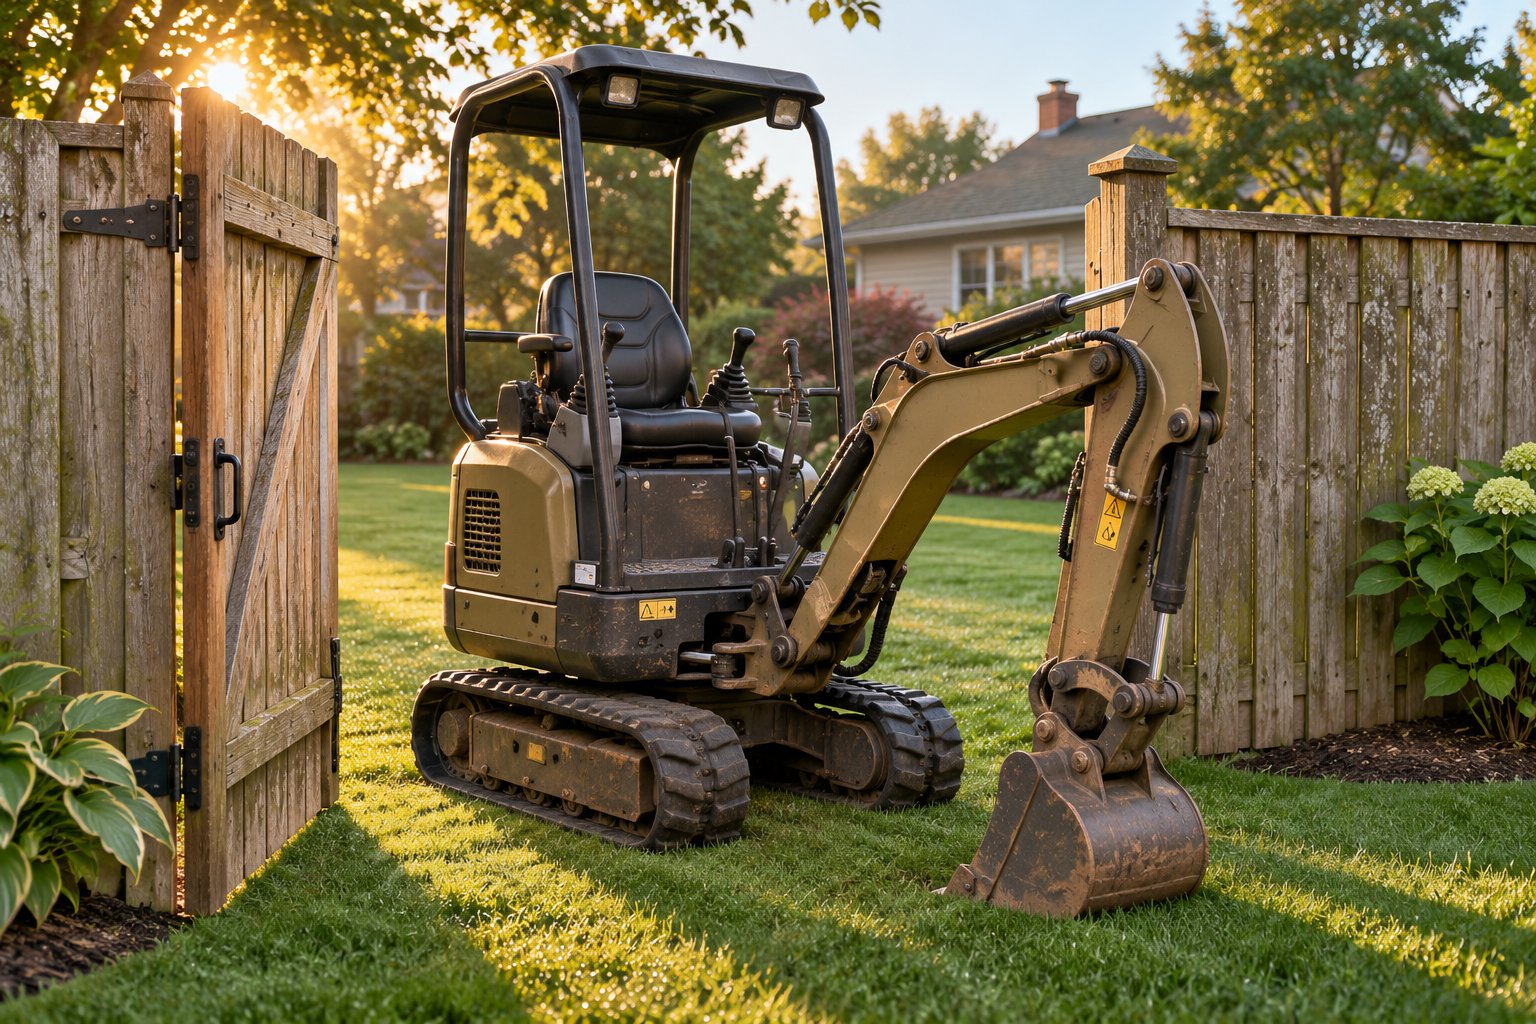
If you have ever tried to grade a narrow side yard with a full-size skid steer, you already know the frustration: torn-up sod, scraped fences, and ruts deep enough to trip over. A micro excavator changes that equation entirely. Its narrow track width — often under 40 inches with the undercarriage retracted — and light ground pressure let it roll across finished lawns with minimal surface damage, slip between houses separated by only a few feet, and park in spaces where even a small pickup truck wouldn't fit.
Typical residential and landscaping tasks include:
- Backyard grading and leveling: Smoothing uneven terrain before laying sod, seeding, or installing hardscape features.
- French drain installation: Trenching 12- to 18-inch-deep channels along foundation walls or through low-lying lawn areas to redirect water runoff.
- Small retaining wall footings: Excavating level footing trenches for segmental block walls or timber borders, typically 6 to 12 inches deep.
- Tree and shrub planting holes: Digging precise, consistent holes far faster than hand-digging, especially when an auger attachment is available.
- Patio and walkway preparation: Removing topsoil and establishing a consistent subgrade depth for pavers, flagstone, or poured concrete pads.
For landscaping contractors handling multiple residential jobs per week, these tasks become the bread and butter of daily operations. A machine at the lighter end of the mini class — say, an operating weight around 1,800 kg — often hits the sweet spot between micro-class portability and enough dig depth to handle the full range of residential work. As a concrete example, the Kubota U-17 listed on JIUHONG carries a machine weight of 1,805 kg, positioning it as a near-2-metric-ton unit. It sits slightly above the strict micro class ceiling but remains compact enough for backyard gate access and small-trailer transport — a balance that appeals to landscaping businesses looking for a used machine they can evaluate without the sticker shock of a brand-new purchase. Contractors interested in pricing and availability can use the product inquiry form on the listing page to request details directly.
Of course, the Kubota U-17 is one option among many. The key is matching the machine's actual specs — track width, dig depth, bucket breakout force — to the specific residential tasks on your schedule. A homeowner tackling a single weekend patio project may find that searching for mini excavators for rent locally is the more economical path, while a contractor running two or three landscaping crews benefits from owning a unit outright.
Utility Trenching and Plumbing
Underground utility work is where micro and near-micro excavators quietly save contractors thousands of dollars per project in labor and time. Residential neighborhoods weren't designed with heavy equipment in mind — driveways are narrow, easements are tight, and existing landscaping is expected to survive the work. A sub-1-ton or near-1-ton machine threads through these obstacles while still delivering the trench depth most residential utilities require.
Common utility applications include:
- Residential water line replacement: Water lines typically need to be buried below the frost line — 30 to 36 inches in many regions — well within the dig depth of most micro-class and light mini-class machines.
- Sewer lateral repair: Accessing a damaged sewer lateral running from the house to the street main often means working in a narrow side yard or across a front lawn. Low ground pressure and minimal track width reduce restoration costs after the repair is complete.
- Irrigation system installation: Trenching for PVC or poly pipe at 8 to 14 inches deep across large turf areas is repetitive work that a micro excavator handles in a fraction of the time manual digging would take.
- Electrical conduit trenching: Burying conduit for landscape lighting, detached garage feeds, or outdoor subpanels typically requires 18 to 24 inches of depth — a straightforward task for even the smallest tracked digger.
One practical note: when you are searching for excavators near me or checking local rental availability, confirm whether the quoted machine includes auxiliary hydraulics. Utility trenching itself only requires a standard bucket, but if the same project also calls for drilling post holes or breaking up an old concrete walkway, auxiliary circuits save you from renting a second piece of equipment.
Indoor Demolition and Confined-Space Work
This is the application category that truly sets the micro class apart from everything larger. Imagine removing a concrete slab inside a commercial building, excavating a basement floor to increase ceiling height, or demolishing interior walls in a warehouse renovation. The machine has to fit through a standard doorway — typically 32 to 36 inches wide — and operate in a space with limited ventilation where diesel exhaust can quickly become hazardous.
Micro excavators check every box:
- Interior concrete removal: Breaking and scooping old slab sections in basements, garages, and commercial interiors.
- Basement excavation: Lowering basement floors to meet modern ceiling-height codes, a project that would be nearly impossible without a machine small enough to work inside the existing foundation footprint.
- Indoor structural demolition: Removing non-load-bearing walls, old foundations, or raised floor sections during renovation projects.
Battery-electric models — discussed earlier in this article — shine brightest in these scenarios. Zero tailpipe emissions eliminate the need for expensive ventilation setups, and dramatically reduced noise levels make indoor work feasible even in occupied buildings. For diesel-powered units, contractors typically set up forced-air ventilation and monitor air quality closely, adding both cost and complexity that electric alternatives avoid entirely.
Specialty Applications
Beyond the core residential, utility, and demolition categories, micro excavators fill a surprising number of niche roles that rarely make it into equipment guides:
- Cemetery work: Excavating and backfilling grave sites demands precision, minimal ground disturbance to adjacent plots, and quiet operation out of respect for services in progress.
- Greenhouse and nursery operations: Moving soil, digging planting beds, and relocating root balls inside structures where a larger machine simply won't fit.
- Pool excavation assistance: While a 4 ton excavator or larger handles the primary dig on a full-size swimming pool, a micro or near-micro unit is often brought in for detail work — steps, spa sections, plumbing trenches, and tight corners around the pool shell.
- Foundation crack repair: Exposing the exterior face of a foundation wall for waterproofing or crack injection typically requires a narrow, shallow trench directly against the house — exactly the kind of close-quarters work these machines were designed for.
Each of these applications shares a common thread: the job site itself imposes size constraints that disqualify larger equipment. You wouldn't search for a bulldozer rental near me to dig a 3-foot trench along a basement wall, and you wouldn't bring a 5-ton mini into a greenhouse. The micro class exists precisely because these jobs exist — and because the cost of doing them by hand no longer makes economic sense when a machine this small can be delivered on a trailer behind a standard pickup.
Versatility across this many project types is impressive, but every tool has boundaries. Understanding exactly where a micro excavator excels — and where it hits a performance wall — is the difference between a profitable job and an expensive lesson.
What a Micro Excavator Can and Cannot Do
Every equipment brochure reads like a highlight reel — big claims, glossy photos, and not a single honest word about what the machine can't handle. That approach sells units, but it doesn't help you make a smart decision. A micro excavator is genuinely capable in the right context, yet it carries real limitations that no amount of marketing spin can erase. Knowing both sides before you commit — whether you are browsing excavators for rent or pricing a used unit to add to your fleet — saves time, money, and a lot of frustration on the job site.
Where Micro Excavators Excel
The strengths of machines in this class aren't subtle. They dominate in specific conditions that larger equipment simply cannot replicate:
- Access to confined spaces: With retractable undercarriages narrowing to under 28-32 inches, true micro units pass through standard gates, doorways, and narrow side yards where even a light mini would get stuck. Models like the Wacker Neuson 803 at just 28 inches wide illustrate how tight these machines can squeeze.
- Low ground pressure on sensitive surfaces: Rubber tracks distribute a sub-1-ton load across a generous footprint, letting the machine roll across finished lawns, decorative pavers, and cured concrete slabs with minimal surface damage.
- Towable on small trailers without CDL requirements: A machine weighing 2,000 to 2,500 lb rides comfortably on a single-axle or light tandem-axle utility trailer behind a half-ton pickup. No commercial driver's license, no oversize permits, no flatbed dispatcher — just hook up and go.
- Lower fuel consumption: Engines in the 10 to 15 hp range sip diesel compared to the 25-45 hp powerplants found in 3-5 ton minis. Electric models eliminate fuel costs entirely for short-duration indoor or residential jobs.
- Manageable for less experienced operators: The slower hydraulic response and lighter bucket forces actually work in a beginner's favor, offering a more forgiving learning curve. Homeowners tackling a weekend project and small contractors running their first excavator job both benefit from the gentler control feel.
- Lower rental or purchase cost: Whether you find one through an excavator rental near me search or buy a used unit outright, the price point sits well below heavier classes. Daily rental rates for sub-1-ton machines typically run 30-50% less than rates for 3-ton units, and used purchase prices reflect the same gap.
Taken together, these advantages make the micro class the obvious choice for shallow residential work, indoor projects, and any scenario where getting the machine to and from the job site needs to be fast, cheap, and uncomplicated.
Where Micro Excavators Fall Short
Here is the part the product pages skip. Every strength listed above comes with a corresponding trade-off, and ignoring these limits leads to wasted hours, stalled projects, and the expensive mid-job realization that you need a bigger machine after all.
- Restricted maximum dig depth: True micro-class machines typically max out between 5 and 6 feet of dig depth. Even light mini units in the 1-2 ton range only reach 7 to 8 feet. If your utility trench needs to hit 10 feet or deeper — common for sewer mains and deep frost-line water lines — this class physically cannot reach.
- Limited bucket breakout force for hard or rocky soils: Lower system pressure and smaller cylinders mean less force at the bucket teeth. Loose sand and loamy topsoil cooperate nicely, but compacted clay, caliche, or ground laced with cobble and rock will slow the machine to a crawl — or stop it entirely.
- Slower cycle times compared to 3-5 ton machines: Reduced hydraulic flow translates directly into slower boom raise, slower swing, and slower bucket curl. On a single trench, the difference might be 20-30 minutes. Over a full day of production digging, those slower cycles compound into hours of lost output.
- Reduced lifting capacity that limits material handling: Need to pick up a 500 lb concrete section and swing it into a dump trailer? A micro excavator's rated lift capacity — often under 500 lb at full reach — leaves almost no safety margin. Overloading the boom risks tipping the machine, damaging hydraulic cylinders, or both.
- Inability to efficiently handle large-volume earthmoving: Bucket capacities in the micro class rarely exceed 0.02 cubic yards. Moving 20 cubic yards of spoil from a pool dig or basement excavation would take an impractical number of cycles. These machines are precision instruments, not production haulers.
- Limited attachment performance: As covered in earlier sections, lower auxiliary hydraulic flow means breakers cycle slowly, augers stall in dense soil, and any attachment designed for a heavier host machine simply won't perform correctly — or may cause hydraulic damage.
None of these limitations make the micro class a bad investment. They make it the wrong investment for jobs that exceed its design envelope. The distinction is critical.
When to Size Up Instead
So where exactly is the line between "perfect fit" and "bring a bigger machine"? A few practical thresholds help frame the decision:
- Trench depth exceeds 6-7 feet: Once your project calls for depths beyond what the micro or near-micro class can physically reach, you need to step into the standard mini range (2-4 tons) at minimum. Deep utility runs and commercial foundation work routinely demand 10-plus feet — territory where even the xz20r mini excavator or similar light-mini options may fall short, pointing you toward a 3-4 ton unit instead.
- Daily production volume matters: If the job requires moving significant yardage on a tight schedule — site grading for a new build, clearing fill from a commercial lot, or excavating a full-size swimming pool — the micro class will bottleneck the entire project. A 3-5 ton mini x can cycle two to three times faster, and the productivity gain easily justifies the higher rental cost and heavier transport logistics.
- Soil conditions are heavily compacted or rocky: Hard-pan clay, frozen ground, and rocky substrates demand the higher breakout force and system pressure that only larger machines deliver. Forcing a micro unit into these conditions risks premature wear on bucket teeth, pins, and hydraulic components.
- Material handling weight exceeds safe limits: Lifting precast blocks, moving heavy pipe sections, or placing large boulders for landscape features requires rated lift capacities that micro excavators simply do not offer. Exceeding those ratings isn't just inefficient — it's dangerous.
- The project requires multiple powered attachments: If your scope includes breaking concrete, drilling post holes, and grading — all on the same job — the limited auxiliary flow of a sub-1-ton machine becomes a bottleneck. Searching for a mini skid steer rental near me or stepping up to a 3-ton excavator with robust auxiliary circuits may serve the project better.
Rental availability plays a role here too. In many markets, the micro class is harder to find in rental fleets than the popular 3-4 ton segment. If the smallest available unit at your local yard is a 2-ton machine, that may actually be the right practical choice — slightly more capability than you need, but immediately available and still light enough for easy transport.
Match the machine class to the job — not the other way around. A micro excavator underspending on a shallow residential task is smart. A micro excavator underperforming on a deep commercial trench is a costly mistake. Let the project's depth, volume, soil conditions, and access constraints choose the weight class for you.
Knowing what these machines handle well — and where they hit a wall — is half the equation. The other half is understanding which attachments actually work at this scale, because a mismatched bucket or underpowered auger can turn a capable machine into an expensive paperweight.
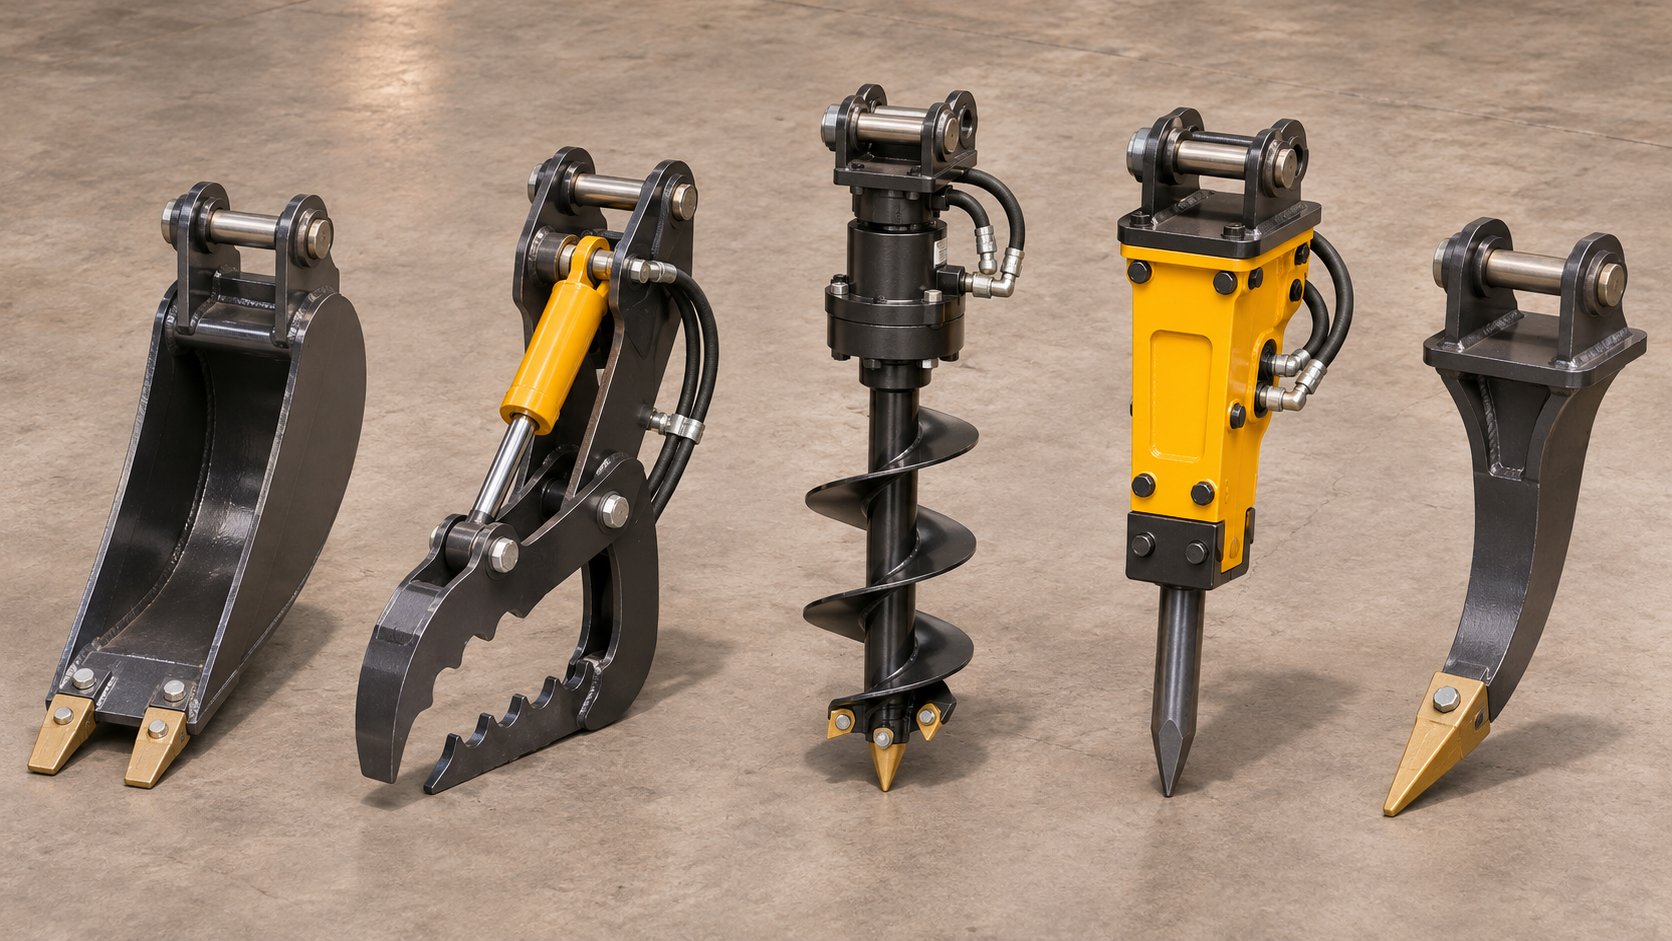
Attachments That Work with Micro Excavators
A micro excavator without the right attachments is like a cordless drill without bits — the platform has potential, but the tooling determines what you can actually accomplish. And here is the problem most buyers run into: attachment compatibility in the sub-1-ton and near-1-ton class is far more restrictive than it is for larger machines. Pins are smaller, hydraulic flow is lower, and the interchangeability that contractors take for granted on 3-5 ton minis simply does not exist at this scale. Picking the wrong attachment doesn't just waste money — it can damage the machine's hydraulic system or leave you stranded mid-project with a tool that won't perform.
Whether you plan to rent excavator attachments alongside the machine or build a personal toolkit for a unit you own, understanding exactly what fits — and what doesn't — keeps you productive and protects your investment.
Common Attachments Available for Micro Excavators
The good news is that even at this compact scale, a respectable range of attachments exists. Some rely purely on the boom and arm cylinders for movement (passive attachments), while others need a dedicated auxiliary hydraulic circuit to function. The table below lays out the most common options, what they do, and whether they require that auxiliary circuit.
| Attachment Type | Typical Application | Requires Auxiliary Hydraulics |
|---|---|---|
| Digging Bucket (6-18 in. widths) | General trenching, utility excavation, planting holes, foundation footings | No |
| Ditching / Cleanup Bucket (24-36 in.) | Grading swales, shaping ditch profiles, final cleanup of trench bottoms | No |
| Hydraulic Thumb | Grabbing rocks, roots, pipe sections, and irregular debris in coordination with the bucket | Yes |
| Mechanical Thumb | Same grabbing tasks as a hydraulic thumb, but pinned into a fixed open or closed position manually | No |
| Auger Drive + Bit | Drilling fence post holes, deck footing holes, sign post installations, soil sampling | Yes |
| Hydraulic Breaker | Breaking concrete slabs, sidewalks, small rock formations, and frozen ground | Yes |
| Tilt Bucket | Precision grading on slopes, shaping angled ditches, finish work without repositioning the machine | Yes |
| Ripper Tooth | Loosening compacted soil, hardpan, or frost layers before excavation with a standard bucket | No |
A few patterns stand out. Passive attachments — standard buckets, mechanical thumbs, rippers — work on virtually any micro excavator because they borrow movement from the boom and arm rather than demanding their own oil supply. Powered attachments — augers, breakers, hydraulic thumbs, tilt buckets — require the machine to have an auxiliary hydraulic circuit with adequate flow and pressure. If you plan to rent mini excavator units for a weekend project that involves both trenching and post-hole drilling, confirm auxiliary hydraulic availability before you sign the rental agreement. A machine without that circuit limits you to passive tools only, no matter how many powered attachments you bring to the site.
How Attachment Pin Size and Flow Requirements Limit Options
Here is where micro-class attachment shopping gets tricky — and where expensive mistakes happen most often. Two compatibility barriers work against you simultaneously: physical mounting geometry and hydraulic capacity.
Pin Geometry: Not All Attachments Physically Fit
Every excavator attachment connects to the stick (dipper arm) through a pair of mounting pins. Three measurements define whether the connection works:
- Pin diameter: The thickness of each mounting pin. Micro excavators typically use pins in the 25 to 35 mm range, significantly smaller than the 40-60 mm pins found on 3-5 ton minis.
- Pin center distance: The space between the center of the top pin and the center of the bottom pin. Even a 5 mm mismatch prevents the attachment from seating properly — or creates dangerous play in the joint.
- Dipper gap (arm width): The distance between the inner faces of the stick ears. The attachment's mounting bracket must fit within this gap without binding or excessive slop.
Because these dimensions are smaller on micro and near-micro machines, attachments built for a 3-ton-class excavator will not physically mount on a sub-1-ton unit. The pins won't align, the ears won't clear, and forcing a fitment risks cracking the stick or shearing a pin under load. This is not a theoretical concern — industry data suggests that pin-dimension mismatches are the single most common cause of attachment fitment failures, costing contractors thousands in returns and project delays.
The reverse is also true. Micro-class attachments mounted on a heavier machine will be undersized, creating excessive stress on the smaller pins and brackets. The attachment may physically hang on the stick, but it was never engineered to handle the forces a larger excavator generates.
Hydraulic Flow: The Invisible Mismatch
Even when pins line up perfectly, the hydraulic side can still sabotage performance. A breaker or auger designed for a 3-ton machine typically requires 15 to 25 GPM of auxiliary flow and system pressures in the 2,500-3,500 PSI range. A micro excavator delivering 5 to 12 GPM of auxiliary flow simply cannot push enough oil through that attachment to make it work correctly. The result is a breaker that taps weakly instead of striking with force, an auger that stalls in anything denser than loose sand, or — in the worst case — an overloaded hydraulic pump that overheats, blows seals, and leaves you facing a repair bill that dwarfs the cost of the attachment itself.
Conversely, running a small attachment on a machine with too much flow or pressure can damage the attachment's internal motor. As hydraulic specialists note, matching flow and pressure is a two-way street: the machine must supply enough to power the tool, but not so much that it overwhelms the tool's components.
Practical Guidance for Buying or Renting Attachments
Buying used attachments is a smart way to stretch your equipment budget — aftermarket and secondhand tools often sell at 40-60% below new OEM prices. But every dollar saved evaporates if the attachment doesn't match your machine. Before committing to any purchase or rental, run through this quick compatibility check:
- Measure your machine's actual pin dimensions. Use calipers to record pin diameter, pin center distance, and dipper gap width. Do not rely solely on model-number lookups — manufacturers sometimes change pin geometry between production years on the same model.
- Verify auxiliary hydraulic output. Check your machine's spec sheet for auxiliary flow (GPM or LPM) and maximum auxiliary pressure (PSI or bar). If the machine is older or has significant hours, consider testing actual output with a flow meter, since pump wear gradually reduces real-world flow below published specs.
- Compare against the attachment's requirements. Reputable attachment manufacturers publish required flow range, maximum pressure, and pin dimensions. If a seller — whether an AGT industrial mini excavator parts dealer, a local equipment auction, or an online marketplace — cannot provide these specs, treat that as a red flag.
- Confirm coupler compatibility. If your machine uses a quick coupler instead of direct pin-on mounting, verify that the coupler standard matches the attachment. S-40 couplers, common on 1-4 ton machines, will not accept attachments built for S-45 or CW-series interfaces without an adapter plate.
One overlooked detail worth flagging: the excavator rental cost for a machine with auxiliary hydraulics may be slightly higher than for a base unit without them. That modest premium is almost always worth paying if your project involves any powered attachment work. Renting a second machine — or worse, hand-digging what an auger should have handled — costs far more than the daily rate difference.
The right attachment transforms a micro excavator from a single-purpose digger into a versatile job-site platform. The wrong one transforms your project timeline into a cautionary tale. Pin dimensions and hydraulic flow are not glamorous specs, but they are the two numbers that separate a productive day from an expensive one.
Attachment compatibility is a critical spec-sheet exercise — yet specs alone can't tell you what it actually feels like to sit behind the controls of one of these machines, or how to get it from your driveway to the job site without a commercial hauling rig.
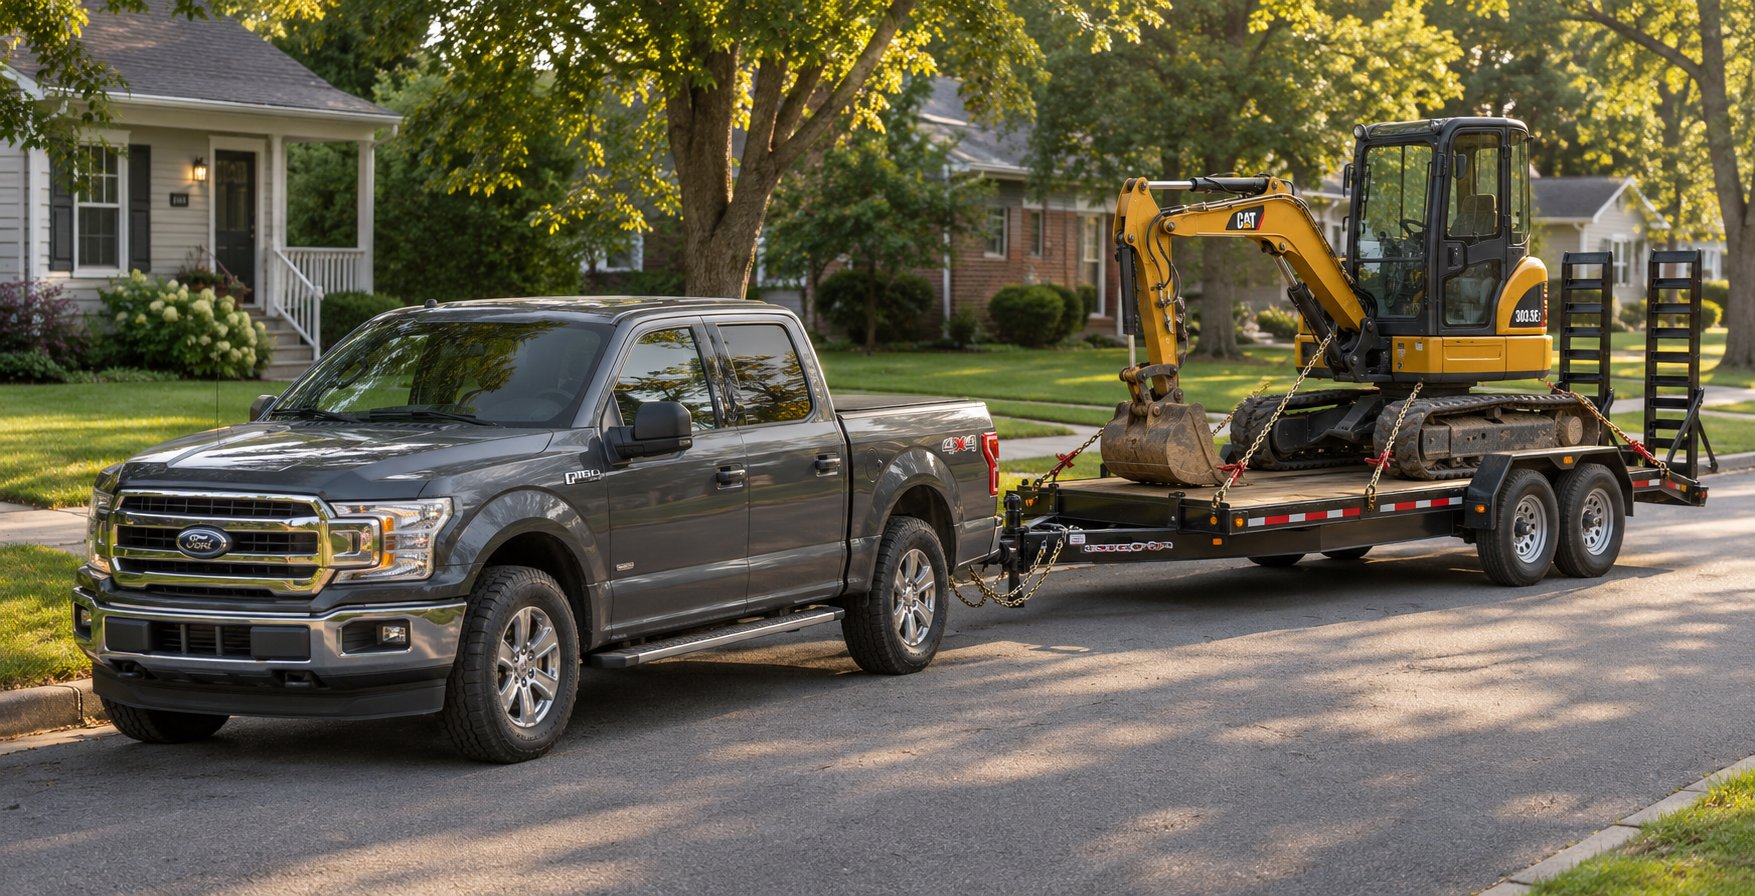
Operator Experience and Transport Logistics for a Micro Excavator
Spec sheets are silent on what it actually feels like to climb onto a 1,500 lb tracked machine, grab two joysticks, and start moving dirt. They also skip the logistics that happen before the first bucket curl — loading the machine onto a trailer, towing it across town behind a pickup, and backing the whole rig down a residential driveway without scraping the neighbor's mailbox. For first-time operators and small contractors stepping down from heavier equipment, these practical realities shape the entire experience as much as dig depth or hydraulic flow ever will.
What Operating a Micro Excavator Feels Like
Forget the enclosed, climate-controlled cab you might associate with a 5-ton mini. Most true micro excavators — machines under one metric ton — feature an open station design with a simple ROPS/FOPS canopy overhead and no glass, no doors, and no air conditioning. You are sitting on a compact, lightly padded seat with the elements fully around you. On the smallest units, some manufacturers skip the seat entirely; the operator stands on a small platform behind the controls, shifting weight to maintain balance while the machine works. Standing operation sounds awkward until you try it in a tight basement or inside a building where seated clearance is impossible — then it makes perfect sense.
Regardless of whether you are seated or standing, the control layout is reassuringly standardized. Nearly all modern micro and near-micro excavators use the ISO-pattern two-joystick configuration. The left joystick controls the swing (left and right) and the dipper stick (push away to extend, pull toward you to retract). The right joystick handles the boom (pull toward you to raise, push away to lower) and bucket (push left to curl in, push right to dump). Travel is managed by a pair of lever-and-pedal controls at your feet — push both forward to drive forward, pull both back to reverse, and use opposing inputs to pivot or steer.
If you have operated any excavator before — even a compact power equipment rental unit at a landscape supply yard — the controls will feel immediately familiar. The ISO pattern is what most manufacturers default to, and it is often called "CAT controls" because Caterpillar machines popularized it. Some older or specialty units run the SAE pattern (sometimes called "John Deere controls"), which swaps the boom function to the left joystick and the swing/stick to the right. On newer machines, a lever or switch — usually located beneath the floor panel — lets you toggle between patterns. Always check before you start digging.
The biggest difference you will notice compared to a larger machine isn't the control layout — it's the feel. Hydraulic response on a micro excavator is slower and gentler. The boom raises at a deliberate pace. The bucket curls without the aggressive snap you get from a 3-ton unit running a high-flow piston pump. Swing speed is noticeably more relaxed. For an experienced operator accustomed to heavier equipment, the initial reaction might be impatience. For a homeowner or first-time user? That gentler response is a genuine safety advantage. It gives you more time to correct a misjudged joystick input before the bucket overshoots or the boom drops too fast.
A practical tip for anyone stepping onto one of these machines for the first time: start simple. Find a patch of open ground — a corner of the job site, a clear section of yard, anywhere with no buried utilities or fragile surfaces — and practice basic dig-and-dump cycles. Extend the stick, lower the boom, curl the bucket to fill it, raise it a few feet, swing to the side, and dump. Repeat until the four joystick movements start to feel like muscle memory rather than a puzzle you are solving in real time. Industry training guidance recommends getting comfortable with single-lever movements before attempting multi-function operation, where you move both joysticks simultaneously to scrape a grade or dig a smooth arc. Rushing into close-quarters work — next to a foundation wall, around gas lines, between fence posts — before building basic control confidence is how accidents happen.
Getting a Micro Excavator to the Job Site
Here is one of the strongest practical arguments for choosing a micro or near-micro machine over a heavier alternative: the transport logistics are dramatically simpler and cheaper. A Chinese mini excavator weighing 1,500 lb, a Japanese-built sub-1-ton unit, or a near-2-ton light mini all share the same core advantage — they can ride on affordable utility trailers towed by vehicles most contractors and homeowners already own.
Machines under roughly 2 metric tons (about 4,400 lb) typically fit on single-axle or tandem-axle utility trailers rated between 3,500 and 7,000 lb GVWR. A half-ton pickup like an F-150, Silverado 1500, or Ram 1500 can legally tow most of these combinations, though you should always verify your specific truck's rated towing capacity against the combined weight of the loaded trailer. Three-quarter-ton and one-ton trucks handle the load with even wider margins, making the transport feel routine rather than risky.
Compare that to the logistics of moving a 5-ton machine. A 10,000 lb excavator needs a heavy-duty flatbed trailer, a tow vehicle rated for serious weight, and potentially a CDL depending on the combined gross vehicle weight and your state's regulations. For a small contractor juggling three residential jobs in a week, hiring a flatbed dispatcher each time erases most of the profit margin on smaller projects. The micro class eliminates that overhead entirely.
Before you hook up and head out, though, a handful of transport planning details deserve attention. Overlooking any one of them can turn a 30-minute drive into a costly headache:
- Trailer weight rating: Check the trailer's data plate for its gross vehicle weight rating (GVWR), not just its advertised capacity. Subtract the trailer's own empty weight to find the actual usable payload. A trailer rated at 5,000 lb GVWR that weighs 1,200 lb empty gives you 3,800 lb of real payload — enough for most near-micro machines, but tight once you add attachments and a full fuel tank.
- Ramp angle for loading: Steep ramp angles are one of the fastest ways to lose traction during loading. Low-profile trailers or tilt-deck designs reduce the ramp incline, making the load-on process safer and smoother. Always load in the machine's slowest travel mode with the boom held low, using the bucket as a counterweight if the ramp is steep.
- Tie-down points: Secure the machine with a minimum of four heavy-duty chains or rated straps at the manufacturer's designated tie-down locations — not arbitrary points on the frame. Cross chains at the front and rear in an X pattern to block forward, rearward, and lateral movement during transit.
- Total tow vehicle GVWR compliance: Your truck's sticker on the driver's door jamb lists its gross combined weight rating (GCWR). The sum of the truck's weight, passengers, cargo, trailer weight, and excavator weight must stay below this number. Exceeding it creates a legal liability and a genuine safety hazard, particularly during braking and downhill grades.
- Residential driveway access: Consider whether the client's driveway — or the street in front of the property — can handle the combined ground pressure and turning radius of the truck-and-trailer combination. A 40-foot rig doesn't navigate a cul-de-sac or a narrow suburban driveway the same way a standalone pickup does. If driveway access is questionable, plan to unload on the street and track the machine to the work area under its own power.
The financial math here tilts heavily in the micro class's favor. Hiring a commercial flatbed to deliver and retrieve a 5-ton mini excavator can run $300 to $600 per round trip in many markets — sometimes more if the job site is far from the equipment yard. A contractor who already owns a tandem-axle utility trailer (a common $2,000 to $4,000 investment) pays only fuel and time to move a sub-2-ton machine. Over the course of a busy season handling dozens of one-day residential jobs, that transport savings alone can cover a significant chunk of the machine's purchase or rental cost.
For homeowners searching for an excavator near me to handle a single weekend project, this transportability advantage works just as well in reverse. Many rental yards offer trailer rental alongside the machine, or the unit arrives on a small trailer you tow home yourself. You won't need to arrange — or pay for — a dedicated equipment delivery truck. And when the job is done, you return the machine the same way: loaded on a trailer behind your own vehicle, on your own schedule.
One scenario worth mentioning for context: if your project involves both a micro excavator and a separate tool like a hydraulic auger, you might compare the all-in cost against alternatives. Some homeowners consider a home depot auger rental for standalone post-hole work, which avoids the excavator altogether. Others discover that a micro excavator with an auger attachment handles the drilling and the trenching in a single mobilization, making the slightly higher daily rate a net time-saver. The same cost-comparison logic applies when you see a cat mini excavator for sale at a used equipment dealer — if the purchase price plus a trailer investment costs less than cumulative rental fees over two seasons, ownership starts to make financial sense.
Getting the machine to the site efficiently and operating it confidently are two sides of the same coin. Neither matters much, though, if the machine you chose doesn't match the job in the first place — which is exactly why the final step in the process is learning how to evaluate and source the right unit for your specific project scope.
How to Evaluate and Source the Right Small Excavator
Knowing the weight classes, hydraulic specs, attachment limits, and transport logistics puts you ahead of most first-time buyers. The final — and arguably most consequential — decision is whether to rent or buy, and how to verify that the specific machine you choose actually fits the work you have lined up. Get this step wrong and every spec-sheet advantage dissolves into wasted budget and lost project time. Get it right and a micro excavator becomes one of the highest-ROI pieces of equipment a small operation can own.
Renting vs. Buying a Micro Excavator
The rent-or-buy question isn't about preference — it's a math problem tied directly to how often the machine will work. Homeowners tackling a single French drain or patio project almost always come out ahead renting. The machine shows up, does its job for a day or a weekend, and goes back to the yard with no storage headaches, no maintenance calendar, and no depreciation sitting in the driveway.
For small contractors, the calculation shifts as utilization climbs. Industry cost analysis puts the ownership-versus-rental crossover point at roughly 400 to 500 operating hours per year — about 12 to 15 weeks of active production. Below that threshold, rental avoids the fixed costs of financing, insurance, maintenance, and storage that keep running whether the machine earns or sits. Above it, cumulative rental fees approach or exceed annual ownership costs without building any equity in the asset.
Here is where the decision gets interesting. A crew renting a compact earth moving machine 15 weeks per year at typical weekly rates spends $18,000 to $30,000 annually — numbers that can rival the yearly cost of owning a used unit outright. Seasonality matters too. A contractor whose work pauses three to five months each winter absorbs ownership costs against minimal production during that downtime, dragging the break-even point higher. Honest accounting of your actual project pipeline, not optimistic projections, should drive this call.
Used equipment reshapes the math in the buyer's favor. A well-maintained used micro or near-micro excavator purchased at a meaningful discount to new pricing reduces the monthly fixed-cost burden and can make ownership viable even at lower utilization thresholds. Many people ask how much is a mini excavator — and the answer varies enormously depending on age, brand, hours, and condition. New sub-1-ton machines can start around $15,000 to $25,000 depending on configuration, while used units in good condition often trade at 40-60% of new pricing. A home depot trencher rental might handle a single shallow trench, but it can't replace the versatility a dedicated excavator brings to a contractor who juggles trenching, grading, and demolition across multiple weekly jobs.
Key Specs to Compare Before You Commit
Whether you are browsing rental catalogs or inspecting a used machine in person, a consistent evaluation checklist prevents costly oversights. Run every candidate through these criteria before signing anything:
- Operating weight: Confirm whether the listed figure is base weight, canopy operating weight, or cab operating weight. This number determines your trailer requirements, ground pressure on sensitive surfaces, and whether the machine qualifies as a true micro or a light mini.
- Maximum dig depth: Match this to your deepest anticipated trench. If your projects routinely need 10-plus feet, a sub-1-ton machine won't reach — step up to the standard mini class.
- Bucket breakout force: Critical for soil conditions. Loose loam cooperates with any machine; compacted clay and rocky ground demand higher force numbers that only heavier units deliver.
- Auxiliary hydraulic availability: No auxiliary circuit means no powered attachments — no augers, no breakers, no hydraulic thumbs. If your project scope includes any of these tools, this spec is non-negotiable.
- Track width and retractable undercarriage options: Measure the narrowest access point on your typical job site — gate openings, doorways, side yards — and verify the machine fits with margin to spare.
- Transport dimensions: Check folded height (boom stowed), overall length, and weight against your trailer's payload rating and your tow vehicle's GCWR.
- After-sale parts and service access: A bargain-priced machine from an obscure manufacturer loses its value fast if replacement hydraulic hoses, undercarriage components, or engine filters require eight-week international shipping. Prioritize brands with established North American parts networks.
For used machines specifically, the inspection goes deeper. Experienced buyers recommend verifying the serial number against paperwork, performing a cold-start engine test, checking hydraulic cylinders and hoses for leaks, measuring undercarriage wear on tracks, rollers, and sprockets, and testing every control function with warm hydraulics. Hour-meter readings should align with visible wear — a "low-hour" unit with worn pedals, a shredded seat, and sloppy joystick play tells a different story than the numbers suggest. Fresh paint or pressure-washing on a machine with no explanation can mask structural repairs or weld cracks on the boom and stick. None of these red flags automatically disqualify a machine, but each one is a signal to ask harder questions and budget for potential repairs before finalizing a purchase.
To illustrate what sourcing actually looks like in practice, consider the used Kubota U-17 listed on JIUHONG. With a listed machine weight of 1,805 kg, this is a near-2-metric-ton unit — not an exact 2,000 kg machine — which places it at the lighter end of the mini class. For a small contractor or landscaping business evaluating a 5 ton excavator against a more compact option for residential-scale work, a machine in this weight range offers a practical middle ground: enough dig depth and breakout force for most homeowner and light-commercial tasks, yet still compact and transportable enough to avoid the heavy logistics that larger equipment demands. The listing's product inquiry form lets prospective buyers request pricing and availability directly, making it one sourcing avenue worth exploring alongside local dealers, auction platforms, and certified pre-owned programs from major OEMs. A 305 cat excavator, for comparison, sits in a heavier class entirely — excellent for production-level commercial work, but overkill and over-budget for the smaller residential jobs where a near-micro unit earns its keep.
One final note on sourcing mindset. You'll find micro and small excavator listings everywhere — from major auction houses and dealer lots to online marketplaces and even listings that mix in toy excavator collectibles alongside real equipment. Regardless of where you find a candidate machine, the evaluation process stays the same: verify the specs against your project requirements, inspect thoroughly or hire someone who can, and resist the urge to buy based on price alone. A $6,000 machine that needs $4,000 in hydraulic repairs isn't a deal — it's a $10,000 machine with extra headaches.
Match the machine to the job scope, verify specs against your project requirements, and always inspect or inquire thoroughly before purchasing used equipment. The best micro excavator isn't the cheapest or the most powerful — it's the one whose weight, dig depth, hydraulic capacity, and transport footprint align precisely with the work you need done.
Frequently Asked Questions About Micro Excavators
1. What is the difference between a micro excavator and a mini excavator?
A micro excavator weighs under approximately one metric ton (about 2,200 lb) and is built for the tightest access points such as doorways, narrow side yards, and indoor spaces. A mini excavator covers a broader range from roughly 1 to 6 metric tons, offering greater dig depth, higher breakout force, and faster cycle times. The micro class is essentially the smallest tier within the compact excavator umbrella, optimized for portability and confined-space work rather than production-level digging. Choosing between them depends on trench depth requirements, soil hardness, site access width, and whether the machine needs to fit on a lightweight utility trailer.
2. How deep can a micro excavator dig?
Most true micro excavators — those weighing under one metric ton — reach a maximum dig depth of roughly 5 to 6 feet. Light mini models in the 1 to 2 metric ton range extend that to about 7 to 8 feet. These depths handle common residential tasks like French drains, irrigation trenching, shallow utility lines, and small footing excavations. If your project calls for trenches deeper than 7 feet, such as deep sewer mains or commercial foundation work, you will need to step up to a standard mini excavator in the 2 to 4 ton class, which typically reaches 9 to 12 feet.
3. Can you use attachments like augers and breakers on a micro excavator?
Yes, but only if the machine has an auxiliary hydraulic circuit. Powered attachments such as augers, hydraulic breakers, tilt buckets, and hydraulic thumbs require dedicated oil flow routed to the end of the stick. Without auxiliary lines, the excavator is limited to passive tools like standard digging buckets, mechanical thumbs, and rippers. Even with auxiliary hydraulics, micro-class machines deliver lower flow rates — typically 5 to 12 GPM — so attachments designed for 3-ton or larger machines will underperform or risk hydraulic damage. Always verify pin dimensions, required flow rate, and pressure specs before renting or buying any attachment.
4. How much does it cost to rent or buy a micro excavator?
Rental rates for sub-1-ton micro excavators typically run 30 to 50 percent less than rates for 3-ton mini excavators, with daily rates varying by market and machine condition. New micro excavators generally start in the $15,000 to $25,000 range depending on brand and configuration, while used units in good working order often trade at 40 to 60 percent of new pricing. For small contractors, the rent-versus-buy break-even point falls around 400 to 500 operating hours per year. Below that threshold, renting avoids fixed ownership costs; above it, purchasing — especially a well-inspected used machine like a near-2-metric-ton Kubota U-17 available through listings such as JIUHONG — often proves more economical over a full season.
5. Do you need a CDL to transport a micro excavator?
In most cases, no. Machines under roughly 2 metric tons (about 4,400 lb) fit on single-axle or tandem-axle utility trailers that standard half-ton and three-quarter-ton pickup trucks can tow legally without a commercial driver's license. The key is ensuring the combined weight of the truck, trailer, excavator, and any attachments stays below the tow vehicle's gross combined weight rating. Always check your specific state's CDL threshold for combined gross vehicle weight, verify the trailer's rated payload, and secure the machine with at least four rated tie-down chains or straps before transport.