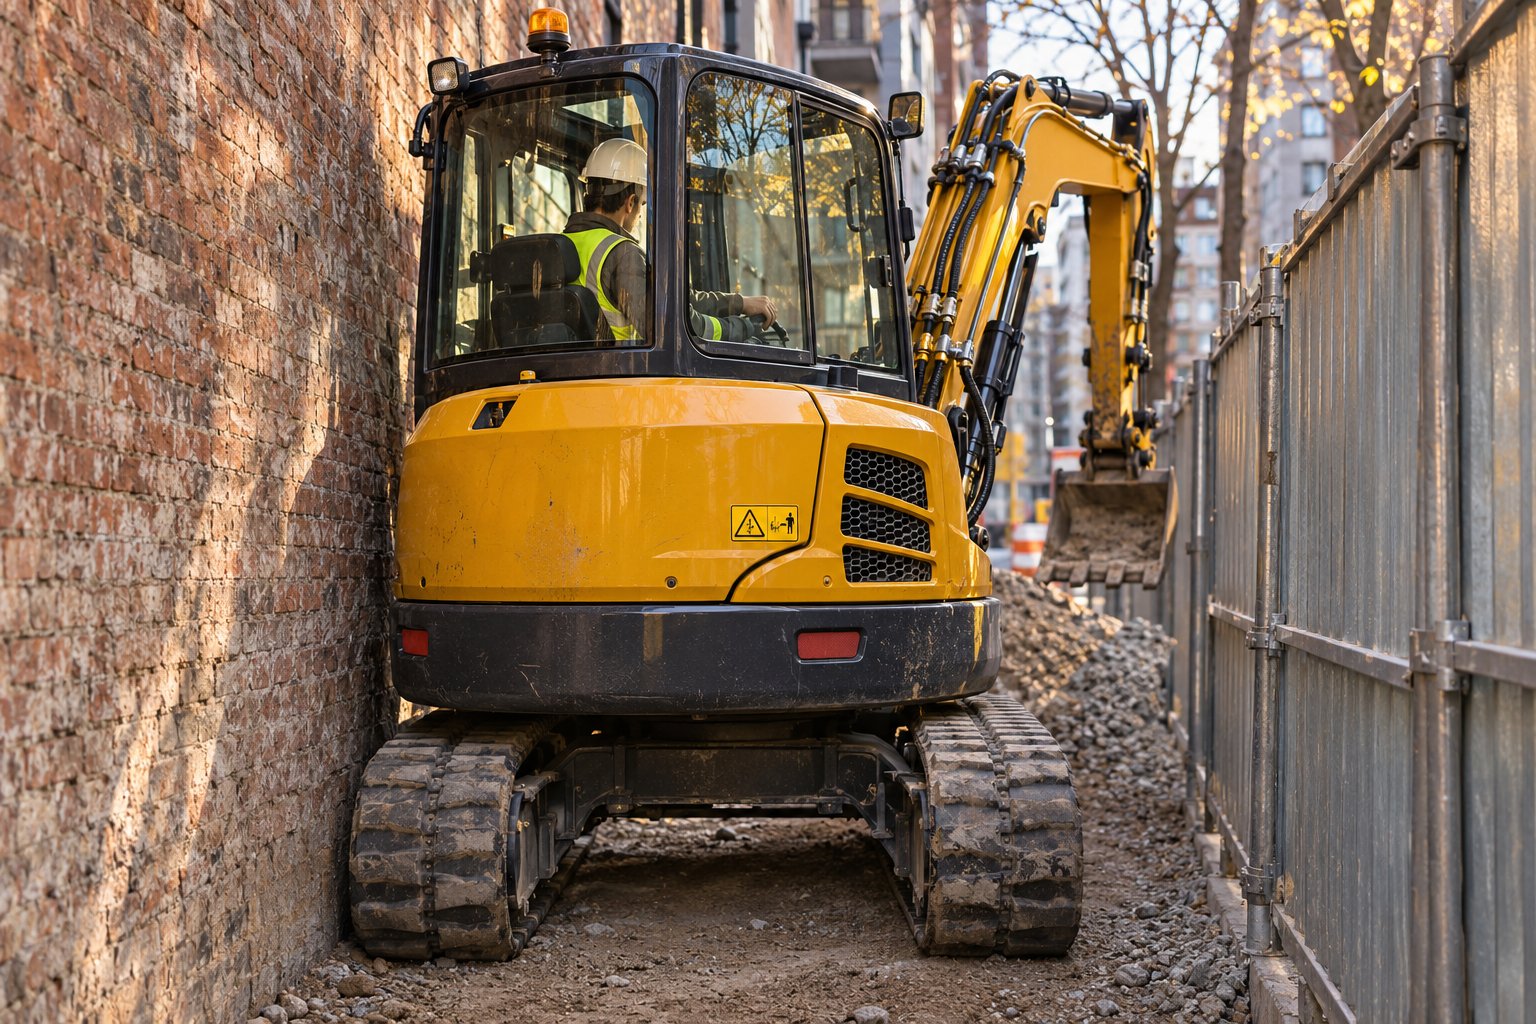



Why Every Construction Site Needs a Safety Inspection Workflow
Imagine arriving at a job site Monday morning and finding an OSHA compliance officer already walking the perimeter. Your guardrails, your trenches, your crane rigging—all under a microscope. Would your site pass?
Construction remains the deadliest private industry in the United States. In 2024, the Bureau of Labor Statistics recorded 1,034 fatal work injuries in construction out of 5,070 total workplace fatalities nationwide—more than any other sector. Falls, slips, and trips alone claimed 844 lives across all industries that year. These are not abstract numbers. They represent workers who left home and never returned.
A construction site safety inspection is a structured, physical evaluation of job-site conditions against regulatory standards—primarily OSHA's 29 CFR 1926. It is not a quality inspection verifying workmanship against architectural specs, and it is not a progress inspection tracking schedule milestones. A safety inspection asks one question: Can every person on this site work and leave unharmed today?
Why Self-Inspections Are Non-Negotiable
OSHA simply cannot be everywhere. Federal inspector staffing dropped to an all-time low of 750 in 2021, and even after aggressive recruitment pushed that number above 890, the agency still oversees millions of worksites with a limited workforce. Waiting for a regulator to find your hazards is not a safety strategy—it is a gamble. That reality shifts the burden squarely onto site teams to run their own rigorous inspections, treating every walkthrough with the same seriousness as an official visit.
Under OSHA 29 CFR 1926.20(b)(2), every construction employer must provide for frequent and regular inspections by a competent person. This is not a suggestion buried in guidance documents; it is a legal requirement. A well-structured facilities inspection checklist tailored to your active trades helps satisfy that obligation, but checking a checklist alone is only the starting point—not the finish line.
What This Guide Covers That Others Miss
Most online resources hand you a generic facilities inspection checklist and call it a day. This guide takes a different approach. You will learn a complete three-phase workflow—pre-inspection planning, on-site execution, and post-inspection follow-up—built from a practitioner-first perspective. The goal is to teach you how to inspect a construction site for safety the way experienced safety professionals actually do it, not just how to create a construction site checklist that collects dust in a trailer.
Most inspection guides stop at the checklist. This guide teaches you how to evaluate what you see, classify what you find, and act on what matters.
The difference between a site that survives an OSHA visit and one that earns a citation often comes down to what happens before the inspector ever sets foot on the ground—and that preparation starts with the people responsible for running the inspection itself.
Step 1 – Plan Before You Walk the Site
The most valuable part of any construction site safety audit happens before you ever lace up your boots. Skipping the planning phase is the single biggest reason inspections miss critical hazards—you end up wandering the site reactively instead of evaluating it systematically. Think of it this way: an emergency room doctor reviews a patient's chart before walking into the exam room. An inspector should do the same with the site.
Pre-inspection planning transforms a casual walkthrough into a focused evaluation. It tells you where to look, what to look for, and which hazards deserve your attention first. Without it, you are checking boxes. With it, you are conducting construction safety audits that actually prevent injuries.
Reviewing Incident History and Prior Findings
Start by pulling every record that tells you what has already gone wrong—or almost gone wrong—on this site. That means previous inspection reports, near-miss logs, corrective action tracking sheets, and OSHA 300 logs if the project has been active long enough to generate them. You are looking for patterns, not isolated events.
Did the last two inspections flag incomplete guardrails on the third floor? That recurring finding tells you either the corrective action failed or conditions keep reverting after repairs. Has the site logged multiple near-misses involving forklift traffic near pedestrian walkways? That cluster points to a systemic layout or behavioral problem, not bad luck.
Critically, verify that corrective actions from past findings were actually completed—not just signed off on a form. A closed-out item on paper means nothing if the hazard still exists in the field. This reconciliation step is where most inspection programs fall apart. Gathering subcontractor safety submittals is equally important: review each trade contractor's site-specific safety plan, training certifications, and any incident reports they have filed. Building audits into a recurring cycle only works when each round starts by closing the loop on the last one.
While you are at it, collect the essential documents you will need in hand during the walk: current site plans showing active work zones, posted permits for any specialty operations, the project's overall safety and health plan, and any hot-work or confined-space entry permits issued for the day. These documents form the baseline you will measure real conditions against.
Mapping Your Inspection Route and Scope
Here is where planning becomes tactical. Pull the day's work schedule from the superintendent or project coordinator. Identify every high-risk activity planned—crane lifts, excavation work, steel erection, hot work, concrete pours at height. These operations carry the highest injury potential, and your inspection route should ensure you observe them while they are actively underway, not after crews have packed up.
Use the site layout to create a logical path that covers the highest-risk zones first. If a tower crane is making picks on the east side and an excavation crew is shoring a trench on the south perimeter, those areas take priority over a material staging yard. You also need to decide on scope: a full-site walkaround covers every active area and is ideal for weekly or periodic inspections, while a targeted inspection zeros in on specific trades, equipment, or building audits of particular structures where recent issues have surfaced.
Before heading out, run through this pre-inspection planning sequence:
- Review prior inspection reports and verify that corrective actions were completed—not just documented.
- Obtain current site plans, active permits, and the project safety plan.
- Check the day's activity schedule and identify all high-risk operations.
- Identify the applicable OSHA standards (29 CFR 1926 subparts) for every active work type you will observe.
- Assemble your inspection tools—clipboard or tablet, camera, required PPE, and trade-specific checklists tailored to the day's scope.
That fifth step matters more than it seems. Knowing which OSHA standards apply to the work happening today—not just generally—sharpens your ability to spot violations in real time. If you know excavation crews are working below five feet, you arrive already aware that 29 CFR 1926.652 requires protective systems. If steel erection is active, you are primed to check connectors' fall protection compliance under Subpart R.
Planning also determines when you inspect. Varying your timing prevents the site from staging a cleanup fifteen minutes before your expected arrival—a common pitfall that turns inspections into theater rather than genuine safety evaluations. Arrive early, arrive at shift change, or arrive mid-afternoon when fatigue sets in. The goal is to see the site in its natural state, not its rehearsed one.
With your route mapped, your documents gathered, and your scope defined, the next question becomes: who actually carries out each part of the inspection, and what authority do they hold when something dangerous surfaces?
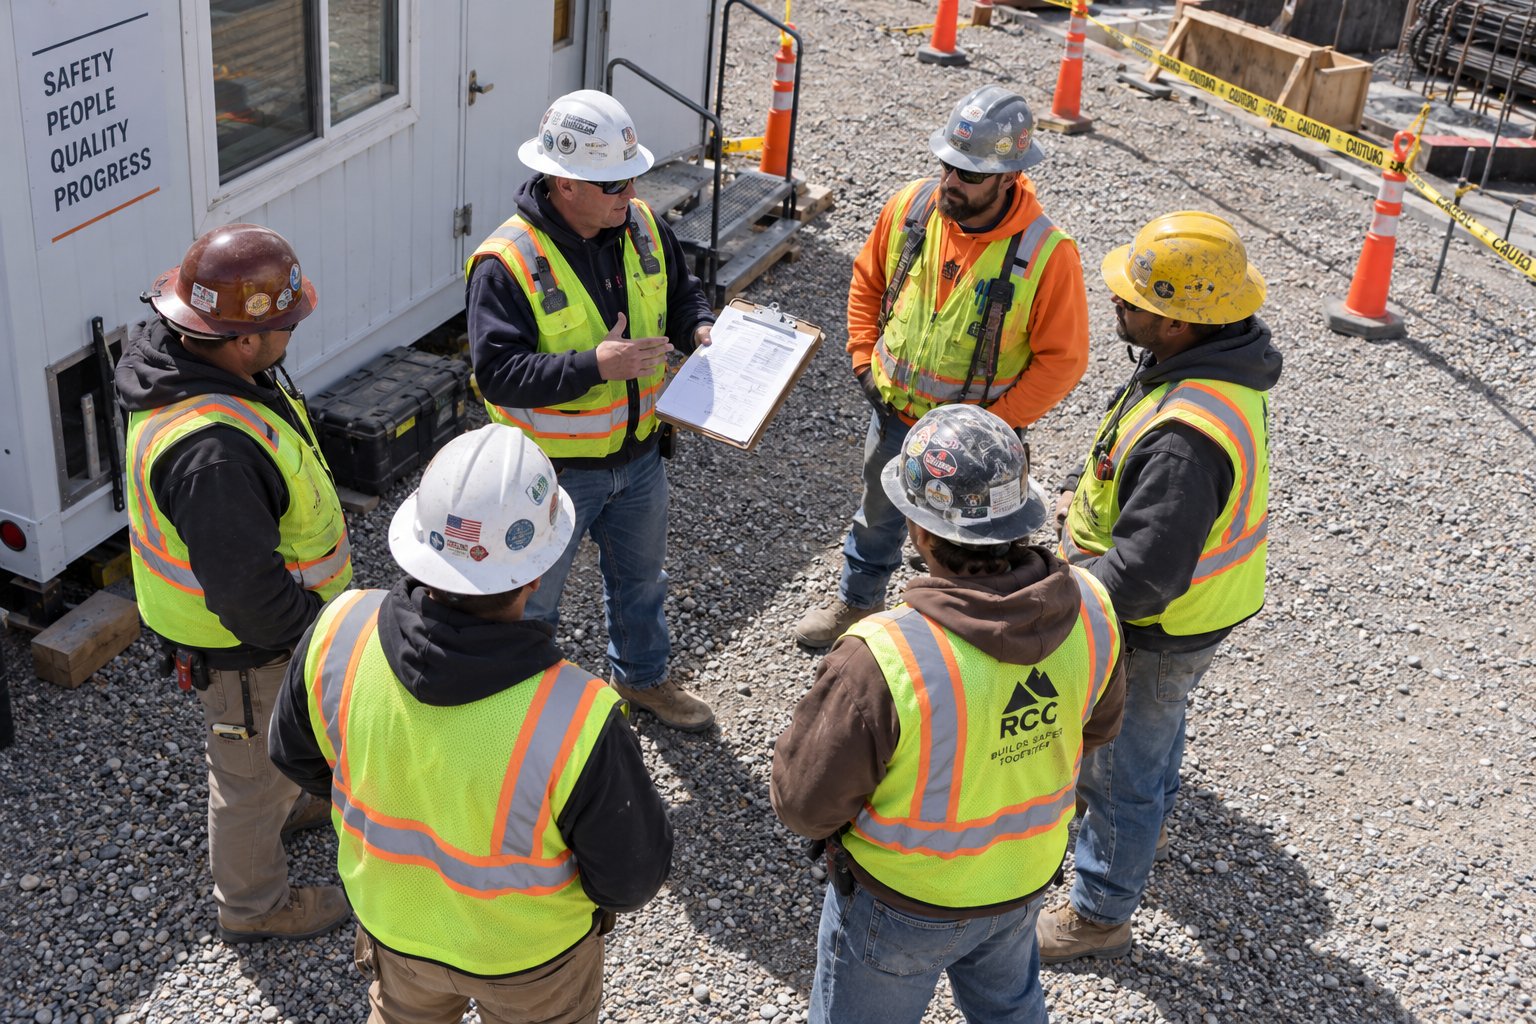
Step 2 – Assign Inspection Roles and Authority
A perfectly planned inspection route means nothing if no one knows who is responsible for walking it—or what they are authorized to do when they find something dangerous. This is where many construction checklist programs silently fail. The documents exist, the forms are printed, but the people holding them lack clear ownership or the authority to act. The result? Hazards get noted but never corrected, or worse, they get spotted by someone who assumes it is someone else's problem.
On a construction site, understanding how to inspect construction work effectively starts with assigning specific roles tied to specific responsibilities. Who evaluates scaffold integrity? Who checks that the excavation crew has adequate shoring? Who has the power to shut everything down if a worker is about to get killed? These answers should never be improvised on the spot.
Who Inspects What on a Construction Site
Every project has an organizational structure, and the inspection program must mirror it. On a large commercial or infrastructure project, you might have a dedicated safety officer, a site superintendent, multiple competent persons designated by trade, and several subcontractor forepersons—all with distinct inspection duties. On a smaller residential or light commercial project, one or two people may wear several of those hats simultaneously. Either way, the responsibilities must be explicitly assigned, not assumed.
OSHA defines a competent person as someone "capable of identifying existing and predictable hazards in the surroundings or working conditions which are unsanitary, hazardous, or dangerous to employees, and who has the authorization to take prompt corrective measures to eliminate them" under 29 CFR 1926.32(f). Notice the two-part requirement: the person must both identify hazards and have the authority to fix them. Knowledge without authority is observation. Authority without knowledge is guesswork. Neither keeps workers safe.
Here is how inspection responsibilities typically break down across a building construction checklist framework:
| Role | Primary Inspection Focus | Authority Level | Applicable Project Size |
|---|---|---|---|
| Site Superintendent | Overall site conditions: housekeeping, traffic flow, barricading, general compliance across all trades | Full stop-work authority; directs corrective action across all contractors | All project sizes (primary inspection lead on small to mid-size projects) |
| Competent Person (OSHA-defined) | Trade-specific hazards: scaffolding, excavation, fall protection, crane rigging, confined spaces | Authority to take prompt corrective measures within their trade scope, including halting trade-specific work | Required on all projects where applicable standards mandate a competent person |
| Dedicated Safety Officer | Regulatory compliance, documentation quality, inspection program oversight, trend analysis across findings | Stop-work authority; issues formal citations and corrective action notices | Mid-size to large projects; often shared across multiple sites on smaller programs |
| Subcontractor Foreperson | Crew-specific hazards: PPE usage, tool condition, task-specific safety measures, daily pre-task plans | Stop-work authority for their own crew; escalates site-wide issues to superintendent or safety officer | All project sizes (each subcontractor should designate at least one) |
On a large-scale project—say, a multi-story commercial build with eight active subcontractors—you might have a safety officer conducting a comprehensive weekly walkthrough, the superintendent performing daily spot checks, each sub's foreperson running pre-shift crew inspections, and designated competent persons evaluating scaffolds, trenches, and crane setups independently. The construction checklist each person carries should reflect their specific focus area, not a one-size-fits-all form.
Smaller projects demand consolidation, not elimination. A remodeling contractor with a six-person crew still needs someone designated as the competent person, and that person still needs the authority to stop work. The project size changes the staffing, not the standard. As SafetyPro Resources notes, "when roles are undefined or assumed rather than explicitly defined, gaps emerge in which hazards fall through the cracks." That applies equally to a high-rise tower and a single-story strip-out.
One often-overlooked detail, particularly relevant for anyone referencing an inspection checklist Texas projects require or similar state-specific standards: some states layer additional competent person requirements on top of federal OSHA mandates. Always verify whether your state plan adds inspection obligations beyond the federal baseline.
Understanding Stop-Work Authority and Escalation
Imagine this scenario. Your competent person is inspecting an active excavation and discovers that the trench—seven feet deep—has no shoring, no sloping, and no trench box. Two workers are standing at the bottom. What happens next?
If the answer involves "writing it up and discussing it at the next safety meeting," someone could die before that meeting happens. This is exactly where stop-work authority becomes the most important tool on the entire site—more critical than any hard hat or harness.
Stop-work authority is not optional. OSHA's General Duty Clause (Section 5(a)(1) of the OSH Act) requires every employer to address recognized serious hazards. When an imminent danger exists, the legal and moral obligation is to halt work immediately—not after a committee reviews it.
The protocol for exercising stop-work authority follows a clear sequence, and every person listed in the table above should know it by heart:
- Stop the work immediately. Direct all affected workers to cease the hazardous activity and move to a safe distance. This is non-negotiable and does not require supervisory approval first.
- Secure the area. Barricade or rope off the hazard zone so no one inadvertently re-enters while the issue is being resolved.
- Notify the chain. Alert the site superintendent, safety officer, and the subcontractor's management. On multi-employer sites, the general contractor's project manager should also be informed, especially given OSHA's multi-employer citation policy, which can hold controlling employers responsible for hazards they failed to correct.
- Document everything. Photograph the condition, record the exact location, note the time, identify the workers involved, and describe what you observed. This documentation protects the person who stopped work and creates the evidentiary basis for corrective action.
- Do not resume until verified safe. Work restarts only after the hazard has been corrected, the corrective measure has been verified by a competent person, and all affected workers have been briefed on the resolution.
Here is the uncomfortable reality that no generic construction checklist addresses: pushback happens. A subcontractor foreperson who stops a crane lift because rigging looks suspect may face pressure from the crane operator's company, the general contractor's scheduler, or even their own employer worried about production delays. Workers who raise safety concerns sometimes get labeled as problems rather than assets.
This is why stop-work authority must be supported from the top of the organizational chart, written into subcontract agreements, and reinforced in every toolbox talk. Berkeley Lab's Stop Work Policy puts it plainly: all personnel have "both the right and responsibility to initiate a stop work action without fear of retaliation." Any site culture that punishes people for stopping unsafe work is not just ethically bankrupt—it is building the conditions for the next fatality.
When roles are clearly assigned and authority is genuinely supported, the inspection team functions as a coordinated safety net rather than a collection of individuals checking separate boxes. That organizational clarity sets the stage for the real skill that separates average inspectors from exceptional ones—learning how to read a site the moment you step onto it.
Step 3 – Walk the Site and Read the Conditions
You have your route planned, your documents gathered, and your roles assigned. The moment you step through the gate, everything shifts from preparation to perception. This is where a construction site inspection separates from paperwork—and where most guides fail you. They hand you a form with forty line items and say "go." But a form cannot teach you how to see.
Reading a site is a skill, not a procedure. Experienced safety professionals develop an almost instinctive ability to scan an environment and identify where risk is concentrating—often within the first sixty seconds of arriving. That instinct is not magic. It is a trained pattern of observation that you can learn, practice, and sharpen over time. The key is knowing what to look at first and understanding what those observations actually tell you about the site's overall safety posture.
Reading Housekeeping as a Leading Safety Indicator
Your first impression of a construction site tells you more than most people realize. Before you check a single item on any facility inspection checklist, take a slow look around. What does the ground look like? Are walkways clear, or are they cluttered with scrap lumber, loose rebar, discarded packaging, and tangled extension cords? Are debris bins overflowing? Are material stockpiles organized or scattered randomly across the work area?
Housekeeping is not a cosmetic issue. It is a leading indicator—a measurable condition that predicts future incidents rather than simply recording past ones. A site with consistently poor housekeeping is almost always a site with deeper systemic problems: inadequate supervision, unclear accountability, rushed schedules overriding safe practices, or a workforce that has normalized working around hazards instead of eliminating them. When you see clutter, you are not just seeing a trip hazard. You are seeing a management failure.
Here is what to look for specifically:
- Blocked egress paths. Every exit route, stairwell, and emergency access lane should be completely unobstructed. Stacked materials narrowing a corridor to single-file passage is a code violation and an evacuation nightmare.
- Improperly stored flammable materials. Paint cans, solvents, adhesive containers, and fuel left in direct sun, near ignition sources, or without proper containment violate OSHA's 29 CFR 1926.152 requirements—and they create the conditions for a fire that spreads faster than anyone on site can react.
- Trip and slip hazards. Loose boards, protruding nails in scrap wood, puddles near electrical panels, and hose lines draped across pedestrian routes. These are the hazards that generate the highest volume of non-fatal injuries on construction sites year after year.
- Waste management breakdown. Overflowing dumpsters, construction debris piled against building walls, and no visible daily cleanup routine indicate that housekeeping tasks have been deprioritized—usually because production schedules have taken over.
Think of housekeeping as the vital signs of a patient. A doctor does not need to run a full blood panel to know something is wrong when the patient's temperature, pulse, and blood pressure are all abnormal. Similarly, you do not need to complete an entire construction checklist sample form to know a site has problems when every walkway is a minefield of debris. The housekeeping tells you whether the safety culture is alive or on life support.
Scanning for Temporary Hazards and Behavioral Patterns
Here is a technique that separates seasoned inspectors from first-timers: before you start the formal walkthrough, find a vantage point—an elevated slab, a second-floor window opening, or even the bed of a pickup truck at the perimeter—and simply observe for two to three minutes. Do not approach anyone. Do not announce yourself. Just watch.
Why? Because behavior-based safety research consistently shows that worker actions change the moment someone with a clipboard and a hard hat walks into view. The shortcuts stop, the missing safety glasses reappear, and the guardrail that was leaned aside gets repositioned. You want to see the site in its natural state, not its performance state. Those unguarded two or three minutes reveal more about actual working conditions than an hour of accompanied walkthroughs ever will.
From your observation point, scan for these temporary conditions—hazards that exist because of active work in progress rather than permanent site deficiencies:
- Open floor holes without covers or guardrails. Penetrations cut for plumbing, HVAC, or electrical rough-in are among the most common fall hazards on active projects. OSHA requires that any hole large enough for a person to step into be covered or guarded immediately. Covers must be secured against displacement, capable of supporting expected loads, and clearly marked to prevent removal.
- Guardrails removed for material deliveries and not replaced. A crew may temporarily remove a section of perimeter guardrail to swing in a pallet of drywall or a bundle of steel. The guardrail is supposed to go back up the moment the delivery is complete. On busy sites, that "moment" can stretch into hours—or days. Every minute that gap exists, someone could walk or back off an unprotected edge.
- Extension cords in wet areas. After rain or near active concrete washout stations, energized cords lying in standing water create electrocution risk. Check that ground-fault circuit interrupters (GFCIs) are in use on all temporary power per 29 CFR 1926.405(a)(2)(ii) and that cords are routed away from water accumulation.
- Unsecured compressed gas cylinders. Oxygen and acetylene bottles left standing without being chained or secured to a stable structure can topple. A sheared valve on a high-pressure cylinder turns it into an unguided projectile. This is a common finding on any construction checklist sample that includes hot-work areas, and it takes about three seconds to spot—yet it appears on citation after citation.
While scanning for physical conditions, simultaneously observe worker behavior from a distance. You are looking for patterns, not isolated acts. Ask yourself these questions as you watch:
- Are workers wearing required PPE—hard hats, high-visibility vests, safety glasses, gloves appropriate to the task?
- Are workers on ladders maintaining three-point contact, or are they carrying tools in both hands while climbing?
- Is anyone working within six feet of an unprotected edge without a fall arrest system?
- Are barricades and caution tape actually controlling access, or have workers ducked under them to take shortcuts?
- Does signage look current and legible, or is it faded, torn, and ignored?
What you observe during these initial minutes sets the tone for your entire inspection. If housekeeping is clean, PPE compliance appears high, barricades are intact, and material storage looks organized, you can shift your focus to the more nuanced, trade-specific hazards that require closer examination. If, on the other hand, you are counting missing hard hats and stepping over debris before you have even opened your clipboard, you already know this site has systemic gaps that no single checklist line item will fix.
Experienced inspectors notice these five things first—almost unconsciously—every time they arrive on a new site:
- Overall site housekeeping and debris management
- PPE compliance visible from a distance
- Barricade and guardrail integrity around open edges and excavations
- Condition and placement of safety signage
- Material storage practices—stacking height, securing, separation of incompatibles
These five observations function as a rapid diagnostic. They do not replace the detailed walkthrough—they inform it. They tell you where the problems are likely hiding and which areas deserve your sharpest attention. A site that fails this initial visual scan is a site where the deeper, trade-specific hazards—the ones that actually kill people—are almost certainly present, too.
That natural connection between general site conditions and specific lethal hazards is precisely why the next phase of your walkthrough needs to zero in on the four hazard categories responsible for the vast majority of construction fatalities.
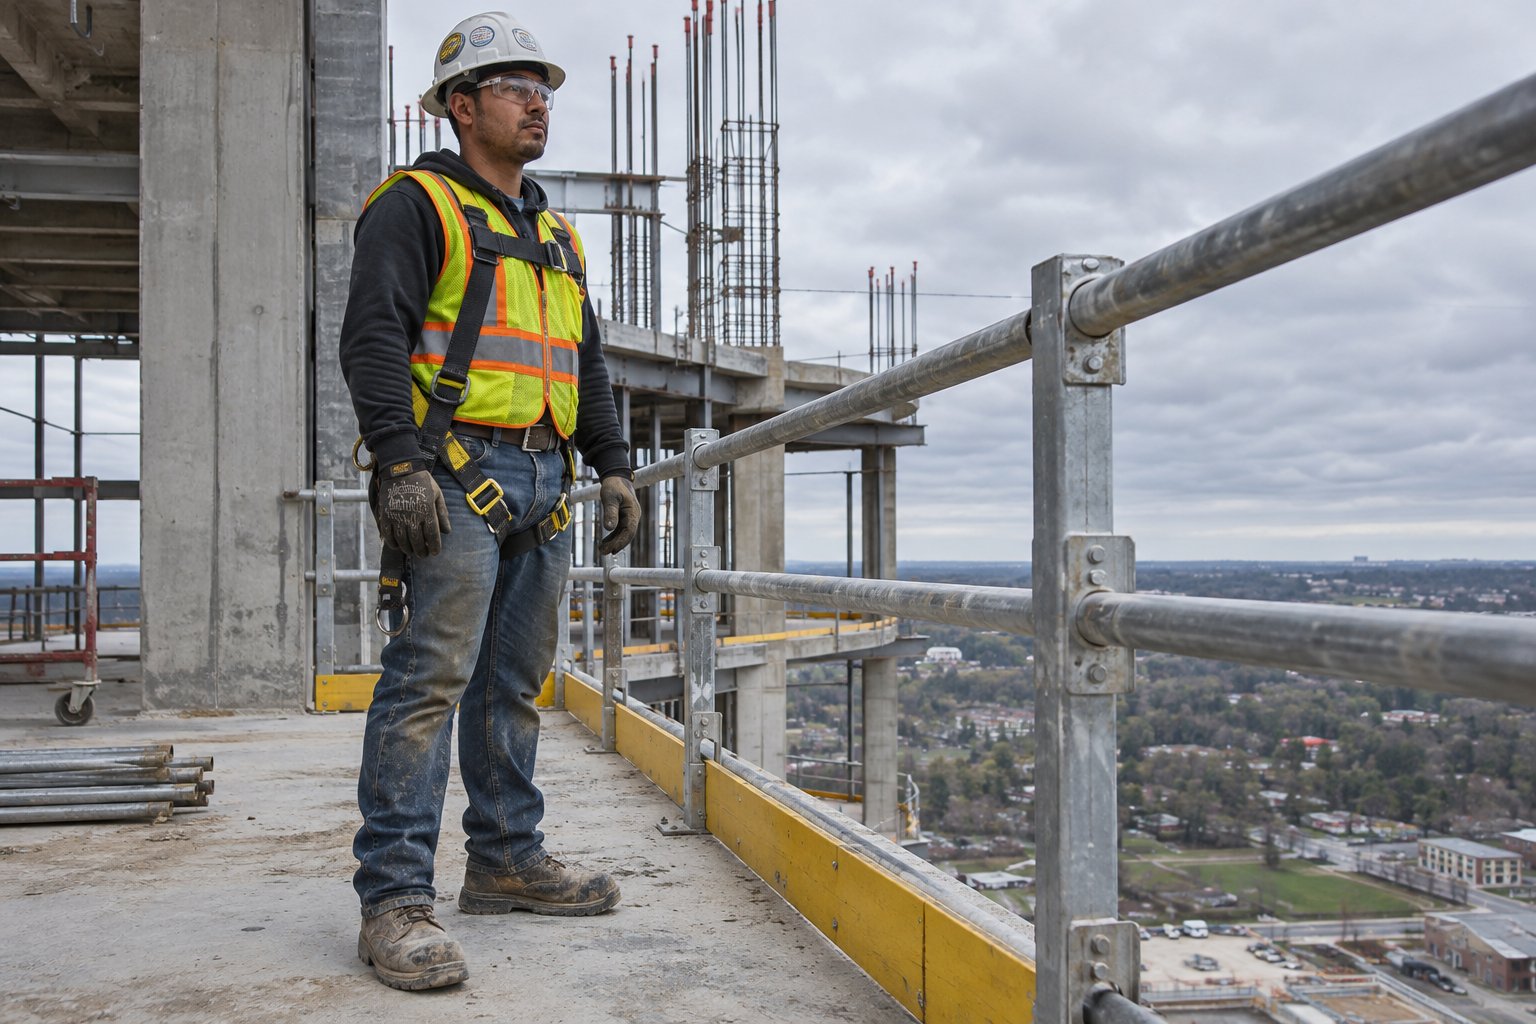
Step 4 – Inspect for OSHA Focus Four Hazards
General site conditions told you where the problems are brewing. Now it is time to hunt for the hazards that actually kill people. OSHA's Focus Four—falls, struck-by incidents, caught-in or caught-between events, and electrocutions—account for nearly 60% of all construction fatalities every year. Falls from elevation alone represent roughly 40% of those deaths, while each of the remaining three categories contributes approximately 5 to 10% of the annual total. These are not edge cases. They are the core of what every site inspection must target.
The difference between a useful inspection and a wasted hour comes down to whether you can translate each Focus Four category into specific, observable conditions with clear pass/fail thresholds. A building inspection checklist that simply says "check fall protection" gives you nothing actionable. Knowing that guardrails must measure 42 inches plus or minus 3 inches per 29 CFR 1926.502(b)—and pulling a tape measure to verify—gives you a defensible finding. That level of specificity is what separates a site inspection that prevents injuries from one that just generates paper.
Falls – Inspecting Edges, Openings, and Access Points
Falls dominate construction fatalities for a reason: nearly every active project creates temporary elevation changes, open edges, and floor penetrations that did not exist the day before. Your inspection must cover five primary fall exposure areas—perimeter edges, floor and roof openings, scaffolds, ladders, and personal fall arrest systems—each with its own regulatory requirements and common failure points.
Guardrails. Start at every unprotected edge where workers operate six feet or more above a lower level. Measure the top rail. It must be 42 inches above the walking or working surface, with a tolerance of plus or minus 3 inches. A guardrail at 38 inches is non-compliant. A guardrail at 46 inches is technically out of spec unless site conditions warranted the increase and all other criteria are met. Check for midrails installed midway between the top rail and the floor surface. If the system uses intermediate vertical members instead of a midrail, those members cannot be spaced more than 19 inches apart. Test rigidity—the top rail must withstand at least 200 pounds of force applied within 2 inches of the top edge in any outward or downward direction, per 1926.502(b)(3). A guardrail that flexes dramatically when you push against it fails this standard even if the height is correct. Also verify that steel banding and plastic banding are not being used as top rails or midrails—a surprisingly common shortcut that violates 1926.502(b)(7).
Do not overlook toeboards. When workers are above other personnel, toeboards must be at least 3.5 inches in vertical height with no more than a quarter-inch gap above the walking surface. Missing toeboards allow tools, fasteners, and debris to slide off elevated platforms directly onto workers below—a struck-by hazard hiding inside a fall protection system.
Floor hole covers. Every penetration large enough for a person to step through must be covered or guarded. Covers must be secured against accidental displacement, capable of supporting at least twice the weight of employees and equipment that could be imposed on them, and marked with the word "HOLE" or "COVER" per 1926.502(i). Walk the active floors systematically. Plumbing and electrical rough-in stages generate dozens of penetrations across a single level, and it only takes one unmarked, unsecured piece of plywood to create a fatal fall.
Scaffolds. Inspect platform planking for full width coverage—gaps between planks and between the platform edge and the building face should not exceed one inch where possible under 1926.451(b). Check that guardrails, midrails, and toeboards are in place on all open sides and ends. Verify that the scaffold was erected under the supervision of a competent person and that a competent person inspects it before each work shift, especially after any event that could affect structural integrity—rain, wind, or impact from adjacent operations.
Ladders. Side rails must extend at least 3 feet above the upper landing surface per 29 CFR 1926.1053(b)(1). The setup angle should follow the 4-to-1 ratio: for every four feet of ladder height, the base sits one foot away from the supporting structure. A quick field check—stand at the base, extend your arms straight forward, and your palms should touch the rung at shoulder height. If you are reaching or leaning, the angle is wrong. Inspect rungs for damage, verify that the ladder is on a stable and level surface, and confirm it is secured at the top or bottom to prevent displacement.
Personal fall arrest systems. Where workers are tied off, verify the anchor point. Anchorages must support at least 5,000 pounds per employee attached or be part of a complete system designed with a safety factor of at least two under the supervision of a qualified person. Check that lanyards and harnesses are inspected before each use, that locking snaphooks are being used (non-locking types have been prohibited since 1998), and that the system is rigged so no worker can free fall more than 6 feet or contact any lower level. Ask workers directly: "Where is your anchor point rated for?" If they cannot answer, training has failed—even if the hardware is correct.
Struck-By, Caught-In, and Electrocution Checkpoints
These three categories collectively contribute roughly 20% of construction fatalities, but they often get less inspection attention than falls because they manifest in more varied and sometimes less obvious ways. Each demands its own focused evaluation.
Struck-by hazards. Look for overhead work zones where materials, tools, or debris could fall onto workers below. Hard hat compliance is mandatory wherever struck-by exposure exists—and "wherever" is the operative word, because on an active multi-story project, that means essentially everywhere. Check whether cranes and heavy equipment have clearly marked swing radius zones barricaded with physical barriers, not just caution tape. Workers on foot who wander into a crane's swing path or an excavator's blind spot represent one of the most common struck-by fatality scenarios. Ask the equipment operator: "How are you communicating with ground workers near your swing radius?" The answer should involve a dedicated signal person, not guesswork.
Caught-in and caught-between hazards. These incidents tend to cluster around two areas: trenches and heavy equipment with rotating or moving parts. For excavations five feet or deeper, 29 CFR 1926.652 requires protective systems—sloping, benching, shoring, or a trench shield. No exceptions. Inspect the trench walls for signs of cracking, bulging, or water seepage that indicate imminent collapse risk even if a protective system is in place. Verify that spoil piles are set back at least two feet from the trench edge. For equipment, confirm that all guarding is in place on moving parts—belts, gears, rollers, and pinch points. Lockout/tagout procedures under 29 CFR 1926.417 must be followed before any maintenance or servicing work. Ask maintenance workers: "Show me where the lockout device is applied." If they point vaguely at the cab, the procedure is not being executed properly.
Electrocution hazards. Construction workers are approximately four times more likely to be electrocuted than workers in all other industries combined. For non-electrical workers, the primary cause of electrocution is contact with overhead or underground power lines—meaning your site inspection must verify that minimum approach distances are being maintained. The general rule is 10 feet of clearance from overhead lines up to 50 kV, with greater distances required for higher voltages per 29 CFR 1926.1408. Inspect all temporary wiring for GFCI protection, check extension cords for cuts or exposed conductors, and verify that electrical panels are properly covered and accessible. Leading tools for contractor safety auditing increasingly include thermal imaging cameras that detect overloaded circuits, but a visual inspection of cord condition and GFCI function catches the majority of electrical violations on active sites. Confirm that lock-out/tag-out practices are active whenever circuits are being serviced—NIOSH research shows that failure to de-energize before inspection and repair remains a leading cause of electrical fatalities.
The following table consolidates the Focus Four into a field-ready reference you can carry during any site inspection. Use it as a companion to your building inspection checklist—not a replacement for the detailed evaluation described above, but a quick-access reminder of where to look, what to verify, and which OSHA standards apply.
| Hazard Category | Where to Look | What to Check | OSHA Standard Reference | Common Violations Found |
|---|---|---|---|---|
| Falls | Perimeter edges, floor openings, scaffolds, ladders, rooftops, stairwells | Guardrail height (42" ±3"), midrail presence, hole covers secured and labeled, ladder extension (3 ft above landing), 4:1 setup ratio, PFAS anchor points (5,000 lb rating), locking snaphooks | 29 CFR 1926.501, 1926.502, 1926.451, 1926.1053 | Guardrails below 39", missing midrails, unsecured hole covers, ladders not extending above landing, non-locking snaphooks, inadequate anchor points |
| Struck-By | Below overhead work zones, near crane swing radius, material staging areas, roadways adjacent to equipment traffic | Hard hat compliance, swing radius barricades, signal person assignment, overhead protection (canopies/nets), tool lanyards on elevated workers, high-visibility vests near mobile equipment | 29 CFR 1926.100, 1926.251, 1926.550, 1926.602 | No hard hats under overhead operations, missing or inadequate swing radius barricading, no signal person for crane lifts, unsecured materials on elevated platforms |
| Caught-In/Between | Excavations and trenches, areas near heavy equipment with rotating parts, spaces between moving and fixed objects | Protective systems in excavations 5 ft or deeper (sloping, shoring, or shielding), spoil pile setback (minimum 2 ft), machine guarding on moving parts, lockout/tagout compliance during servicing | 29 CFR 1926.652, 1926.417, 1926.600 | No protective system in deep trenches, spoil piles at trench edge, missing machine guards, lockout/tagout not applied during maintenance |
| Electrocution | Temporary wiring and panel locations, areas near overhead power lines, wet zones, equipment servicing areas | GFCI protection on all temporary circuits, extension cord condition (no splices or exposed wire), minimum approach distances from energized lines (10 ft up to 50 kV), lockout/tagout on circuits being serviced, proper grounding of equipment | 29 CFR 1926.404, 1926.405, 1926.416, 1926.417, 1926.1408 | Missing GFCIs, damaged extension cords left in service, work within minimum approach distance of power lines, failure to de-energize before servicing, ungrounded equipment |
A practical note on using this table in the field: do not treat it as a passive reference you read once and file away. Print it, laminate it, and carry it during every walkthrough. When you encounter a condition that looks questionable, match it against the "What to Check" column and verify the specific standard. If the condition fails the threshold—guardrail at 37 inches, trench at six feet with no shoring, cord with exposed conductors—you have a documented violation, not a judgment call.
One area worth calling out separately: the intersection between fire prevention and the Focus Four. Projects involving hot work, temporary heating, or flammable material storage should cross-reference site-specific fire protection plans against applicable NFPA standards. While a comprehensive NFPA 241 checklist—covering fire prevention during construction, alteration, and demolition—extends beyond the Focus Four scope, the overlap is real. An improperly stored acetylene cylinder is simultaneously a struck-by hazard if it topples and a fire or explosion risk. Effective inspections recognize that hazard categories bleed into each other rather than staying neatly in separate columns.
Ask workers you encounter during the Focus Four walkthrough at least two targeted questions per hazard category. For fall protection: "If your harness caught a fall right now, what would the clearance distance be below you?" For struck-by: "Where is the signal person for this crane operation?" For caught-in: "What is the soil classification for this trench, and who made that determination?" For electrocution: "Are all circuits on this panel de-energized, and where is the lockout device?" Workers who can answer confidently have been trained. Workers who hesitate or guess reveal gaps that no physical inspection alone can uncover—which is precisely why the next step in the process focuses on what workers say, do, and know when you engage them directly.
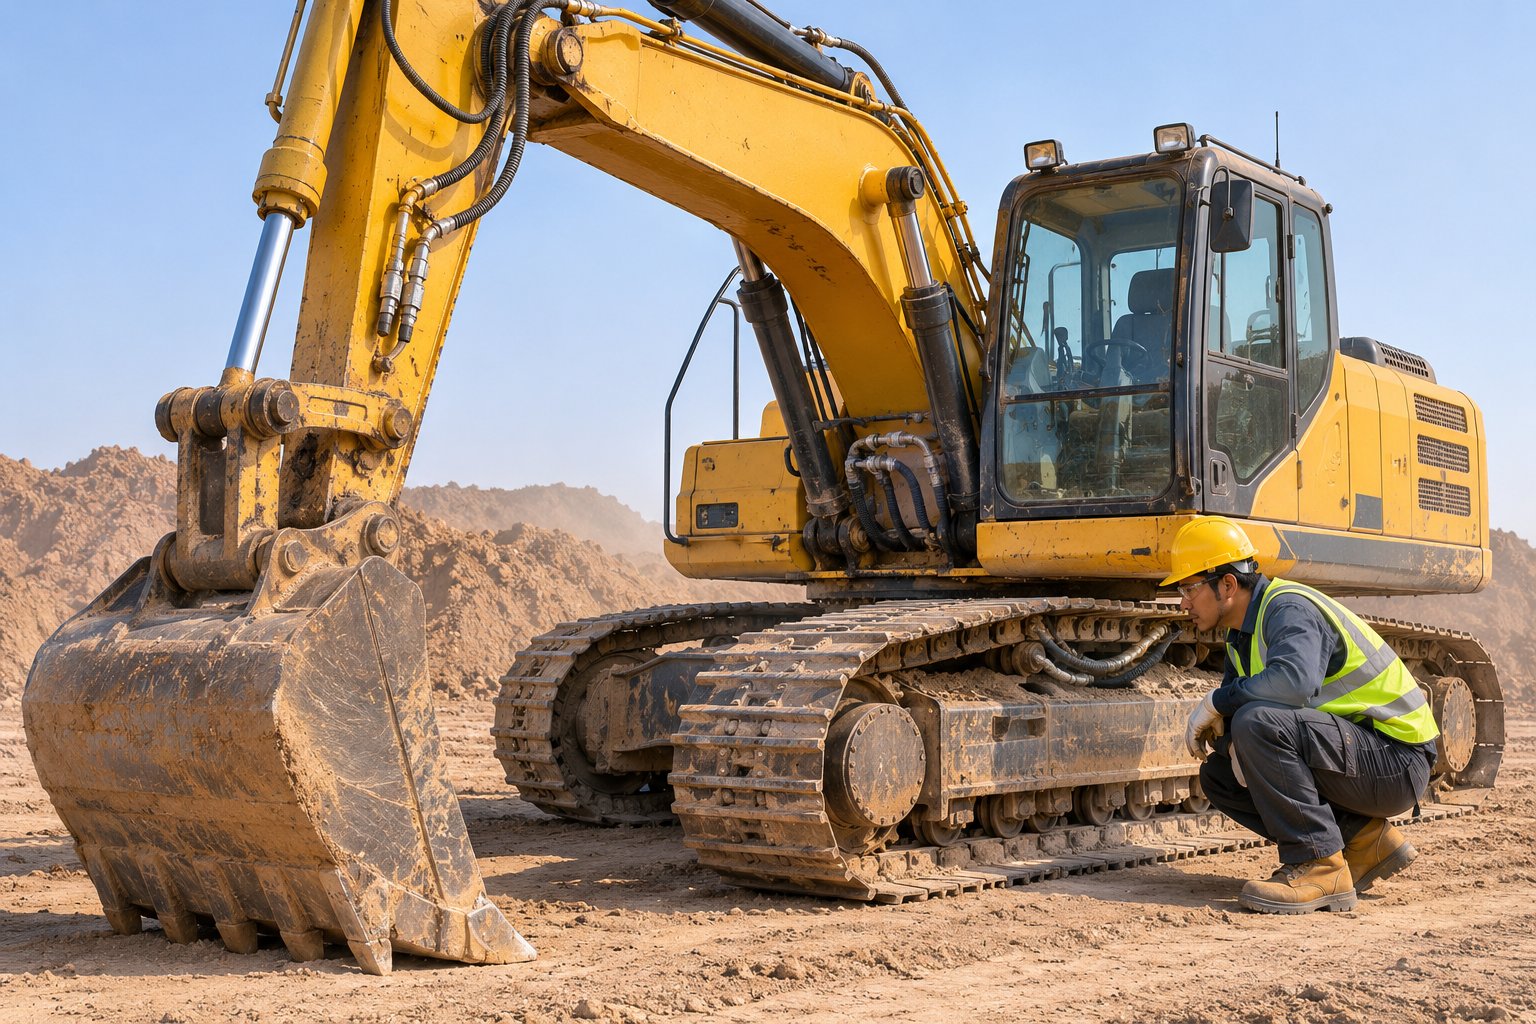
Step 5 – Evaluate Equipment and Machinery Safety
The Focus Four walkthrough zeroed in on where hazards hide across the site. But some of the deadliest conditions on a construction project are not built into the structure—they roll, swing, dig, and lift. Heavy equipment and rigging are involved in a disproportionate share of struck-by and caught-in fatalities, and the root cause often traces back to the same preventable failure: nobody checked the machine before it went to work.
A thorough construction safety audit must treat every piece of motorized equipment and every rigging component as its own inspection zone. OSHA makes this explicit. Under 29 CFR 1926.20(b)(3), any machinery or equipment that does not comply with applicable requirements must be identified, tagged, and removed from service until corrected. That standard does not say "when convenient" or "at the next scheduled maintenance window." It says removed from service—period. Yet on active job sites, equipment routinely runs with known deficiencies because production pressure overrides the checklist safety process. Your inspection needs to catch what the operator's pre-shift form may have glossed over.
Daily Walk-Around Checks for Heavy Equipment
Every excavator, loader, bulldozer, and grader on site should undergo a documented pre-operation inspection before the engine starts each shift. This is not a suggestion from a best-practices manual—it is an OSHA requirement for cranes under 1926.1412(d) and a widely applied industry standard for all heavy equipment under the general duty provisions of 1926.20(b)(2). The operator performs the check. Your job as the site inspector is to verify that the check actually happened—and that the results are accurate.
When you approach a machine during your walkthrough, start with the physical evidence. Walk a full 360 degrees around the unit and look for what matters most:
- Fluid levels and leaks. Check engine oil, hydraulic fluid, coolant, and transmission fluid. Puddles beneath the machine or wet streaks along hydraulic hoses indicate active leaks that can lead to sudden system failure under load.
- Hydraulic hose condition. Look for abrasion, bulging, cracking, or fittings that show signs of weeping. A single hose failure under pressure can spray superheated fluid across a wide area—a burn hazard and a loss-of-control event simultaneously.
- Structural cracks and weld integrity. Inspect the boom, arm, bucket connections, and frame for visible cracks, especially around pin joints and high-stress weld seams. Fatigue cracks propagate quickly under cyclic loading.
- Safety device function. Test the backup alarm—can you hear it clearly at 25 feet with ambient site noise? Check mirrors and camera systems for cleanliness and proper alignment. Verify that headlights, tail lights, and rotating beacon lights are operational.
- Fire suppression. Confirm the fire extinguisher is mounted, accessible, charged (check the gauge), and the inspection tag is current. Machines operating near hot work or in dry vegetation require this without exception.
- Operator restraint systems. Seat belts must be present, functional, and free of cuts or fraying. On machines equipped with rollover protective structures (ROPS) or falling object protective structures (FOPS), verify that the structures are intact—no cracks, no unauthorized modifications, no missing bolts. A ROPS only saves a life if the operator is belted in when the machine rolls.
So what separates a deficiency you document from a condition that pulls the machine off the job immediately? The distinction matters, and it mirrors the red-tag/yellow-tag framework used across the industry. Any defect that compromises the operator's ability to maintain safe control of the machine—brake failure, steering malfunction, active hydraulic leak near hot components, cracked structural members, or non-functional backup alarms in areas with foot traffic—triggers an immediate remove-from-service decision. The machine does not move until repairs are verified and documented. Non-critical deficiencies—a cracked mirror, a dim indicator light, minor cosmetic damage—get logged with a named repair owner and a fixed deadline, but the unit can operate under restricted conditions with appropriate controls in place.
Equally important is verifying who is behind the controls. OSHA requires that only trained and authorized operators run heavy equipment. During your walkthrough, ask the operator directly: "Where did you receive your training for this specific machine, and who authorized you to operate it?" Check that the operator's certification or training documentation is on file in the site trailer. On multi-employer sites, subcontractors sometimes shuffle workers between tasks to cover absences—a laborer who normally works on ground-level material handling ends up in the cab of a skid steer because the regular operator called in sick. That improvisation creates exactly the kind of competency gap that leads to struck-by and caught-in incidents.
Do not stop at the iron. Rigging and lifting equipment—wire rope slings, synthetic web slings, shackles, hooks, and spreader bars—deserve the same scrutiny as the machines they attach to. Inspect wire rope slings for broken wires, kinking, crushing, and corrosion. Synthetic slings must be free of cuts, burns, and chemical degradation. Hooks must have functional safety latches—a hook without a latch is a load waiting to slip free. Before any crane lift, verify that the crane's load chart is posted in the cab and that the operator has calculated the lift radius, boom length, and load weight to confirm the pick falls within the chart's rated capacity. OSHA's Subpart CC requires a competent person to inspect crane rigging before each shift, and the commissioning checklist project safety benefits extend well beyond compliance—they prevent the catastrophic failures that occur when overloaded or degraded rigging components give way without warning.
Evaluating Equipment Condition and Sourcing Reliable Machinery
Here is a pattern experienced inspectors recognize quickly: the older and more poorly maintained the fleet, the longer the deficiency list grows during every walkthrough. Aging equipment with deferred maintenance does not just break down more often—it actively amplifies site hazards. Worn brake systems extend stopping distances. Degraded hydraulic seals cause unpredictable cylinder drift. Corroded structural members reduce load-bearing capacity below design specs. Every one of those conditions feeds directly into the struck-by and caught-in categories you evaluated in Step 4.
This is why equipment sourcing is a safety decision, not just a procurement decision. When contractors or fleet managers are evaluating used machinery for upcoming projects, the condition assessment should mirror the same safety forms for construction that you apply during a site walkthrough—fluid systems, structural integrity, safety device function, and documented maintenance history. Comparing specifications and verified condition reports across multiple suppliers before committing to a purchase prevents contractors from inheriting someone else's deferred maintenance problems.
Suppliers such as JIUHONG offer collections of used construction equipment—including excavators, loaders, bulldozers, and graders—where contractors, fleet managers, and equipment dealers can compare machinery specifications and request purchase quotes before making a commitment. Other options include regional equipment dealers, certified pre-owned programs from OEMs, and auction houses that provide independent mechanical inspections. Regardless of the source, the principle remains the same: the time to evaluate a machine's safety condition is before it arrives on your project, not after your inspector flags it for removal from service on day one.
Document every equipment finding on your safety forms for construction with the same rigor you applied to the Focus Four evaluation—machine ID, specific deficiency, applicable standard, severity classification, and photographic evidence. Equipment deficiencies that recur across multiple inspections are not maintenance issues. They are program failures that require a conversation with the equipment owner about fleet replacement, not just repair.
Machines and rigging tell you a great deal about a site's safety posture—but they cannot tell you everything. The operators, laborers, and tradespeople working alongside that equipment hold information no physical walkthrough can uncover: near-miss incidents that were never reported, shortcuts taken under production pressure, and training gaps that only surface when you ask the right questions the right way.
Step 6 – Conduct Worker Interviews and Observe Behavior
A clipboard full of checked boxes and a camera roll of documented conditions can still miss the most dangerous thing on your site: what people are actually doing—and why. Physical walkthroughs catch visible hazards. They catch missing guardrails, damaged slings, and unsecured trench walls. What they cannot catch is the forklift near-miss that happened last Tuesday but was never reported, the crew that skips harness tie-off when the superintendent leaves for lunch, or the unspoken understanding that production deadlines override the safety plan whenever the schedule slips.
These invisible risks live inside the workforce itself, and the only way to surface them is to talk to people and watch how they work. This is where onsite safety audits move beyond compliance verification and into genuine hazard discovery. A construction site inspection checklist tells you what to look for. Worker interviews tell you what to look into.
How to Interview Workers Without Creating Defensiveness
Here is the problem most inspectors run into: the moment you approach a crew with a clipboard and start asking questions, defenses go up. Workers assume you are looking for someone to blame. Answers get short, vague, and carefully neutral. You learn nothing useful, and the worker walks away feeling like a suspect instead of a resource.
The fix is simple but counterintuitive—stop asking compliance questions and start asking teaching questions. Approach workers individually, not in groups. Group settings create social pressure where no one wants to be the person who admits they do not know something. One-on-one, the dynamic shifts entirely. The worker is the expert on their own task, and your job is to learn from them.
Instead of "Did you read the safety plan?"—a yes-or-no question that virtually guarantees a yes regardless of the truth—try "Can you walk me through how you would respond if the trench wall started showing signs of movement?" Instead of "Are you trained on this equipment?" ask "What was the most useful thing you learned during your orientation for this site?" These open-ended questions do not have a single correct answer that workers can guess at. They require actual knowledge, and the depth of the response tells you instantly whether training was effective or just a signature on a form.
Behavior-based safety research reinforces this approach. Effective observers "learn how to deliver immediate positive reinforcement for safe behaviors and how to engage in open dialogue when they spot an at-risk action," investigating root causes rather than citing violations. When workers realize you are genuinely interested in understanding their work rather than building a case against them, the quality of information you receive improves dramatically. They will tell you about the near-miss nobody reported. They will explain why the crew takes a particular shortcut—and that explanation often reveals a planning failure or resource gap that management needs to fix, not a lazy worker who needs a write-up.
This input is exactly what transforms a routine construction audit into an actionable intelligence-gathering exercise. Workers see hazards every day that no weekly walkthrough will ever catch because those hazards are intermittent, task-specific, or only appear under certain production conditions.
Spotting Behavioral Red Flags During the Walkthrough
Worker interviews reveal what people know. Behavioral observation reveals what people do—and the gap between those two things is where incidents breed. You already practiced distant observation in Step 3 when you scanned the site from a vantage point. As you move through the walkthrough and engage with crews up close, shift your attention to behavioral patterns that signal systemic safety failures rather than individual carelessness.
Watch for these red flags:
- Workers who cannot identify their evacuation route. If a laborer on the third floor cannot tell you the nearest exit stairwell or muster point, the site's emergency action plan exists only on paper. Evacuation knowledge is a direct indicator of whether site-specific orientation was meaningful or merely a checkbox exercise.
- Inability to name the competent person for their trade. OSHA requires a competent person for scaffolding, excavation, fall protection, and numerous other operations. If the worker performing that task does not know who that person is—or worse, has never met them—the competent person designation is administrative fiction, not functional safety oversight.
- PPE removed for "just a minute" tasks. A worker who takes off safety glasses to make a quick cut or unclips a harness lanyard to reach a tool bag "just for a second" is demonstrating a risk normalization pattern. The task duration is irrelevant. The fall, the fragment, the struck-by event—these happen in fractions of a second, not minutes. When you see this pattern across multiple workers, it points to a culture where PPE is treated as optional rather than mandatory.
- Informal workarounds that bypass engineered controls. A crew that wedges open a safety gate to speed up material movement, or stacks buckets as an improvised step instead of retrieving a proper ladder, is revealing that the planning process did not account for how the work actually gets done. These workarounds indicate inadequate job hazard analysis, insufficient tool or equipment availability, or schedule pressure that forces crews to improvise.
- Lack of awareness about nearby hazardous energy sources. Ask a worker installing ductwork near an electrical panel: "Is that panel energized?" If the answer is "I don't know" or "I think so," that worker is operating inches from a potentially lethal energy source without basic situational awareness—a gap that proper construction safety forms and pre-task planning should have closed before work began.
Each of these red flags points upstream to a management-level failure, not a worker-level one. That distinction matters. Onsite safety audits that focus exclusively on catching workers doing things wrong create adversarial cultures where hazards get hidden instead of reported. Audits that treat behavioral observations as diagnostic data—symptoms of systemic issues—drive corrective actions that actually prevent recurrence.
Every inspector walking an active site should ask these five questions to any worker they encounter during the walkthrough:
- What are the main hazards associated with the task you are performing right now?
- Who is the competent person responsible for your work area today?
- Where is the nearest exit route, and where is the muster point for this site?
- Have you received a site-specific safety orientation, and what did it cover?
- Is there anything about your current work conditions that concerns you or that you think could be safer?
That last question is the most powerful one on the list. It gives workers explicit permission to raise concerns without having to frame them as complaints. The answers you collect—documented carefully with names, dates, and specific statements as outlined in OSHA's Field Operations Manual—often become the most valuable findings in your entire inspection report. A cracked guardrail is one hazard. A workforce that does not know its evacuation route is a systemic failure affecting every person on the project.
Gathering this level of insight from workers and behavioral observations produces a rich set of findings—but raw observations are not actionable until they are documented with precision, classified by severity, and translated into language that compels corrective action rather than collecting dust in a file cabinet.
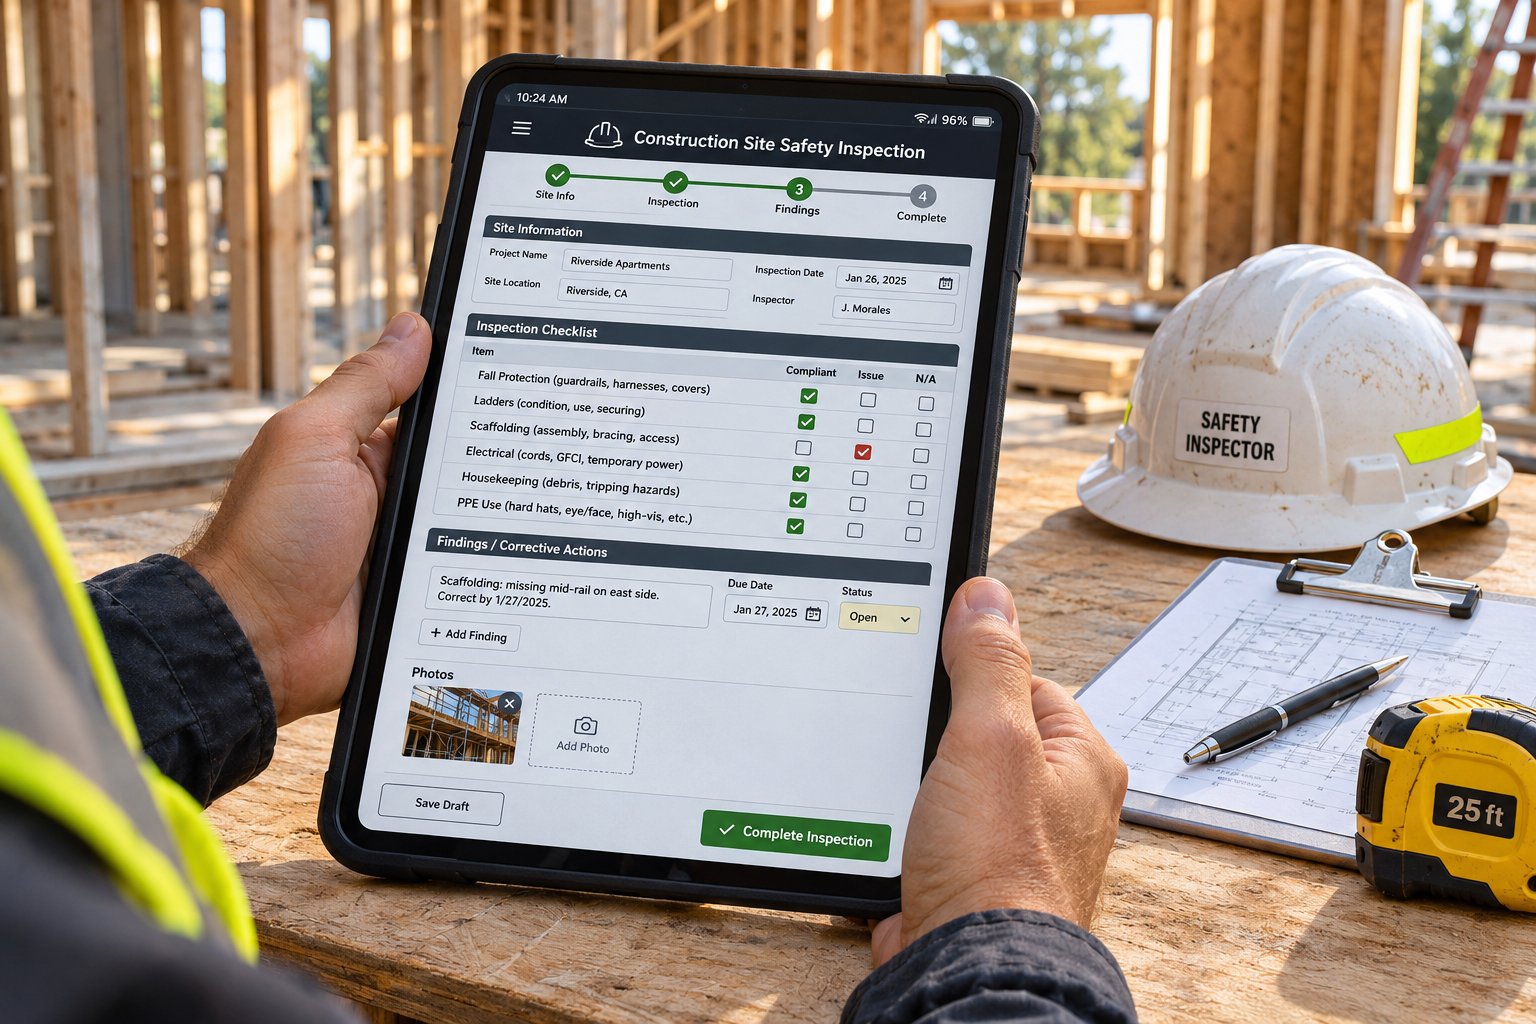
Step 7 – Document Findings and Classify Hazard Severity
You have walked every active zone, evaluated the Focus Four hazards, inspected equipment, and interviewed workers. Your clipboard is full of notes, your phone holds dozens of photographs, and your head is swimming with construction observations ranging from a missing toeboard on level four to a laborer who could not name the site muster point. All of that effort evaporates if the findings never make it into a report that someone can act on.
This is where most inspection programs quietly fail. The walkthrough happens. The hazards get spotted. And then the documentation is so vague, so disorganized, or so lacking in specificity that nobody knows what to fix, how urgently to fix it, or who is responsible. A safety checklist filled with entries like "guardrail issue on 3rd floor" does not drive action. It drives confusion. Defensible, actionable findings require a structure—and a risk classification system that tells every stakeholder exactly how fast they need to move.
Writing Inspection Findings That Drive Action
Every documented hazard should follow a consistent anatomy. Think of each finding as a self-contained instruction set that any competent person on the project could read, understand, and execute—without needing to call you for clarification. The structure is straightforward:
- Location — Exact position on site (building, floor, grid line, compass direction)
- Observation — Factual description of the condition, free of opinion or editorializing
- Standard Violated — The specific OSHA regulation or project safety requirement that applies
- Risk Level — Severity classification based on the matrix described below
- Required Corrective Action — The specific measure needed to eliminate or control the hazard
- Responsible Party — A named individual, not a company or trade description
- Deadline — A date and time tied to the risk classification
Photographic evidence accompanies every finding. Shoot the hazard from a distance that shows context—where on the site this condition exists relative to surrounding work—and then shoot a close-up that captures the specific deficiency. Timestamped photos with GPS metadata, which most smartphones generate automatically, create documentation that holds up under regulatory scrutiny and litigation review alike.
The difference between a useless finding and one that compels immediate action is specificity. Compare these two write-ups for the same condition:
Vague finding: "Guardrail issue on 3rd floor."
What issue? Which side of the third floor? What is wrong with the guardrail—is it missing, too short, too flexible, lacking a midrail? Who is supposed to fix it? By when? This entry tells the reader almost nothing and creates zero accountability.
Finding #7 — Building A, 3rd floor, north perimeter between grid lines C4 and C7: Top rail of temporary guardrail system measured at 36.5 inches above the walking surface, 2.5 inches below the minimum 39-inch threshold permitted under 29 CFR 1926.502(b)(1). Midrail is present. Toeboard is missing along the entire 24-foot span. Two ironworkers observed working within 4 feet of the non-compliant guardrail. Risk classification: HIGH. Corrective action required: Replace or adjust guardrail to 42 inches (±3 inches), install toeboard meeting 3.5-inch minimum height per 1926.502(b)(1) and 1926.502(j). Responsible party: Mike Torres, ABC Steel foreperson. Deadline: End of shift today, verified by competent person before work resumes tomorrow. Photos: IMG_4471 through IMG_4474 attached.
That second version leaves nothing to interpretation. The reader knows the precise location, the exact measurement that triggered the finding, the regulatory standard it violates, the risk level, the specific corrective action, who owns it, and when it must be completed. This level of detail is what separates a report that collects dust from a report that gets people moving. As Miter's safety reporting guidance emphasizes, specifics tell the next reader what the actual risk is "without requiring follow-up with the original observer."
For anyone exploring how to automate contractor safety audits, the finding structure above translates directly into digital form fields that mobile inspection platforms can standardize across every inspector on every project. Automation does not replace observational skill—you still need a trained eye to spot the 36.5-inch rail—but it enforces the documentation discipline that turns individual observations into organizational intelligence. The digital record also makes trend analysis possible: when you can query a database for every guardrail deficiency across twelve months and six projects, patterns emerge that no single inspection report reveals on its own.
Classifying Hazards With a Risk Priority Matrix
Not every finding demands the same urgency. A missing fire extinguisher tag and an unshored seven-foot trench with workers inside are not the same conversation, and your documentation should reflect that difference with mathematical clarity rather than gut feeling. A likelihood-times-severity risk matrix gives your inspection program a consistent, repeatable framework for prioritizing corrective action—so the most dangerous conditions always get addressed first, regardless of which inspector found them or which superintendent receives the report.
The concept is simple. For each finding, you evaluate two questions: How likely is it that this hazard will result in an incident? And if it does, how severe will the outcome be? Plot the answers on a grid, and the intersection tells you the priority classification and response timeframe.
Here is a practical 3×3 matrix calibrated for construction site inspections. Industry risk assessment frameworks commonly use 5×5 grids for complex, high-risk field operations, but a 3×3 matrix provides the right balance of simplicity and precision for the self-inspection programs most construction site teams are running.
| Likelihood \ Severity | Minor Injury (first aid, no lost time) | Serious Injury (hospitalization, lost time) | Fatality or Permanent Disability |
|---|---|---|---|
| Unlikely (could happen but rarely does under current conditions) | LOW — Correct by next scheduled inspection | MEDIUM — Correct within 7 calendar days | HIGH — Correct within 24 hours |
| Possible (has happened before on similar sites or could reasonably occur) | MEDIUM — Correct within 7 calendar days | HIGH — Correct within 24 hours | CRITICAL — Immediate stop-work; do not resume until hazard is eliminated |
| Likely (conditions make an incident probable without intervention) | HIGH — Correct within 24 hours | CRITICAL — Immediate stop-work; do not resume until hazard is eliminated | CRITICAL — Immediate stop-work; do not resume until hazard is eliminated |
Walk through a few real examples to see how the matrix works in practice. The guardrail finding from the write-up above—a rail 2.5 inches below minimum height with workers actively exposed—scores as Possible likelihood (a fall from an inadequately guarded edge has happened on countless construction sites) and Fatality severity (a third-floor fall can easily be fatal). That intersection yields a CRITICAL classification, which aligns perfectly with the end-of-shift deadline assigned in the finding. A missing hard hat in a ground-level material staging area with no overhead exposure, by contrast, might score Unlikely likelihood and Minor Injury severity—a LOW priority that gets corrected at the next inspection cycle.
The matrix does more than just sort your findings by urgency. It drives three operational outcomes that determine whether your inspection program actually reduces injuries or simply produces paperwork:
- Resource allocation. CRITICAL and HIGH findings get budget, personnel, and management attention immediately. MEDIUM findings get scheduled into the corrective action workflow. LOW findings get monitored. Without this tiering, every finding competes for the same finite attention—and the genuinely dangerous ones lose out to whatever is easiest to fix.
- Accountability. When a finding carries a risk classification and a response timeframe, the responsible party cannot claim ambiguity about how fast they need to act. "Correct within 24 hours" is a deadline. "Fix when you can" is a suggestion that never gets executed.
- Trend visibility. Over multiple inspection cycles, the distribution of findings across risk levels reveals whether your site's safety posture is improving, stagnating, or deteriorating. A project that consistently generates CRITICAL findings week after week has a fundamentally broken safety program—not a series of isolated problems. Tracking these patterns is a core benefit for teams developing a machinery inspection checklist or any trade-specific monitoring protocol: recurring high-severity equipment findings signal fleet-wide issues, not one-off mechanical failures.
One important calibration note: the matrix only produces consistent results when everyone using it shares the same definitions for each likelihood and severity level. "Unlikely" must mean the same thing to your safety officer in Building A and your superintendent in Building C. Field1st's risk assessment guide puts it bluntly: "Ambiguity kills consistency. Set crystal-clear definitions for both likelihood and severity scores before anyone starts logging risks." Spend time during your pre-inspection planning phase—back in Step 1—aligning your inspection team on these definitions. A five-minute calibration conversation prevents weeks of misclassified findings.
With every finding now documented in defensible detail and classified by a risk matrix that dictates response urgency, the inspection itself is complete. But the inspection report is not the finish line—it is the starting gun. The findings exist to trigger corrective actions, and those corrective actions need their own structured workflow to ensure they actually get executed, verified, and closed out before the next cycle begins.
Step 8 – Close the Loop With Corrective Actions and Follow-Up
A detailed inspection report with properly classified findings is a powerful document—but only if someone acts on it. Here is the uncomfortable truth about construction safety programs: the most common failure is not missing hazards during the walkthrough. It is failing to follow through on corrections after the walkthrough ends. Findings get documented, reports get filed, and the same hazard shows up again two weeks later because nobody verified that the fix actually happened. That cycle transforms your entire inspection effort from a safety tool into an administrative exercise.
Closing the loop means building a corrective action workflow that assigns every finding to a real person, sets a deadline tied to the risk classification you established in Step 7, and requires physical verification before anyone signs off on closure. It also means establishing an inspection frequency that matches your project's actual risk profile—not just a calendar placeholder that sites prepare for like a dress rehearsal. This post-inspection phase is where your construction site safety checklist either drives measurable improvement or quietly becomes wallpaper in the job trailer.
Building Corrective Action Plans That Get Executed
Think about what happens on most projects after the inspection wraps up. The safety officer emails a PDF to the superintendent. The superintendent glances at it between phone calls, mentally notes the big items, and forwards it to the relevant subcontractors. The subcontractors acknowledge receipt. And then... nothing verifiable. Two weeks pass. The next inspection finds half the same issues. Sound familiar?
Effective corrective action plans break this pattern by converting every finding into a trackable task with five non-negotiable elements. Each element removes one excuse for inaction. As Plexa's corrective action guide emphasizes, a CAP is not complete until effectiveness has been verified through appropriate means—inspection, testing, or audit—and sufficient time has passed to confirm the issue will not recur.
Follow this corrective action workflow for every finding rated MEDIUM or above on your risk matrix:
- Assign each finding to a responsible party by name. Not "ABC Concrete" or "the electrical sub." A person: "Jorge Ramirez, ABC Concrete foreperson." Named accountability eliminates the diffusion-of-responsibility trap where everyone assumes someone else is handling it. The responsible party must have both the authority and the resources to execute the correction within their scope.
- Set a deadline based on the risk classification from Step 7. CRITICAL findings require immediate stop-work and same-day resolution. HIGH findings must be corrected within 24 hours. MEDIUM findings get seven calendar days. LOW findings are corrected by the next scheduled inspection. These are not suggestions—they are contractual expectations that should be written into your project's safety plan and subcontract agreements before the first shovel breaks ground.
- Define the acceptable corrective measure. "Fix the guardrail" is not a corrective action. "Replace the top rail between grid lines C4 and C7 at 42 inches above the walking surface, install a midrail at 21 inches, and add a 3.5-inch toeboard along the full 24-foot span per 29 CFR 1926.502(b)" is a corrective action. Specificity prevents the responsible party from applying a band-aid that technically addresses the symptom but leaves the underlying condition unresolved.
- Schedule a re-inspection date. Every corrective action gets a follow-up verification tied to its deadline. CRITICAL and HIGH items get re-inspected the same day or the following morning. MEDIUM items get re-inspected within the seven-day window. This step is where most programs fall apart—the original finding gets documented, the corrective action gets assigned, but nobody ever goes back to confirm the work was done correctly.
- Document closure with photographic evidence. The corrective action is not closed until a competent person physically verifies the fix, photographs the corrected condition from the same angle as the original deficiency photo, and signs off with their name, date, and time. This before-and-after pairing creates a defensible record that proves the hazard was not just acknowledged but eliminated. For teams using a jobsite environmental audit app with photo documentation with audit trail capabilities, this closure evidence is automatically timestamped, geotagged, and linked to the original finding—making it nearly impossible for corrective actions to be fraudulently signed off without field verification.
Record-keeping is not just good practice—it is a legal shield. OSHA's recordkeeping requirements under 29 CFR Part 1904 mandate that employers maintain logs of work-related injuries and illnesses, and those logs become evidence during inspections and litigation. Your inspection reports and corrective action closure records serve a parallel function: they demonstrate that you identified hazards, classified their severity, assigned corrective actions, and verified completion. If OSHA shows up and finds a violation you already documented, corrected, and closed out, that history demonstrates good faith and a functioning safety program. If they find a violation you documented but never corrected, that same record becomes evidence of willful noncompliance—a distinction that can mean the difference between a standard citation and a penalty that reaches $165,514 per willful violation.
Store every inspection report, corrective action plan, closure photograph, and re-inspection record in a centralized document management system accessible to the project team and retained for at least five years beyond project completion. Employment litigation, long-tail liability claims, and multi-employer citation disputes routinely surface years after a project wraps. The records you keep today are the defense you may need in a courtroom three years from now.
Setting Inspection Frequency by Project Phase and Risk
How often should you inspect? The answer most resources give—"regularly"—is useless. The honest answer depends on three variables: what phase the project is in, how much risk that phase generates, and what your recent findings are telling you about the site's safety trajectory.
Different construction phases produce fundamentally different hazard profiles. Excavation work creates trench collapse and struck-by exposure. Structural framing introduces fall hazards at every new elevation. MEP rough-in brings electrical risks and confined-space concerns. Roofing combines fall exposure with heat illness and hot-work ignition potential. Finishing trades reduce elevation hazards but introduce chemical exposure, respiratory risks, and ergonomic strains from repetitive work. Your site inspection checklist and your inspection frequency must both adapt to match the dominant hazards of each phase—not remain static from groundbreaking to certificate of occupancy.
The following table maps project phases to recommended inspection frequency and the primary hazards that deserve focused attention during each stage. Use it as a baseline and adjust upward based on your project's specific risk factors—size, trade density, incident history, and proximity to public areas.
| Project Phase | Recommended Inspection Frequency | Primary Hazard Focus |
|---|---|---|
| Excavation / Foundation | Daily during active trenching; weekly for foundation pours | Trench collapse, struck-by from heavy equipment, utility strikes, dewatering hazards |
| Structural Framing | Daily for steel erection and elevated concrete work; twice weekly for wood framing | Falls from elevation, struck-by from overhead loads, crane rigging integrity, scaffold compliance |
| MEP Rough-In | Twice weekly minimum | Electrocution from temporary and permanent wiring, confined space entry, fall protection at penetrations and shafts |
| Roofing | Daily during active roofing operations | Falls from roof edges and through openings, heat-related illness, hot-work fire ignition, material handling on slopes |
| Finishing / Close-Out | Weekly minimum; increase if multiple trades overlap in confined areas | Chemical exposure (paints, adhesives, sealants), respiratory hazards, ergonomic injuries, housekeeping deterioration from trade stacking |
| Post-Incident (any phase) | Immediately following any recordable injury, near-miss, or property damage event—regardless of scheduled inspection cycle | Root cause conditions specific to the incident; verification that immediate corrective actions are in place; reassessment of related hazards across the entire site |
That last row is critical. Post-incident inspections are not optional add-ons—they are mandatory triggers that override whatever schedule you have in place. A serious near-miss on a Tuesday does not wait for Friday's planned walkthrough. The inspection happens that day, focused on the incident's root cause conditions and any related exposures elsewhere on site.
One of the most effective tactics for maintaining inspection integrity is also one of the simplest: vary your timing. When inspections happen every Wednesday at 10 AM like clockwork, the site knows. Housekeeping improves at 9:30. Missing guardrails reappear at 9:45. Harnesses that spent the morning hanging on a column suddenly get clipped in. You are not inspecting the site's actual condition—you are inspecting its Wednesday-morning performance. Rotate between early morning, mid-shift, late afternoon, and shift-change windows. Arrive unannounced. The goal of any professional site safety audit is to observe reality, not a rehearsal.
Inspection checklist building for your specific project should also account for cumulative findings over time. If three consecutive inspections flag fall protection deficiencies in the same trade, increasing the inspection frequency for that trade is not punitive—it is responsive risk management. Conversely, a trade that consistently scores clean across multiple cycles may warrant reduced frequency so you can redirect attention to higher-risk areas. The inspection schedule is a living document, not a fixed calendar. Adjust it based on what the data tells you.
Finally, connect your inspection frequency to your corrective action closure rates. If you are generating findings faster than the site can close them—a growing backlog of open MEDIUM and HIGH items accumulating week over week—the issue is not inspection frequency. The issue is corrective action capacity. Either the responsible parties lack resources, deadlines are unrealistic, or management is not enforcing accountability. Slow down, resolve the backlog, and then resume the inspection cadence. An inspection program that continuously generates uncorrected findings teaches the workforce exactly one lesson: nobody actually cares what the report says.
Building a sustainable inspection program means treating every phase of the lifecycle—planning, walking, documenting, correcting, and verifying—as equally essential. Skip any one of them, and the chain breaks. Execute all of them consistently, and you build something far more valuable than compliance: you build a site culture where hazards get found before they cause harm, corrective actions get completed before they are forgotten, and every worker goes home the same way they arrived.
Frequently Asked Questions About Construction Site Safety Inspections
1. How often should construction site safety inspections be conducted?
Inspection frequency should match the active project phase and its risk level. During high-hazard phases like excavation or steel erection, daily inspections are recommended. MEP rough-in warrants at least twice-weekly walkthroughs, while finishing stages typically require weekly checks. Post-incident inspections must happen immediately regardless of schedule. Varying your inspection timing is equally important—predictable schedules allow sites to stage conditions rather than reveal actual working environments.
2. Who is responsible for conducting safety inspections on a construction site?
Responsibility is shared across multiple roles depending on project size. The site superintendent oversees general site conditions, OSHA-defined competent persons evaluate trade-specific hazards like scaffolding or excavation, dedicated safety officers manage compliance documentation and trend analysis, and subcontractor forepersons monitor their own crews' PPE and task-specific safety measures. On smaller projects one person may fill several roles, but the legal obligation under 29 CFR 1926.20(b)(2) to provide frequent inspections by a competent person always applies.
3. What are OSHA's Focus Four hazards in construction?
OSHA's Focus Four are falls, struck-by incidents, caught-in or caught-between events, and electrocutions. Together they cause nearly 60% of all construction fatalities annually. Falls alone account for roughly 40% of deaths. During inspections, each category translates to specific checkpoints: guardrail height and integrity for falls, swing-radius barricades for struck-by, trench protective systems for caught-in, and GFCI protection and power-line clearance distances for electrocution. Matching each hazard to its corresponding OSHA standard gives inspectors clear pass/fail thresholds.
4. What should be included in a construction site safety inspection report?
Every documented finding should include seven elements: the exact location on site, a factual description of the observed condition, the specific OSHA standard violated, a risk severity classification using a likelihood-times-severity matrix, the required corrective action described in precise terms, a named responsible party, and a deadline tied to the risk level. Timestamped photographs showing both context and close-up detail should accompany each entry. This structure ensures findings are defensible during regulatory review and actionable enough for the responsible party to execute without follow-up clarification.
5. What is stop-work authority and when should it be used on a construction site?
Stop-work authority is the right and responsibility of any designated personnel to immediately halt work when an imminent danger is identified—such as an unshored trench with workers inside or a crane lift with defective rigging. Under OSHA's General Duty Clause, employers must address recognized serious hazards without delay. The protocol involves stopping work immediately, securing the area, notifying the chain of command, documenting the condition with photos and written details, and refusing to resume operations until the hazard is corrected and verified by a competent person. This authority must be supported by leadership and written into subcontract agreements to prevent retaliation.